How To Make Antler Reproductions Using Reverse Molding
Overview
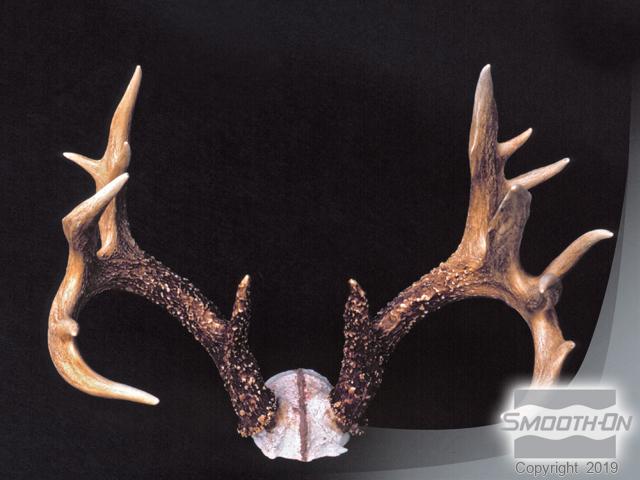
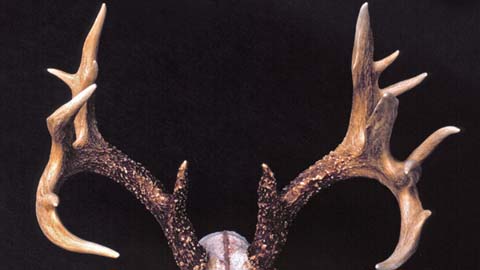
Accurately reproducing antlers is one of taxidermy's tougher challenges. Tony Breedlove of Wildlife Art Creations (Melrose, FL) has chronicled his innovative "Reverse Molding Method" (a cavity pour technique) that yields perfect antler castings everytime. This molding method is more time consuming than the conventional "cradle" technique, but once a rubber mold is made, it is much easier to work with.
Materials Used in this Tutorial
- Acrylic Spray
- Aluminum Foil
- Sulfur-Free Clay
- Silicone Rubber
- Cardboard
- Fiberglass
- Drill
- Nuts and Bolts
- Mold Max 30
- Smooth-Cast 320
- Polytranspar Paints
- Lifetone Paints
- Mixing Containers
- Mixing Sticks
- Marker
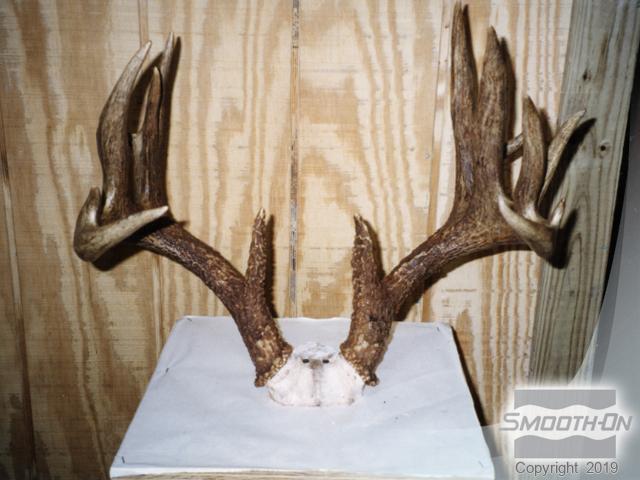
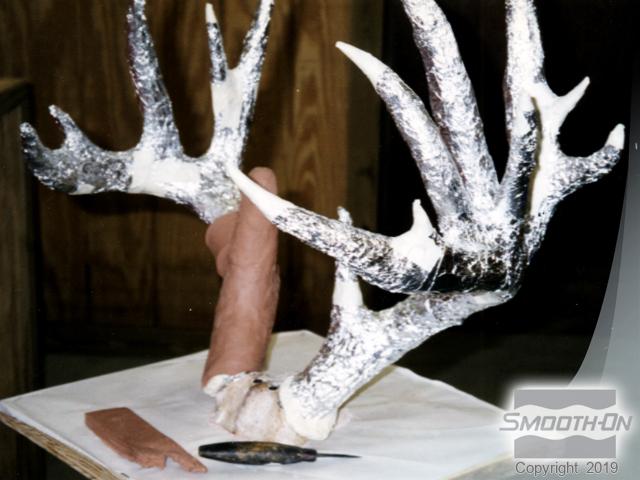
Step 1: Preparing Model
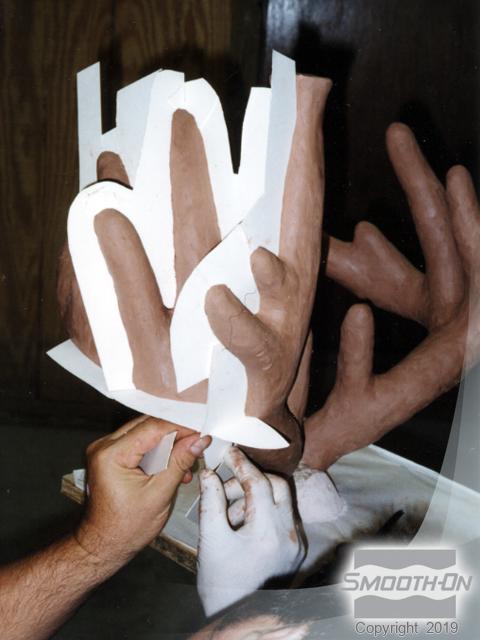
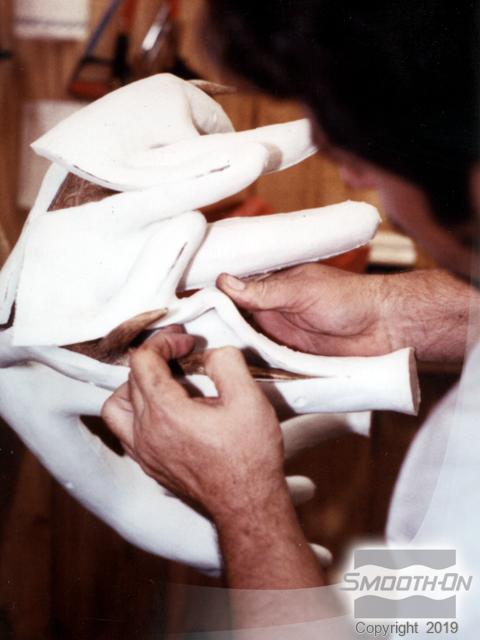
Prepare the piece by adhering it to the base and spraying it with a liberal coat of clear acrylic spray. To protect the antlers, wrap them in aluminum foil. Roll sulfur free clay out into 3/8'' thickness and create a space for the silicone rubber by applying the clay over the entire surface of the antlers.

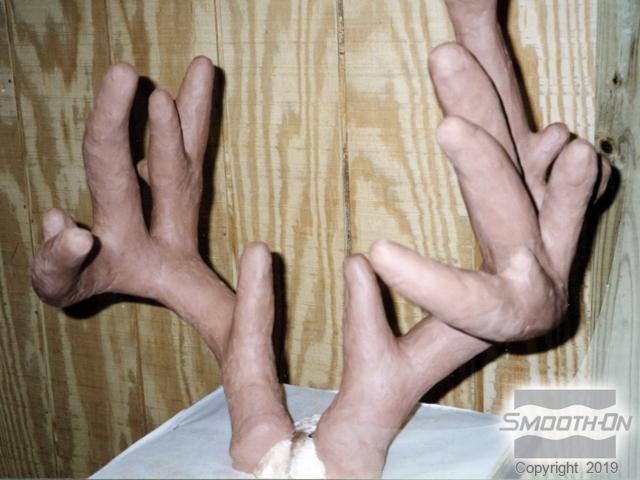
Step 2: Building Fiberglass Support Shell
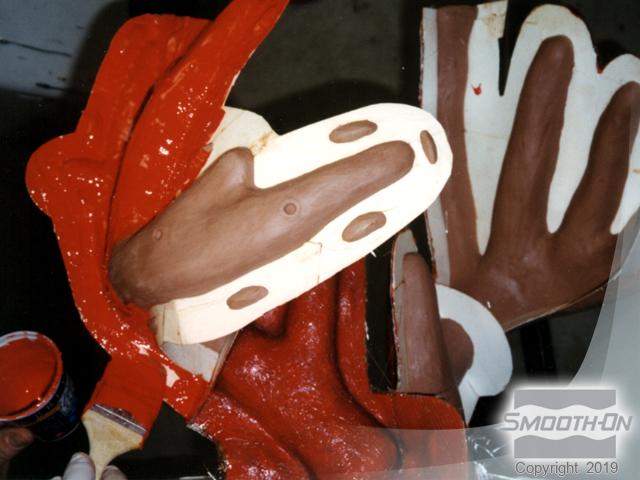
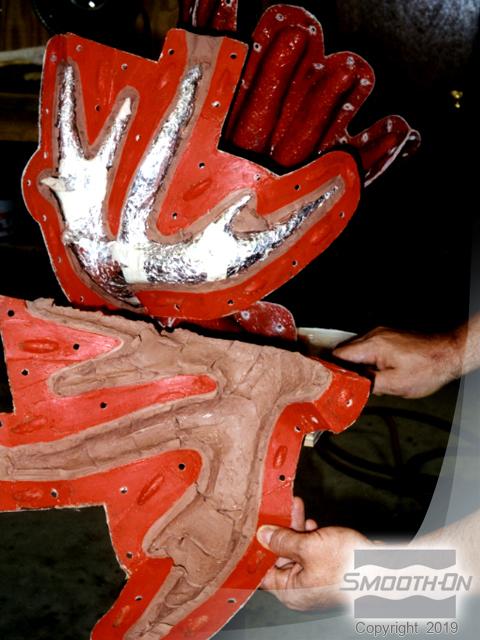
Next, build cardboard dams strategically in order to separate the mother mold pieces. Make sure you apply paste wax to all surfaces before applying the tooling gel-coat to the first piece to be molded.
Then, fill in the undercuts with thickened material. Use fiberglass to strengthen the mother mold section, allowing each portion to set completely before continuing. Once all sectioned have been fully cured, trim and smooth out the sharp edges. Drill 1/4'' holes in all of the flanges for the bolts.
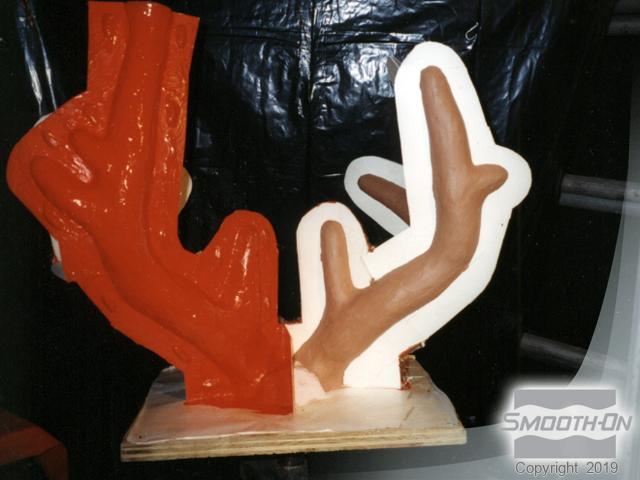
Step 3: Demolding
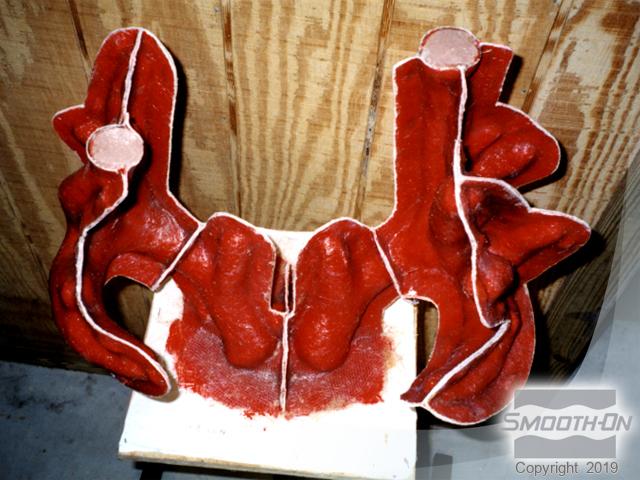
When demolding, carefully remove the mother mold from the antlers. Be sure not to remove the antlers from the base.
Carefully remove the clay and aluminum foil from the antlers and the mother mold.

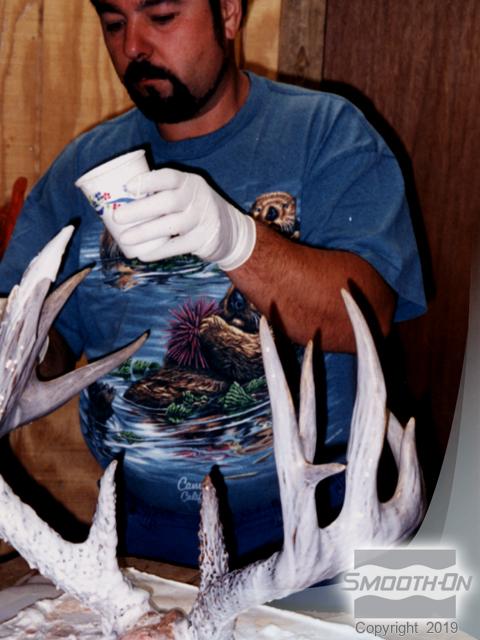
Step 4: Applying Mold Max 30
By using a paint brush, apply a thin coat of Mold Max 30 to the antlers to help reduce bubbles. Then wax all the interior surfaces of the mother mold pieces and re-assemble around the silicone coated antlers.
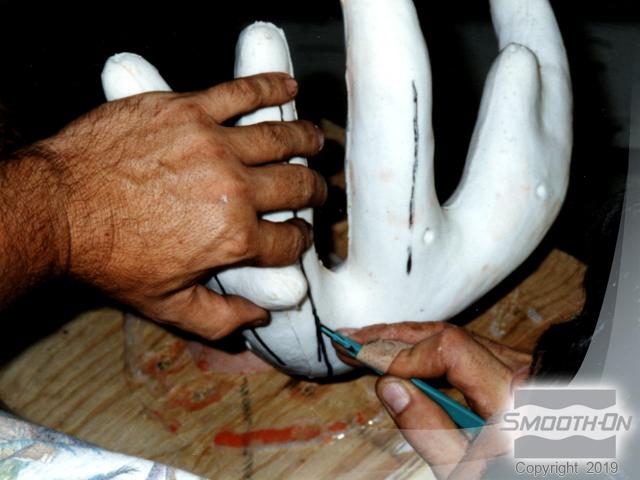
Tighten with wing nuts and pour the Mold Max 30 in a long thin stream into the holes at the top of the mother mold. After the rubber is fully cured, remove the mother mold and use a marker to draw seam lines on the silicone in areas that need to be cut.
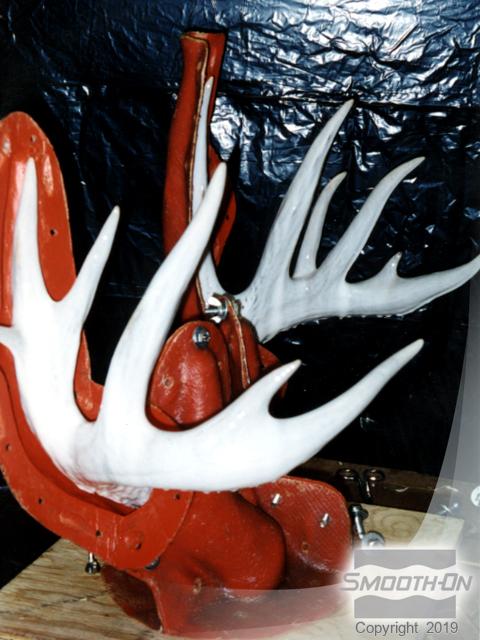

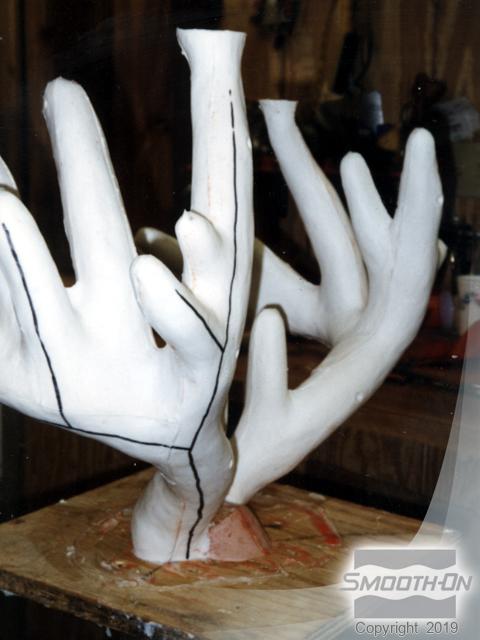
Step 5: Demold
Do not align the silicone seams with the mother mold seams. Rubber covering small tips or kickers will not have to be cut.
Use a sharp scalpel to cut the silicone, gently pull the seam open from both sides as the cut is made. Completely remove rubber mold from antlers.
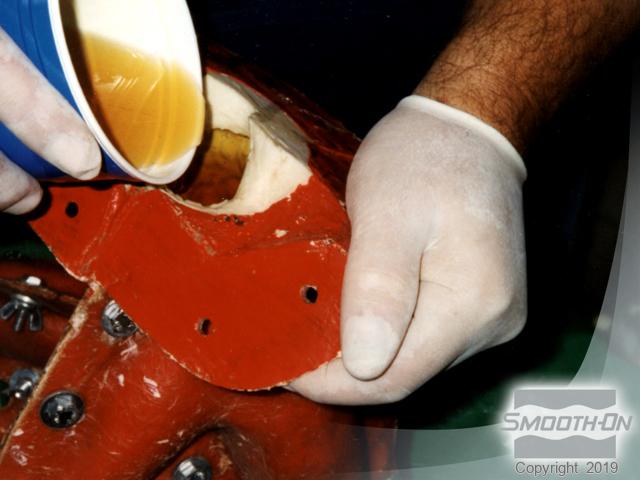
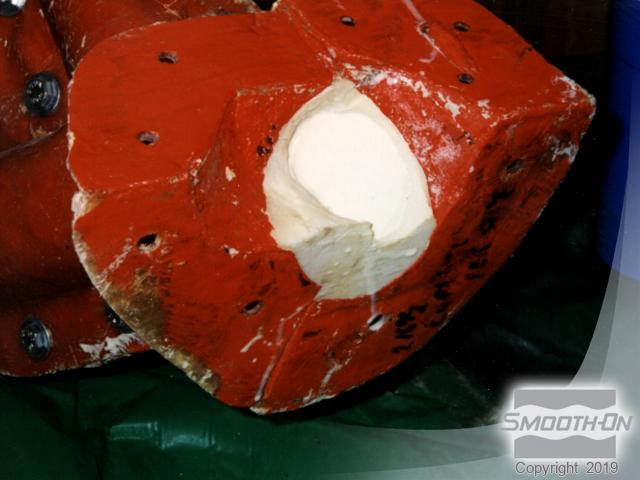
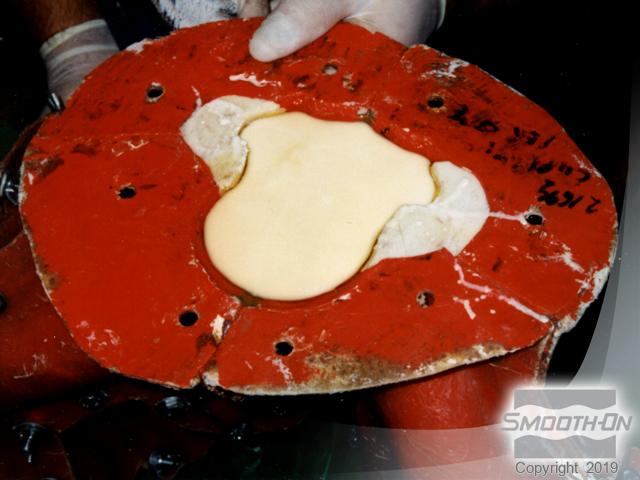
Step 6: Casting Smooth-Cast 320
Measure and mix Smooth-Cast 320 plastic and pour it into one side of the antlers, up to the burr. Gently roll the mold to ensure that the mold tips are coated with plastic. Then repeat on other side.
Once both sides are poured, bolt the mother mold together securely at the center and pour the skull plate. After pouring the skull plate, allow the resin to fully cure for 45 - 60 minutes.