
Alja-Safe™ Series
Skin Safe Crystalline-Silica Free Alginate
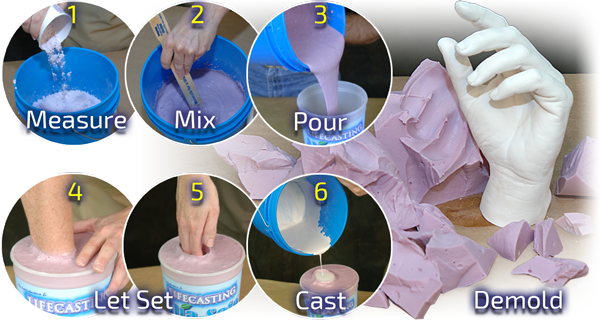
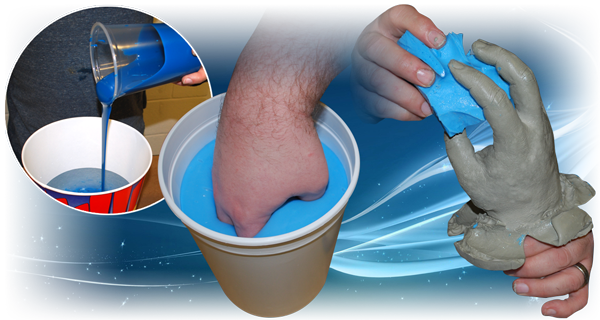
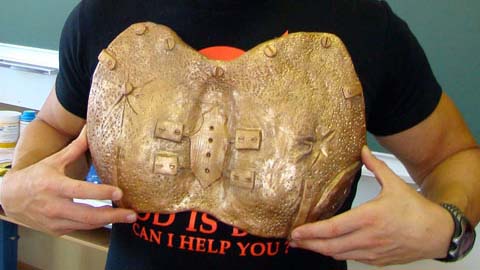
Suitable for making "temporary" molds of the face, hands and other body parts. In addition to being an exceptional skin safe body molding material, certified by an independent laboratory, Alja‑Safe™ alginate does not contain free crystalline silica (a known carcinogen). Alja‑Safe™ also captures detail better than other alginates, giving you a more accurate reproduction of your original.
HIGHLIGHTS
Easy to Use
Easy to Use
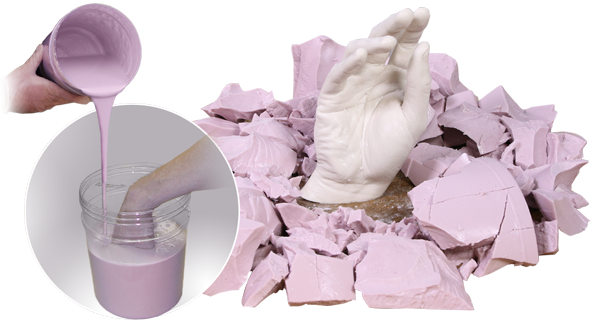
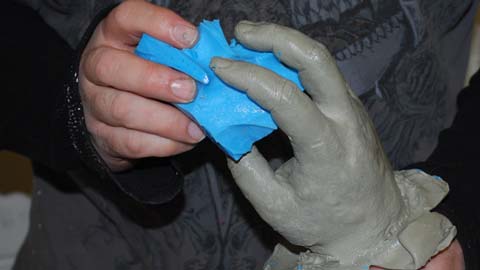
Alja-Safe™ alginates cure quickly, reproduce fine detail and make and excellent temporary mold - good for one or two reproductions of any body part. You can then cast plaster, Matrix™ NEO™, Smooth‑Cast™ 300Q fast urethane resin, or fast curing platinum silicone rubber into your molds to make a reproduction.
 No Scale Necessary
 Fast Setting
 Great Value
Certified Skin Safe
Certified Skin Safe
Alja-Safe™ is skin safe and certified by an independent laboratory.
 Certified Skin Safe
Alja-Safe™ Acrobat™
Fiber Reinforced Alginate
Alja-Safe™ Acrobat™
Fiber Reinforced Alginate
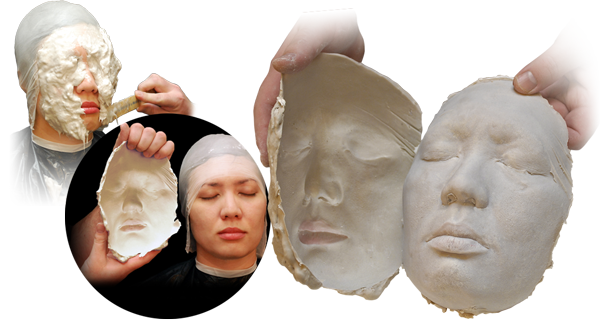
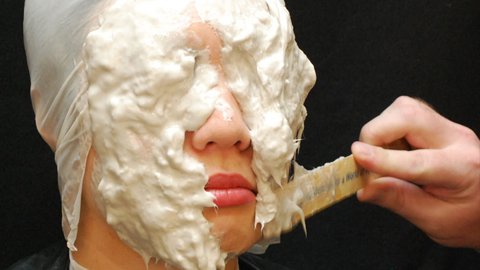
“Non-sag” version of original Alja-Safe™ life casting alginate. Acrobat™ is thicker and holds vertical surfaces allowing the user better control for making molds of the face, torso, etc.
 No Scale Necessary
 Vertical Application
Alja-Safe™ Breeze™
No Powder = No Dust!
Alja-Safe™ Breeze™
No Powder = No Dust!
Alja-Safe™ Breeze™ is a new liquid alginate which blends easily with water, creating a unique, skin safe moldmaking material. Perfect for making single-use pourable molds of hands, feet and other body parts.
 No Scale Necessary
 No Dust No Mess
Technical and Buying Information
| Select a Product Below | Description |
|---|---|
| › Alja-Safe™ | Crystalline Silica-Free Alginate |
| › Alja-Safe™ Acrobat | Fiber-Reinforced “Non-Sag” Life Casting Alginate |
| › Alja-Safe™ Breeze | Crystalline Silica-Free Liquid Alginate |
VIDEOS and GALLERIES
Step-by-Step How-To Articles
video
How To Use Alja-Safe™ Alginate to Cast Silicone Body Parts
Not only is Alja-Safe® safe and easy to, you can also cast platinum silicone rubbers directly into finished molds.
video
Alja-Safe™ Alginate Quick Start Guide
Follow this simple step-by-step lifecasting guide, and you will have a perfect lifecasting which will 'freeze time'.
How To Create Lightweight Theatrical Costume Armor
Andreas Moravec demonstrates a technique for creating theatrical armor using Rebound™ 25 silicone and Smooth Cast® resins
How To Make a Prop Severed Hand Using Alja Safe™ Breeze™
John Fennel used Smooth-On's Alja-Safe Breeze® for creating the initial clay pour for his prop.
video
How To Make a Face Casting with Alja-Safe® Crystalline Silica-Free Alginate
Alja-Safe® Crystalline Silica-Free Alginate is suitable for making temporary molds of the face, hands and other body parts.

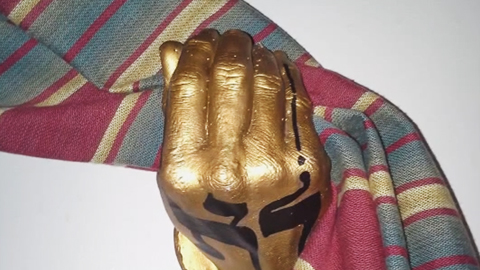
Alja-Safe™ Hand Castings Go Wild!
Let your imagination run wild and create unexpected images with basic hand shapes.
video
How To Mold a Face With Alja-Safe™ Acrobat™
Alja-Safe® Acrobat® is a fiber reinforced "non-sag" version of original Alja-Safe® life casting alginate.
video

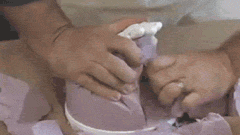
Martha Stewart Making a Hand Mold Using Alja-Safe®
Martha demonstrates how to create a personalized lifecast hand craft
video
Lifecasting Tutorial - How To Make Hand Curtain Holders
In this craft how-to, Smooth-On Fan Leo V. shows how to lifecast hands using alginate.
video
How To Create a Resin Casting in an Alja-Safe™ Mold
This tutorial will show how to pour urethane resin into an alginate mold
video

How To Make Fake Zombie Fingers Using Alja-Safe™ and Ecoflex™ 00-35
Milo creates silicone zombie fingers with breakable bones for Halloween
video

How To Make a Fake Bloody Hand Prop Using Alja-Safe™ and Dragon Skin™ 10NV
We show how to make a realistic rubber hand with fake bloody accents.
What Have Other People Done With These Products?

Long Lake Camp Makes Fine Art Installments
Over this past summer, patrons of the camp used our materials to create two impressive art installments