How To Make a Brush‑On Mold Using Dragon Skin™ Silicone Rubber
Overview
Dragon Skin™ 10 FAST is a high performance platinum cure silicone rubber that can be mixed 1A:1B by weight or volume and cures at room temperature with negligible shrinkage to a Shore 10A. Cured Dragon Skin™ is very soft, very strong and very “stretchy”. It will stretch many times its original size without tearing and will rebound to its original form without distortion.
This stretchiness makes Dragon Skin™ 10 FAST ideal for creating one piece glove molds. A Dragon Skin™ mold can be turned completely inside out without risk of tearing. This means castings can be removed without cutting the mold, leaving no visible flashing common with many mold configurations
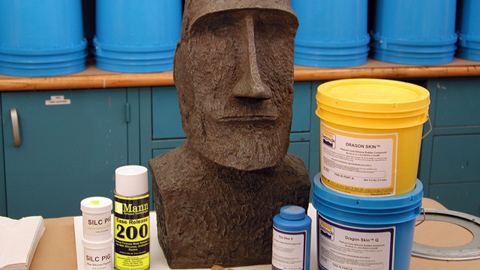
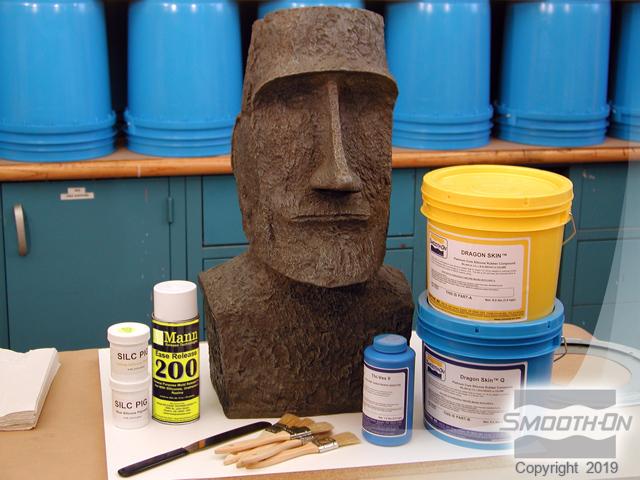
Materials Used in this Tutorial
- Dragon Skin 10 Fast
- FlexFoam-iT X
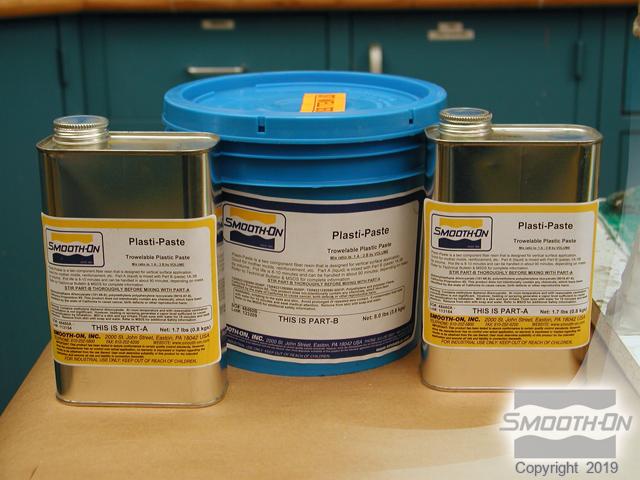
- Plasti-Paste
- Thi-Vex
- Ease Release 2831
- Ease Release 200
- Silc Pig
- Sonite Wax
- Universal Mold Release
- SO-Strong Colorants
- Hot Melt Glue
- Melamine Board
- Paint Brushes
- Mixing Sticks
- Mixing Containers
- Permanent Marker
- Sulfur Free Modeling Clay
- Sculpting Tools
- Dremel Tool
- Bolts
- Sand Paper
Step 1: Preparing Model
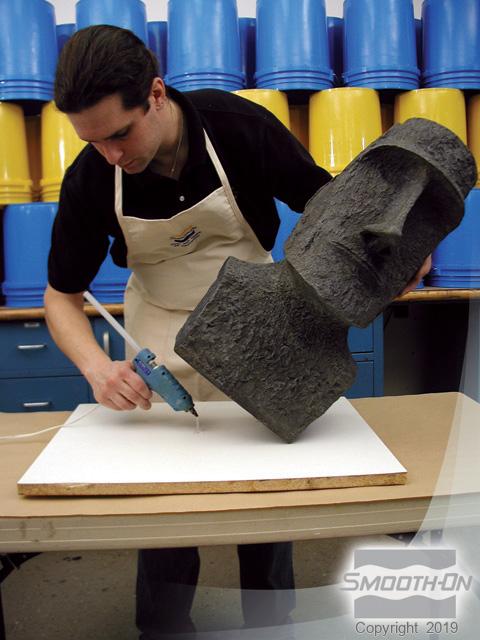
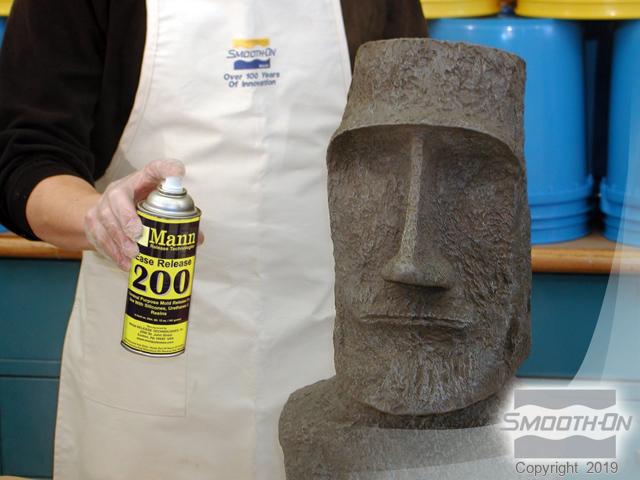
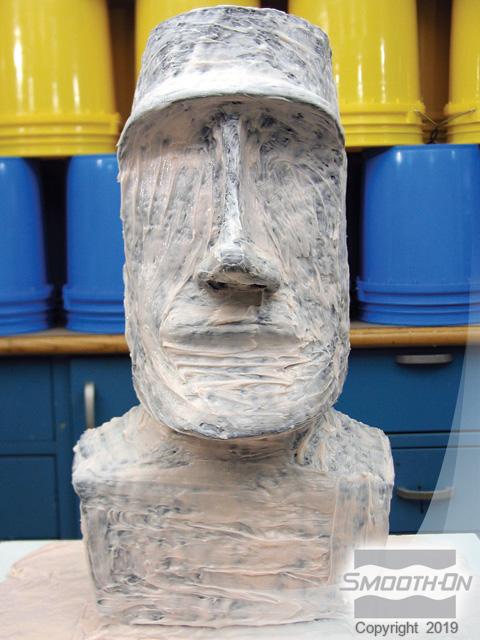
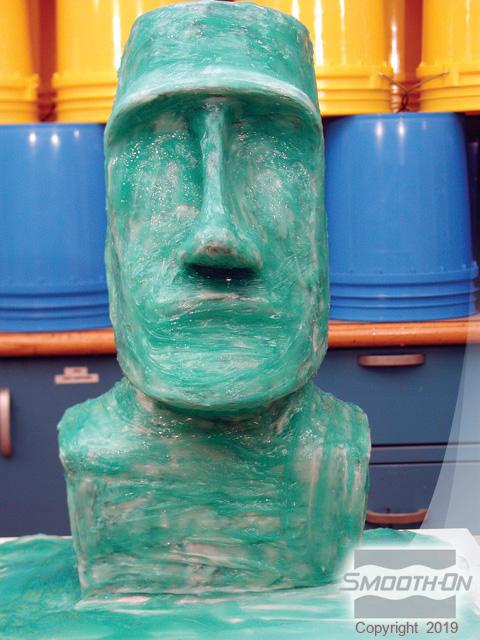
Before starting, gather your materials. In this example the original model is made of hard plastic.
First begin by using hot melt glue to secure the original model to a baseboard. Apply a thorough coat of Ease Release® 200 release agent over the entire model. This will aid in removing the original from the cured silicone mold.
Step 2: Dispensing, Mixing and Applying First Layer of Dragon Skin 10 Fast
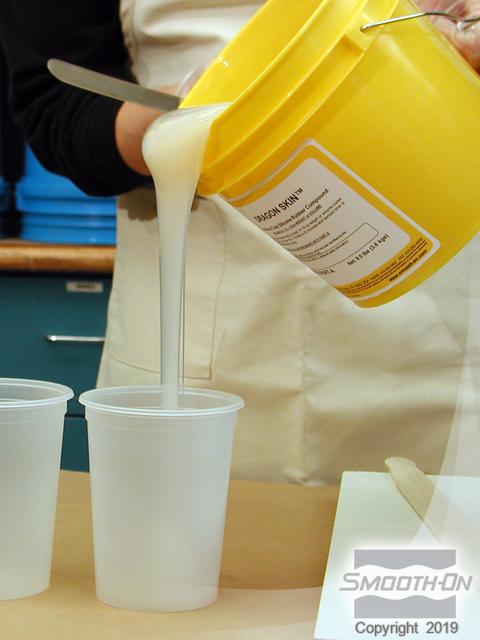
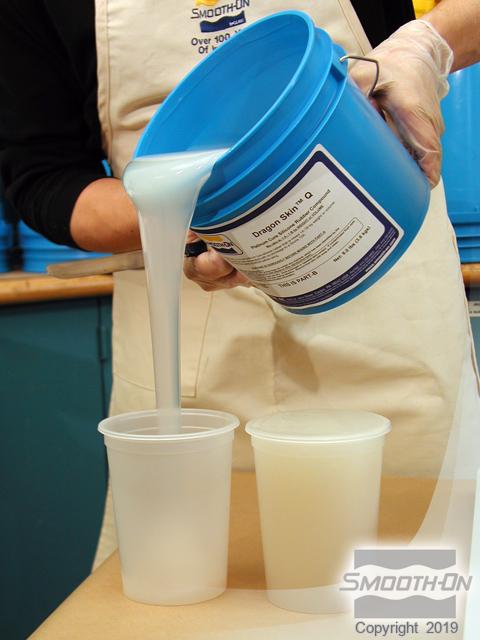
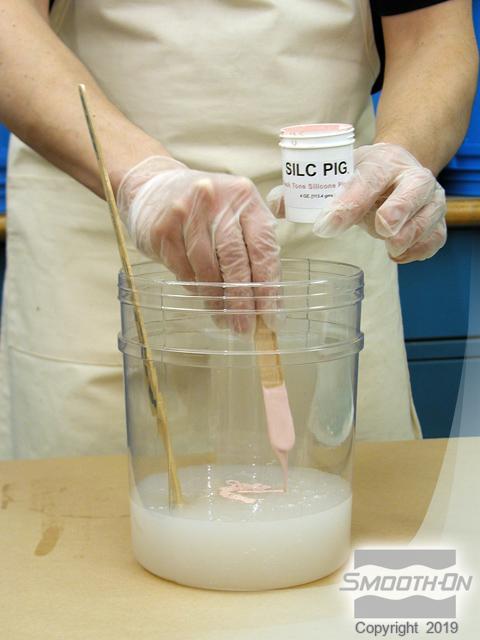
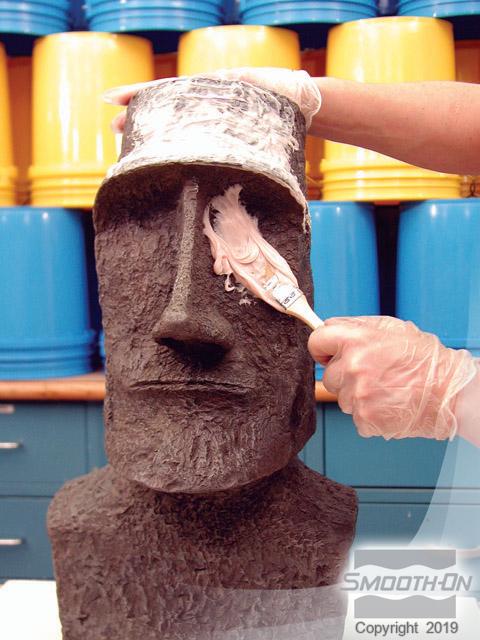
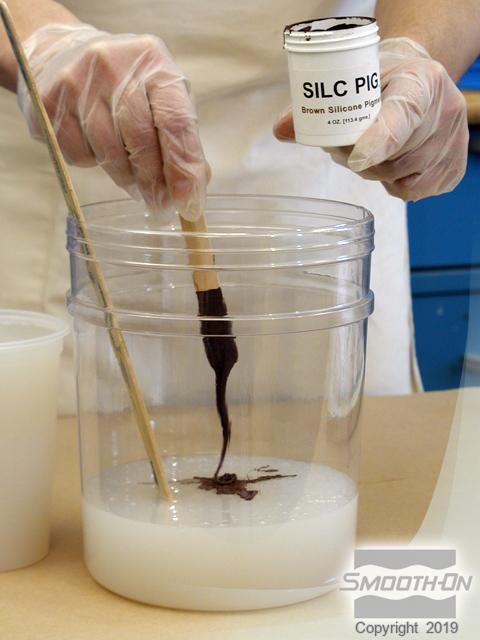
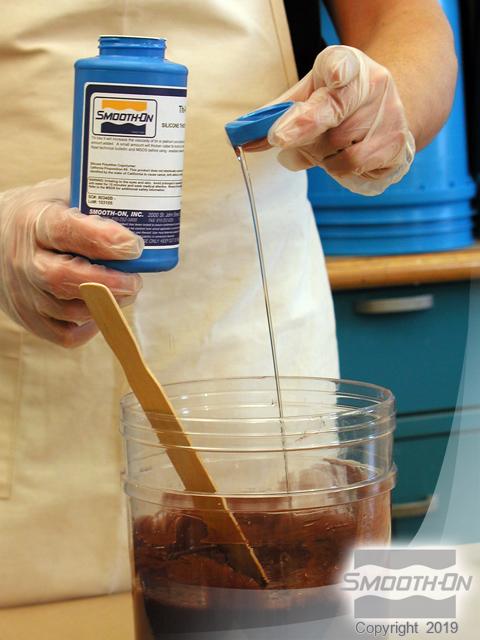
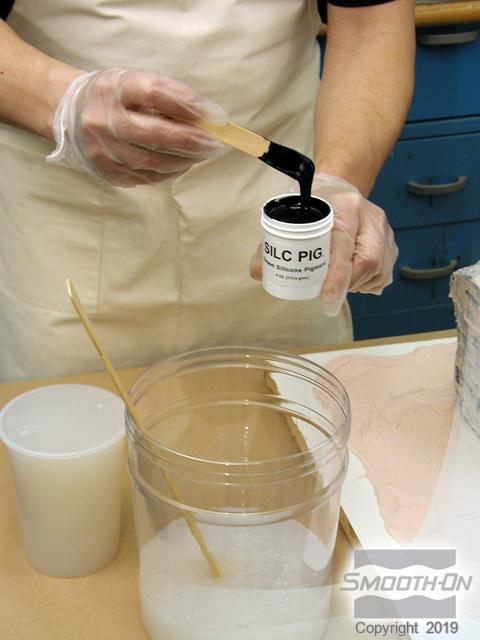
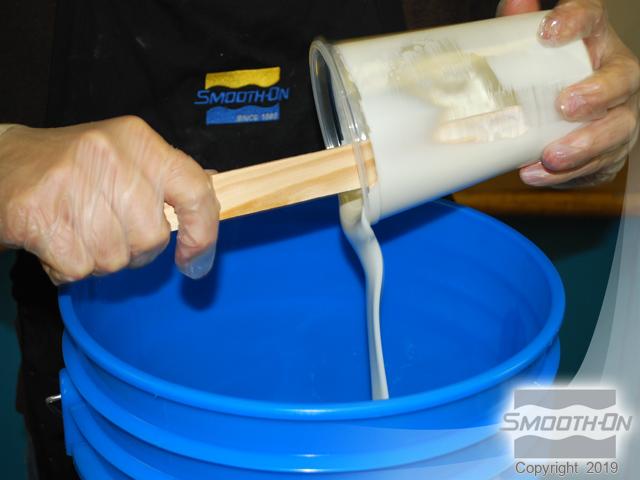
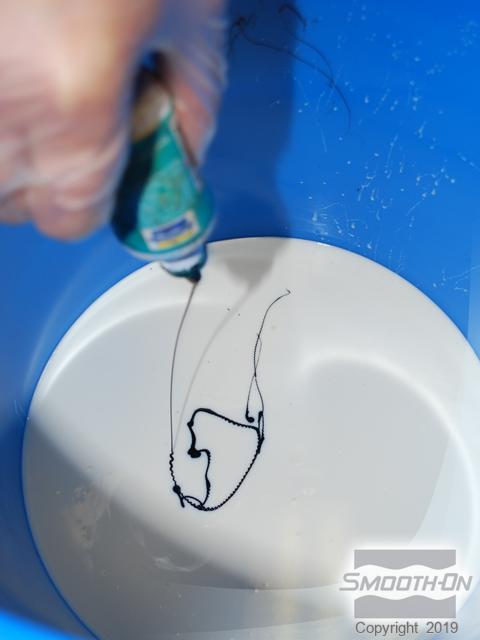
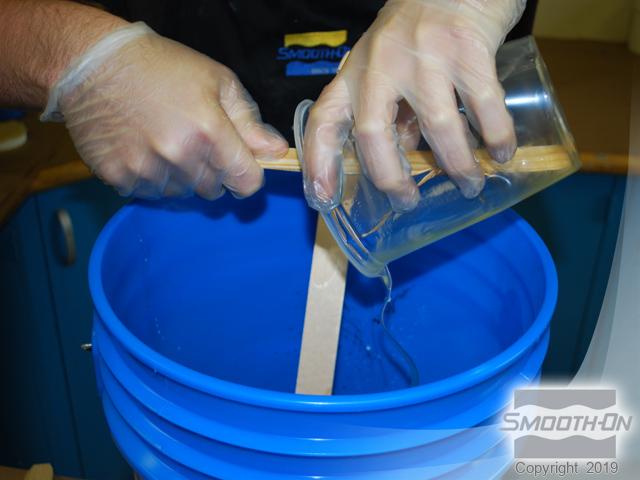
After you have prepared your model, premix both parts of Dragon Skin 10 Fast. Once pre-mixed, measure out an equal volume of both Part A and Part B of Dragon Skin® 10 Fast. Dispense Part B into a larger mixing container. Add Silc-Pig® Fleshtone pigment to Part B. Pigmenting the naturally translucent Dragon Skin® silicone will help ensure a thorough cover over the entire model.
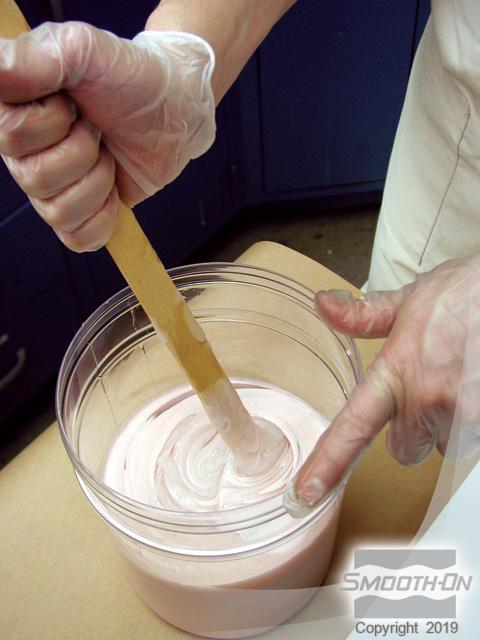
Thoroughly mix pigment into Part B prior to adding Part A. Make sure you have no striations between the Part B and the Silc Pig® pigment. Then add Part A to the pigmented Part B and thoroughly mix them together. Be sure to scrape the sides and bottom of mixing container several times. By pigmenting one part of the silicone, it is easy to see if material has been mixed properly. Continue mixing until there are no color striations.
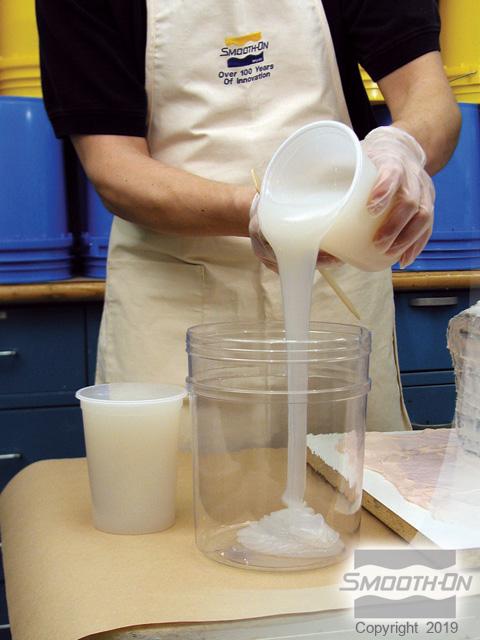
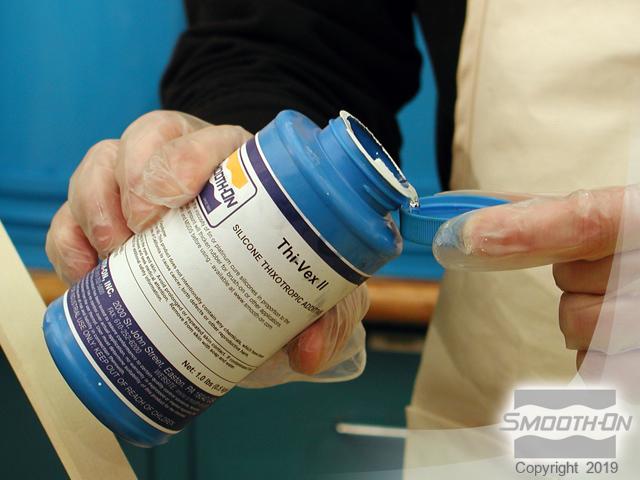
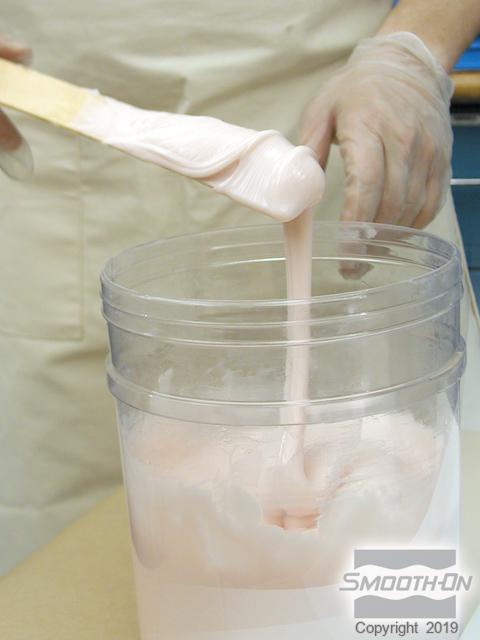
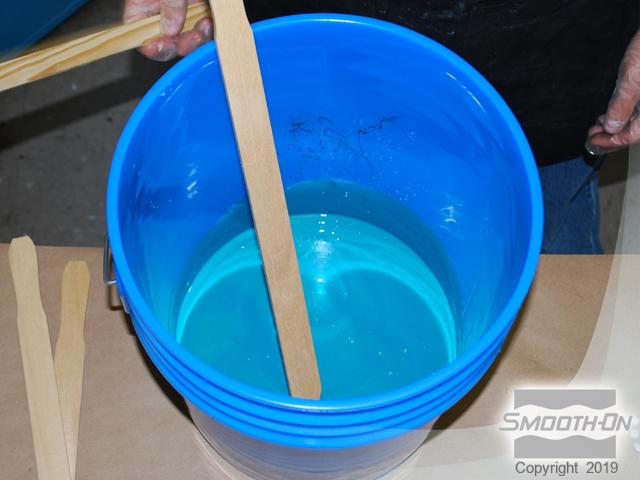
Dragon Skin® 10 Fast is naturally fairly low in viscosity, therefore it is important to thicken the material prior to applying it to the model. Add a capful of Thi-Vex® II silicone thickening agent and mix it in thoroughly. Once thoroughly mixed, the thickened Dragon Skin® should still be somewhat running but thick enough to hold a vertical. Thickness can be modified to suit the mold maker's preference depending on the amount of Thi-Vex® added.
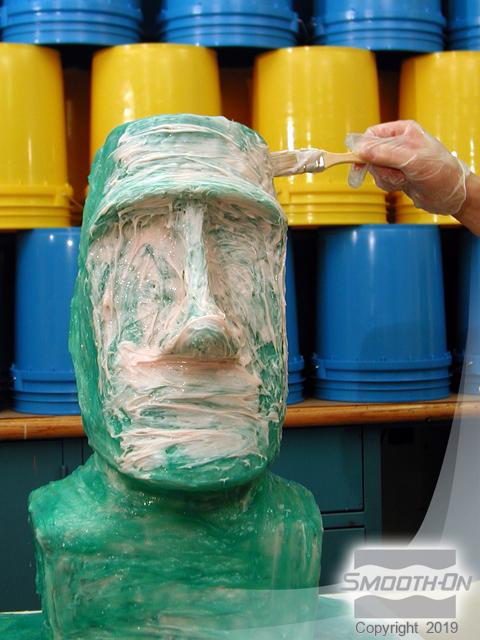
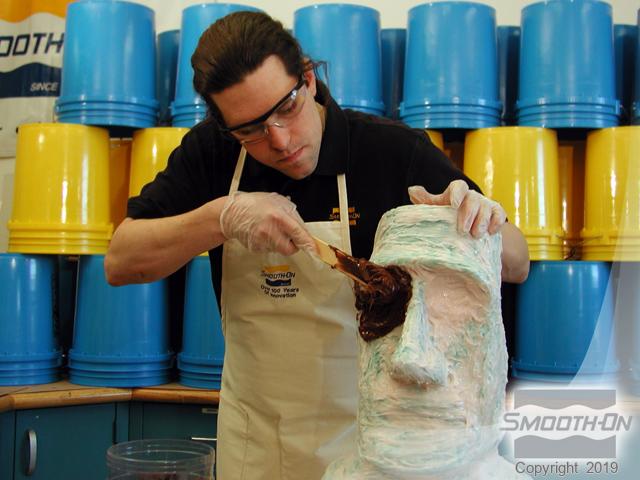
You can now begin applying Dragon Skin® 10 Fast to the original model. The first layer of a brush-on mold should be thin. This will help eliminate any chance of bubble entrapment. Examine the model from all viewpoints (even below) to ensure thorough coverage. Apply Dragon Skin® 10 Fast over the entire model and begin building a flange 3'' (8 cm) around the base of the model. After you have completed the first layer allow the rubber to cure until tacky prior to applying next layer (approximately 45 minutes).
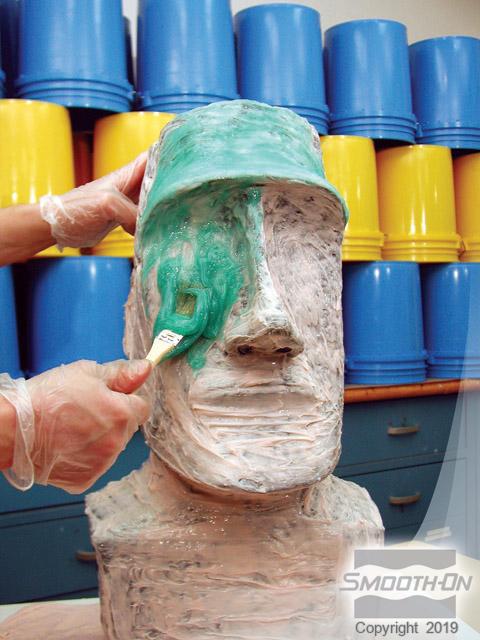
Step 3: Dispensing, Mixing, Applying Second Layer of Dragon Skin 10 Fast
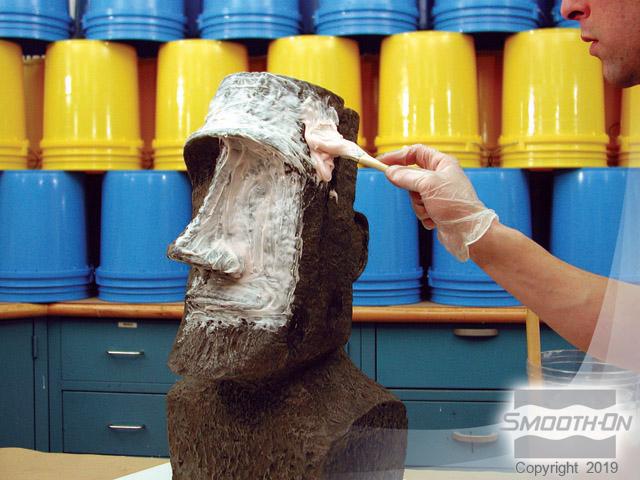
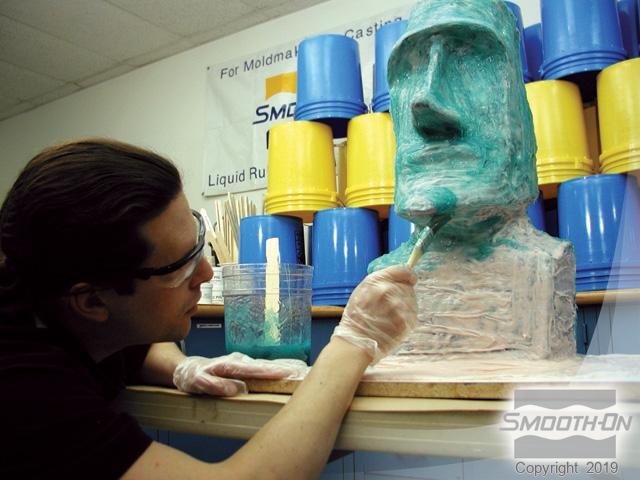
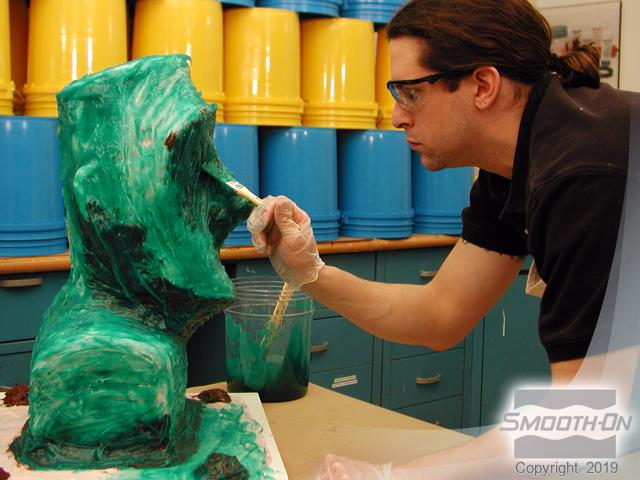
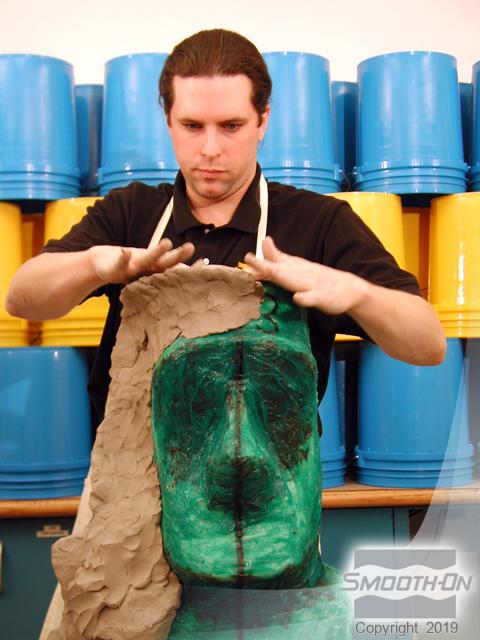
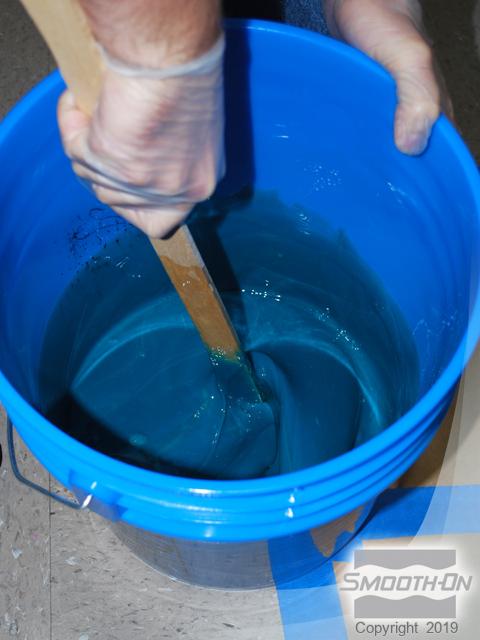
After you have allowed the first layer to cure tacky, start mixing a second thickened batch of Dragon Skin® 10 Fast. Add a different Silc-Pig® pigment to alternate layers will help ensure thorough coverage over the entire model. Then add and mix another capful of Thi-Vex® to thicken the Dragon Skin® 10 Fast. Once your Part A, Part B and Thi-Vex are fully mixed, apply a second coat of Dragon Skin® 10 Fast.
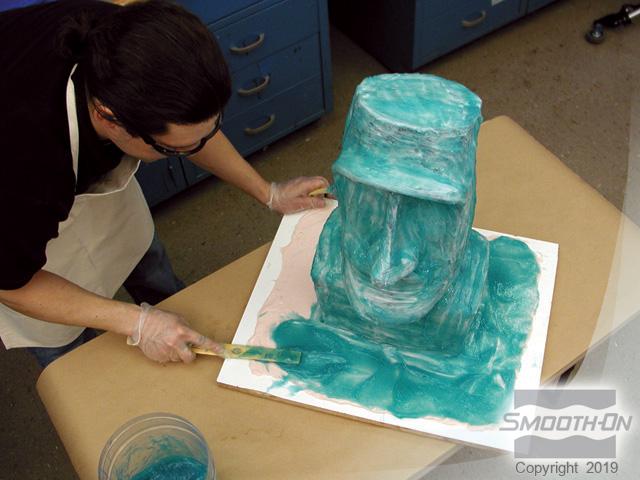
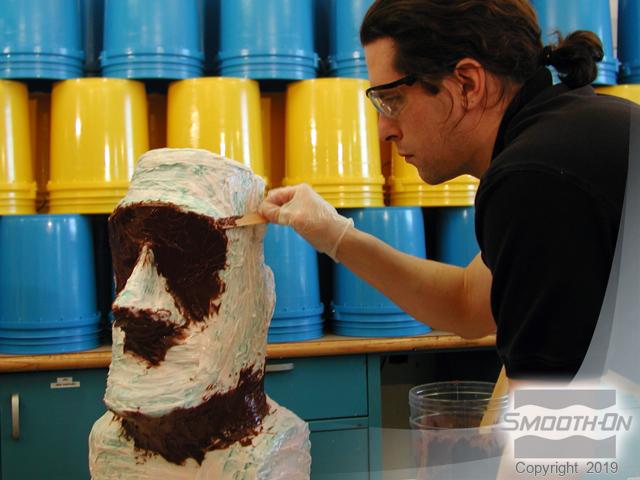
In the example, the green pigment contrasts well with the previous layer, but it is still important to view the model from all angles to ensure thorough coverage. Apply Dragon Skin® 10 Fast over the entire model and continue building a flange 3'' (8 cm) around the base of the model.
You have then completed second layer. Allow the rubber to cure until tacky prior to applying next layer (approximately 45 minutes).


Step 4: Applying Third and Thickened Layers of Dragon Skin 10 Fast
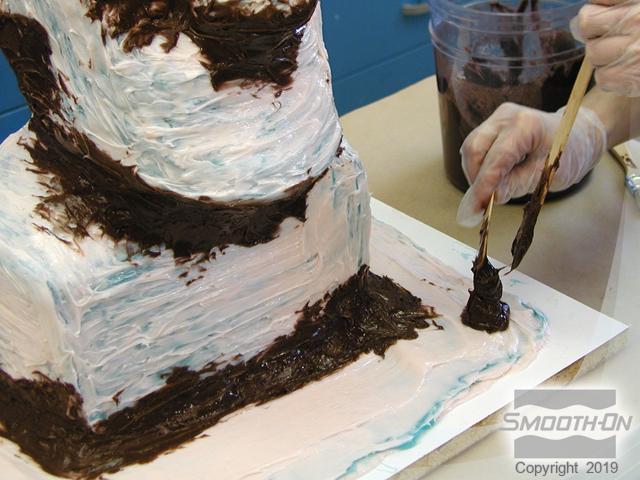
Mix a third batch of Dragon Skin® 10 Fast and add fleshtone pigment. Again, add and mix another capful of Thi-Vex® to thicken the Dragon Skin® 10 Fast.
Now apply your third layer of Dragon Skin® 10 Fast over the entire model. Continue building a flange 3'' (8 cm) around the base of the model. You have then completed third layer. Allow rubber to cure until tacky prior to applying next layer (approximately 45 minutes).
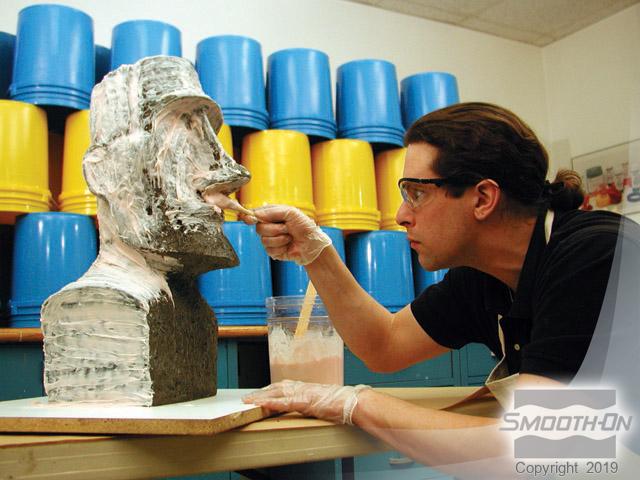
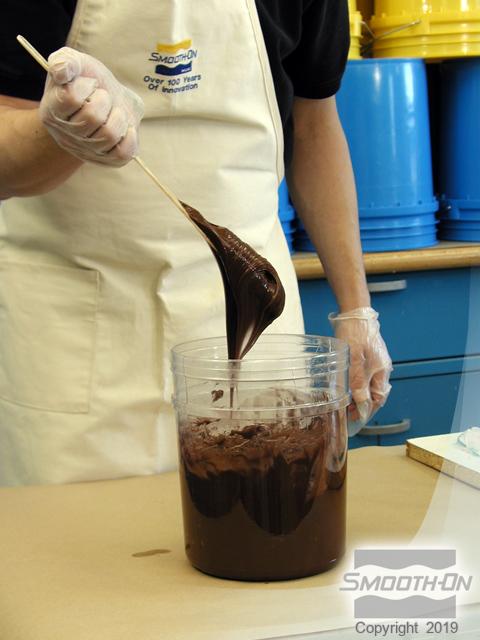
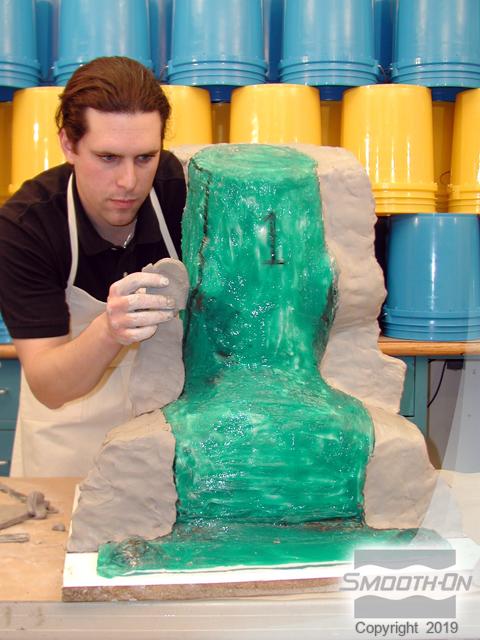
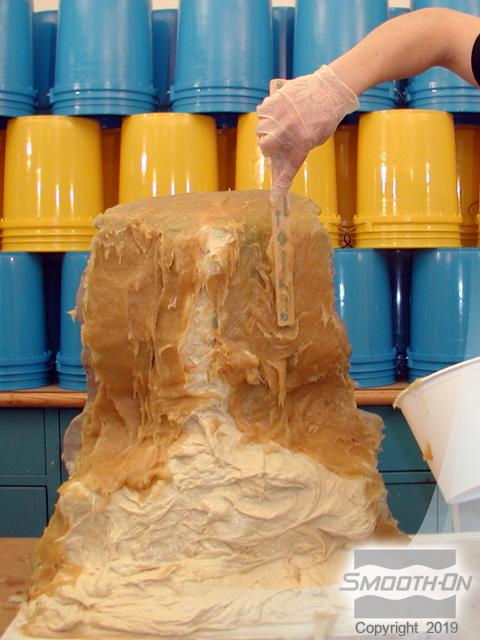
Mix another pigmented batch of Dragon Skin® 10 Fast. This batch is going to be used to fill in deep areas and undercuts. Add more Thi-Vex® than previous layers to thicken the material until it is no longer runny. For this batch, the thickened Dragon Skin® 10 Fast should have a consistency like peanut butter. Use the thickened material to fill in undercuts and deep areas (under the eyebrow, nose and chin). Smooth out edges of thickened areas to blend with the rest of the mold.
* Mold Maker's Tip: Use thickened material to create raised areas to serve as keys. These keys will help align the Dragon Skin® mold with the rigid support shell.
Completed thickened layer. Allow rubber to cure until tacky prior to applying next layer (approximately 45 minutes).


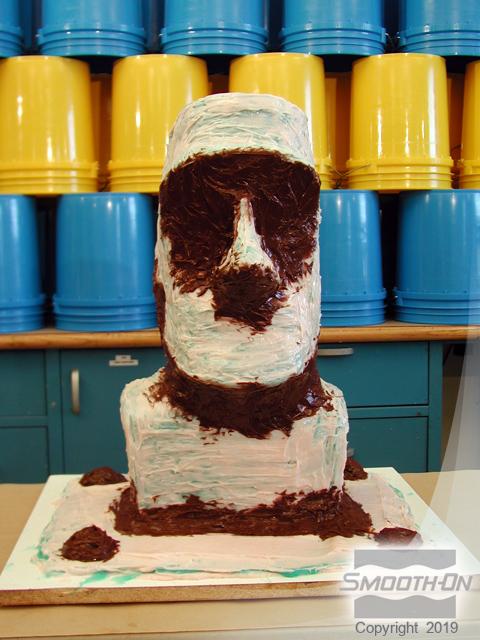
Step 5: Applying Final Layer of Dragon Skin
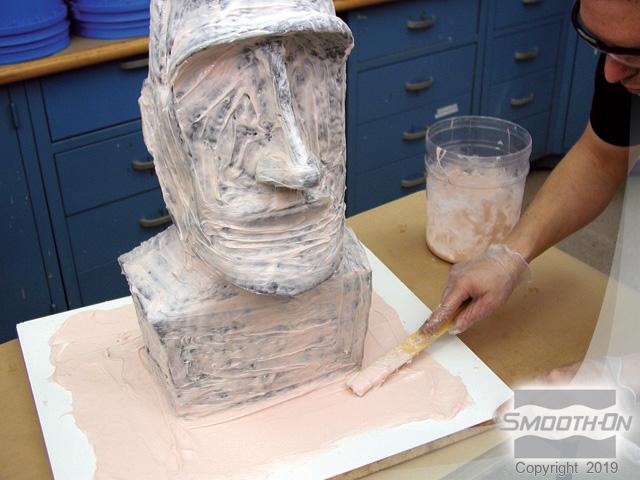
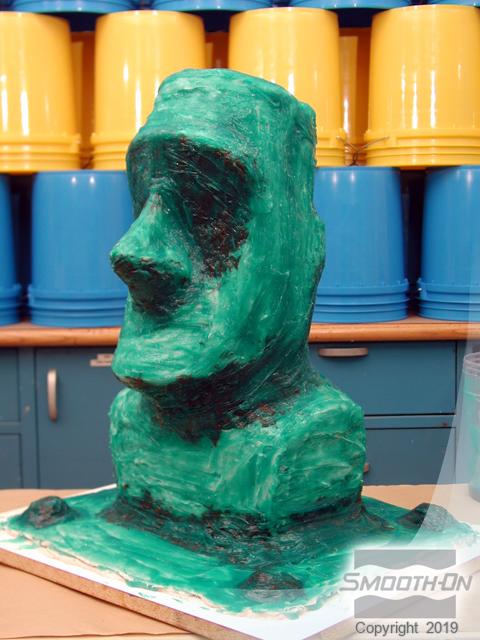
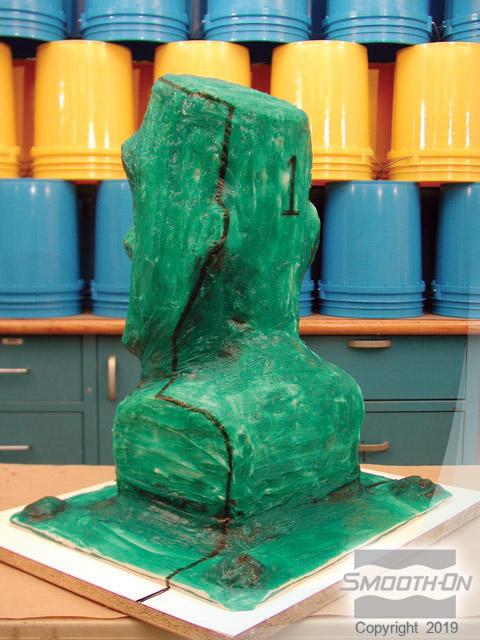
Mix another batch of Dragon Skin® 10 Fast with green Silc-Pig® pigment added. Add and mix a capful of Thi-Vex® to thicken the Dragon Skin® 10 Fast. Apply a fourth coat of Dragon Skin® 10 Fast. This layer will serve to both further build mold thickness, but more importantly it will smooth out any unevenness from previous layers.
Complete fourth and last layer and allow Dragon Skin® 10 Fast mold to fully cure prior to moving to next step (approximately 75 minutes).

Step 6: Preparing Mold For Support Shell
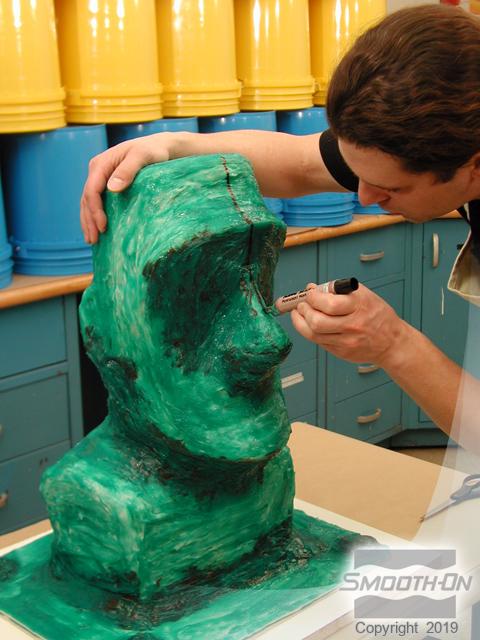
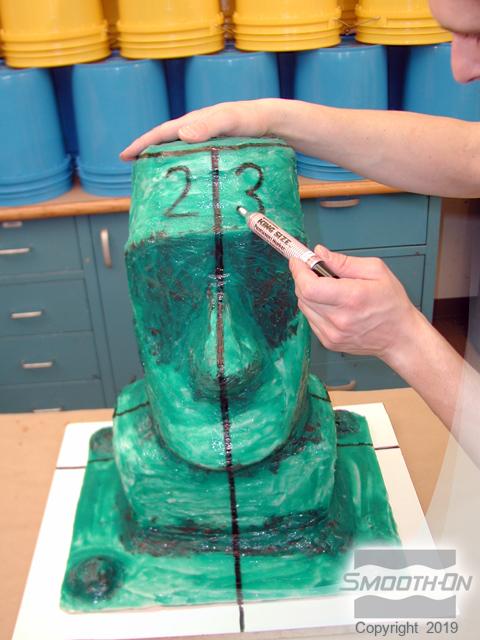
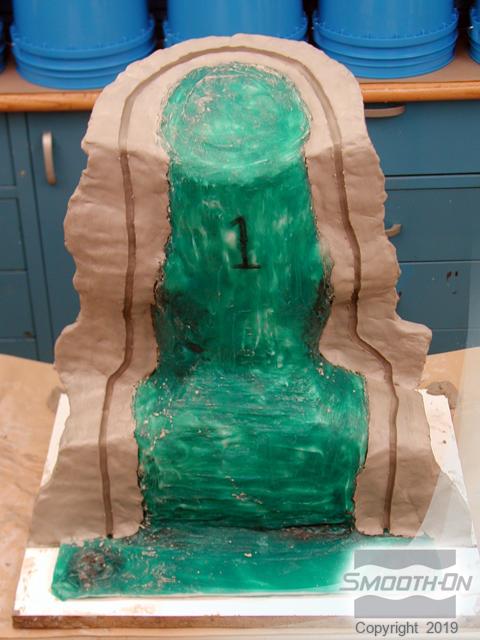
This mold requires a multi-piece support shell. Begin by planning out where the support shell will split to prevent mechanical lock.
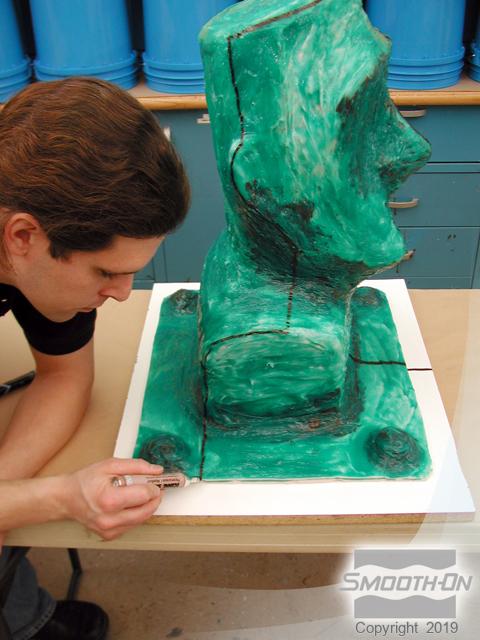
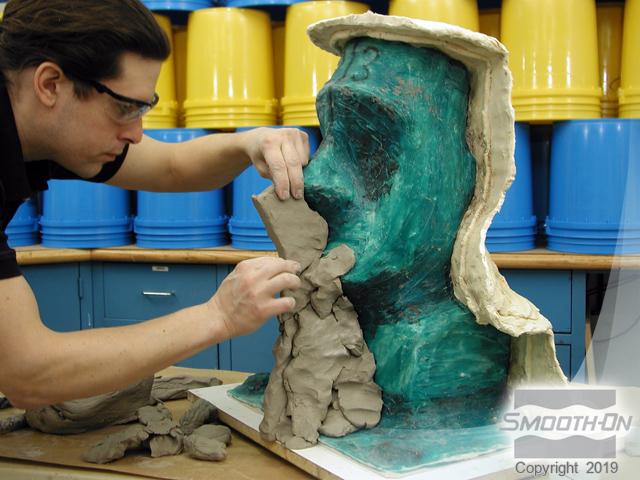
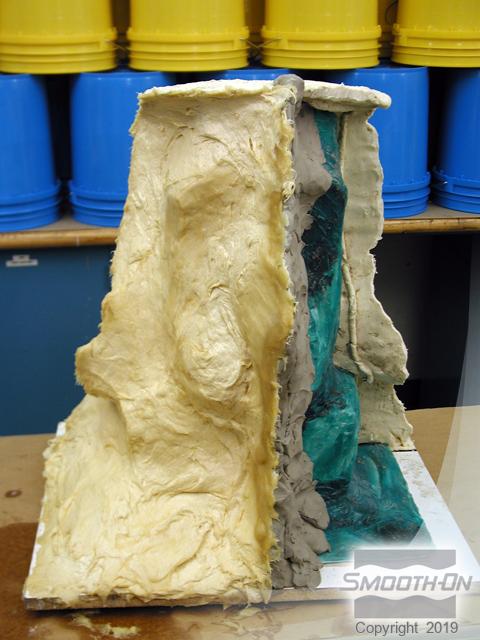
Using a marker, draw a line over the high points of the model along the break points. The support shell will be created in three parts. The back of the model is side 1. The front of the model is split in two parts along the center of the face.
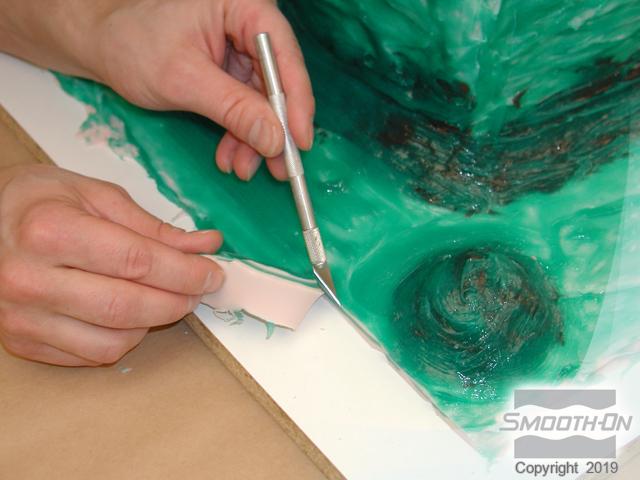
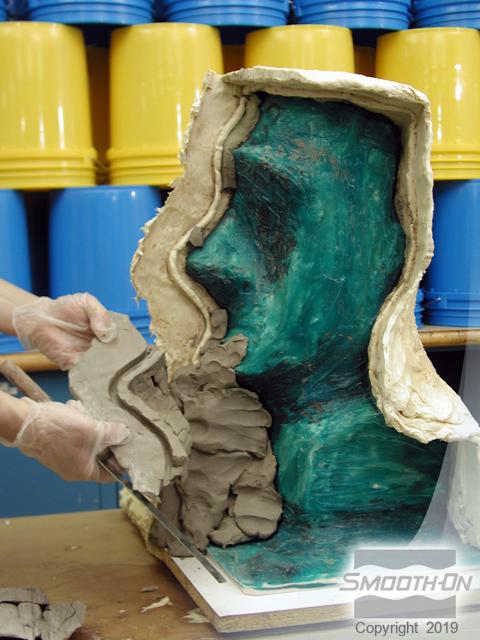
Clay can be used to build shims along the marked high points. Begin by building the clay shim to separate section 1 (back of model) from the other sections. Be careful to build clay on one side of the marked line so that the support shell material can be applied in the planned location. Use sculpting tools to cut keys into the clay shim. Keys will help the support shell lock together tightly when casting. Completed clay shim.
Step 7: Applying the First Part of the Plasti-Paste Support Shell
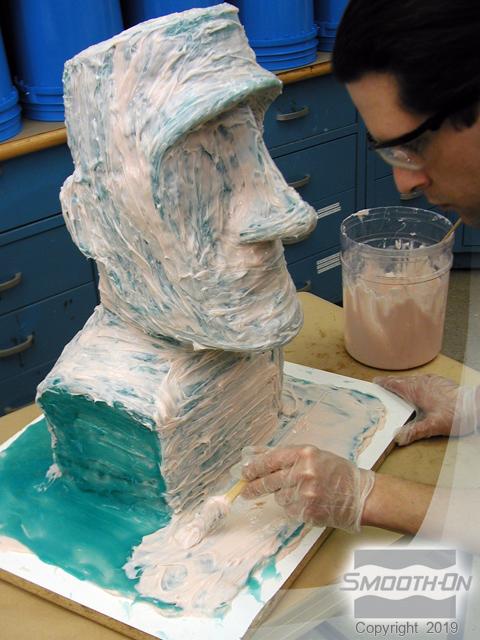
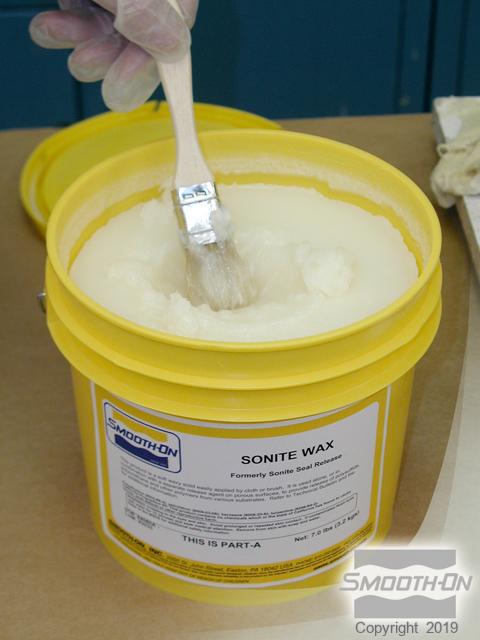
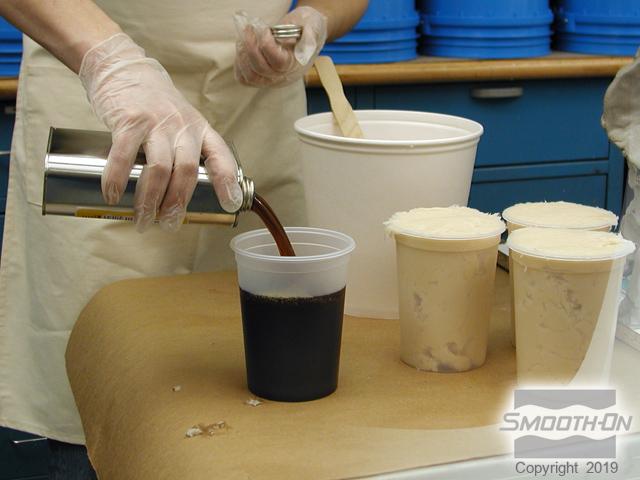
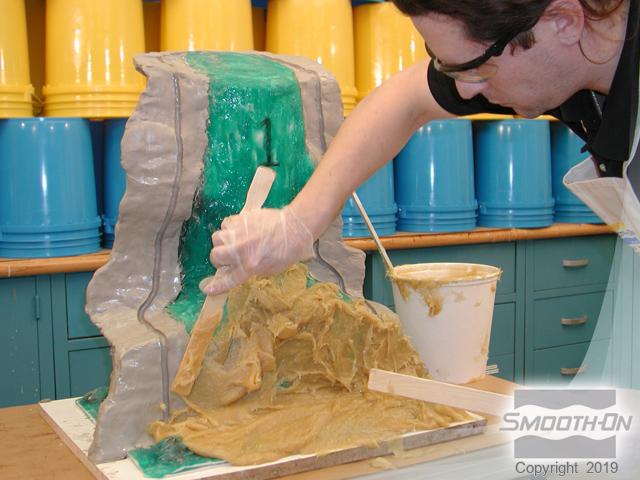
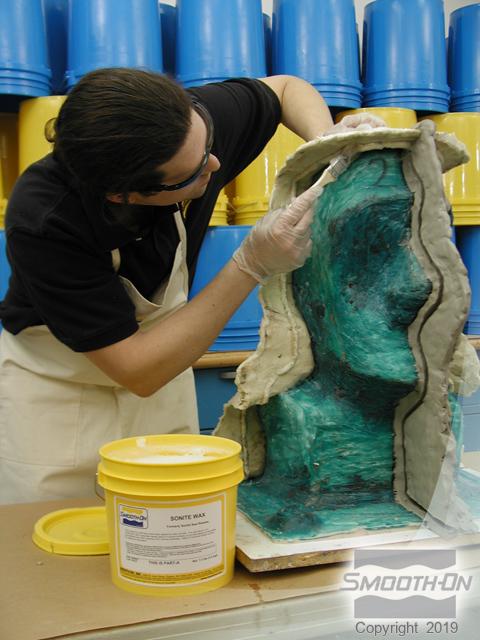
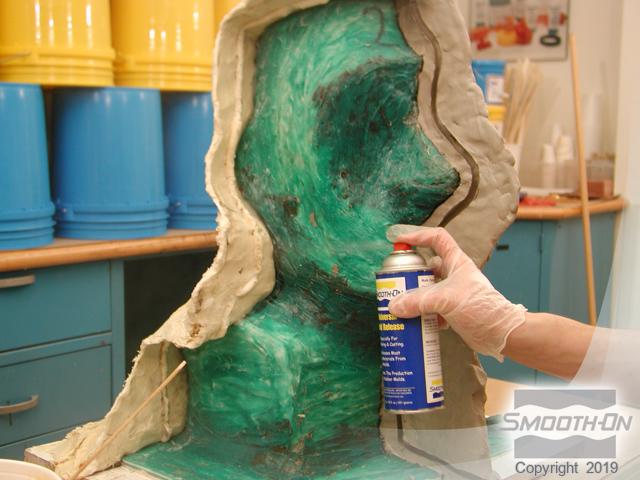
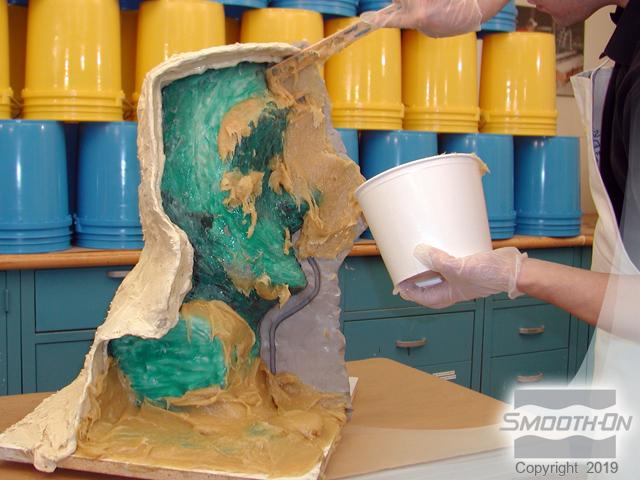
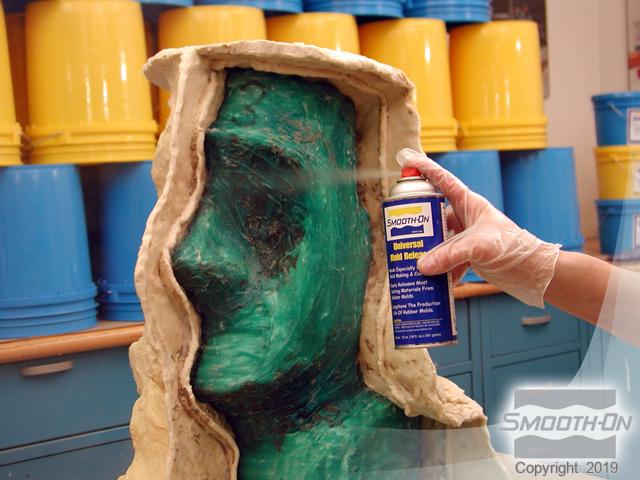
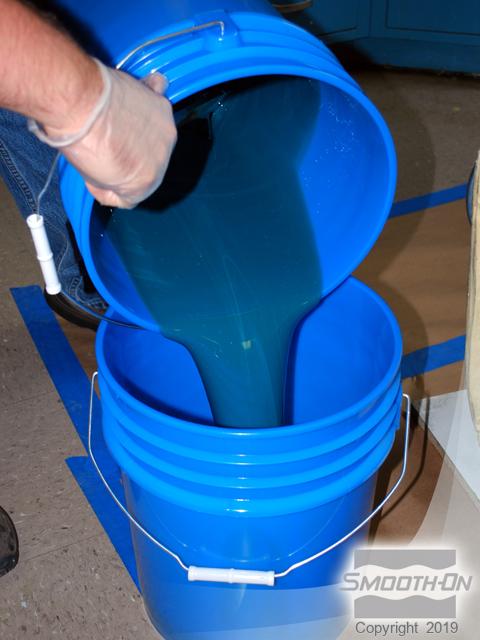
The support shell will be created with Plasti-Paste® filled urethane plastic, which is highly adhesive. Prior to applying Plasti-Paste®, brush Sonite® Wax over all surfaces the support shell material will touch. Spray an even coat of Universal® Mold Release over all surfaces that will come in contact with Plasti-Paste®. Smooth-On's Plasti-Paste® filled urethane plastic is designed for use as a support shell. It is mixed in a ratio of 1 Part A to 2 Parts B by volume. Mix and apply the first batch of Plasti-Paste®.
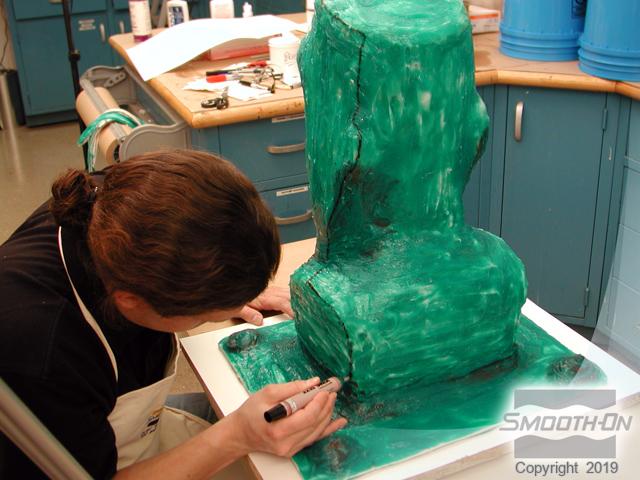
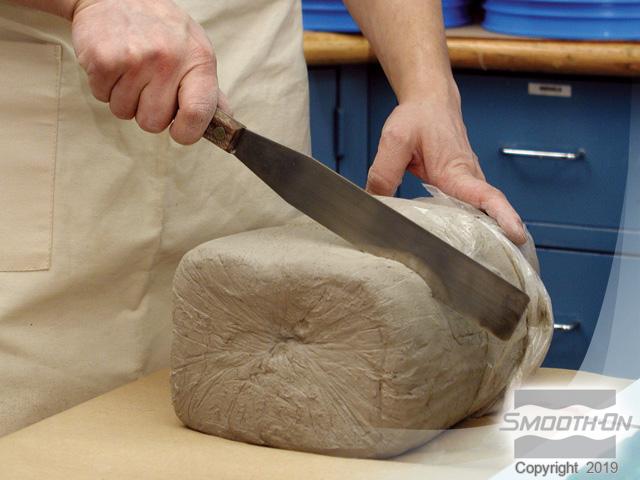
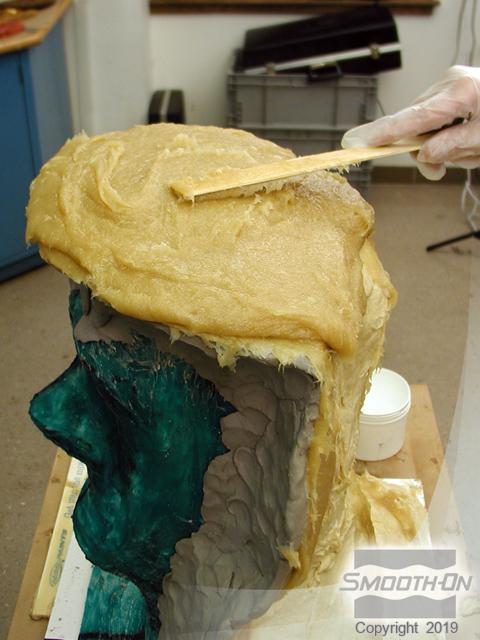
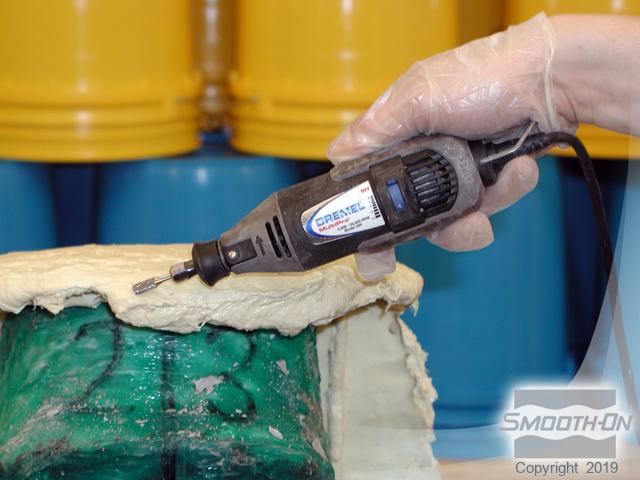
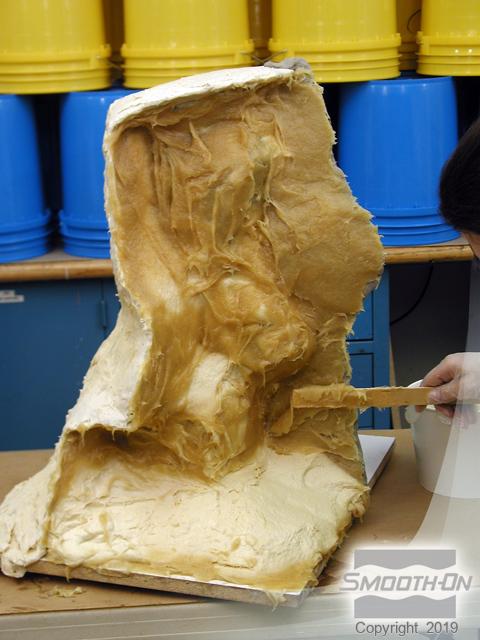
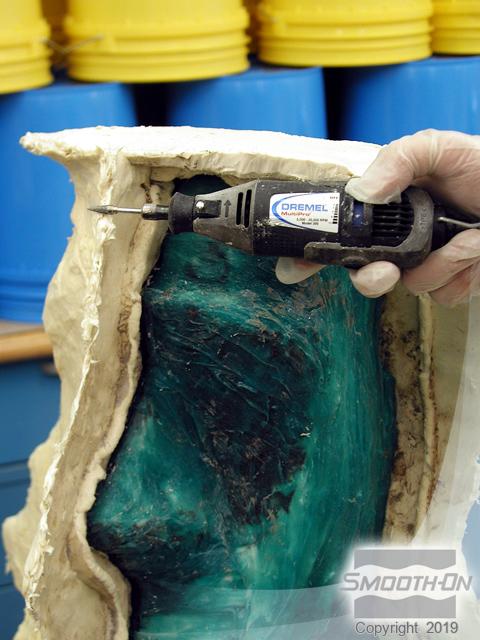
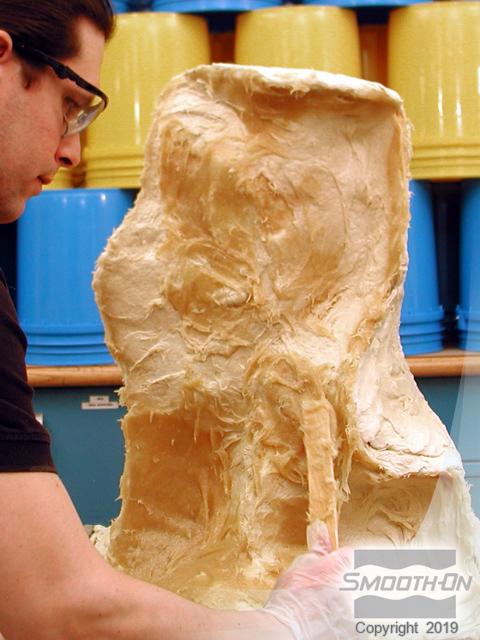
Plasti-Paste® has a relatively short working time (approximately 10 minutes). It is often best to work with several small batches rather than one large batch. Build Plasti-Paste® support shell to an ultimate thickness of 3/8'' (1 cm). Allow Plasti-Paste® to fully cure (approximately 90 minutes) before moving to the next step. Once section 1 has fully cured, remove clay shim and use a Dremel tool to trim sharp edges and corners.


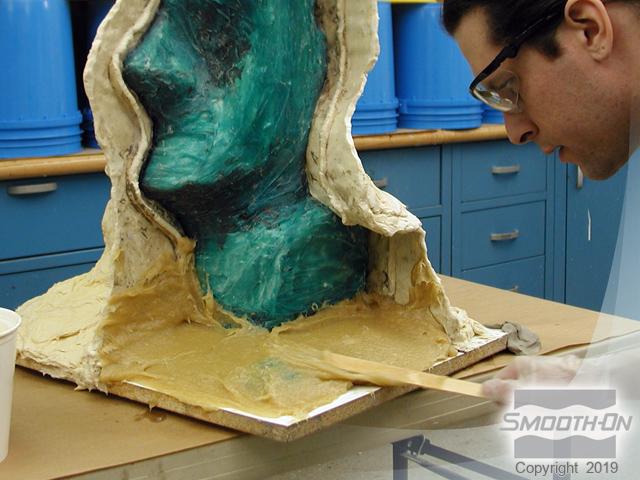
Step 8: Preparing and Building Part 2 of the support shell
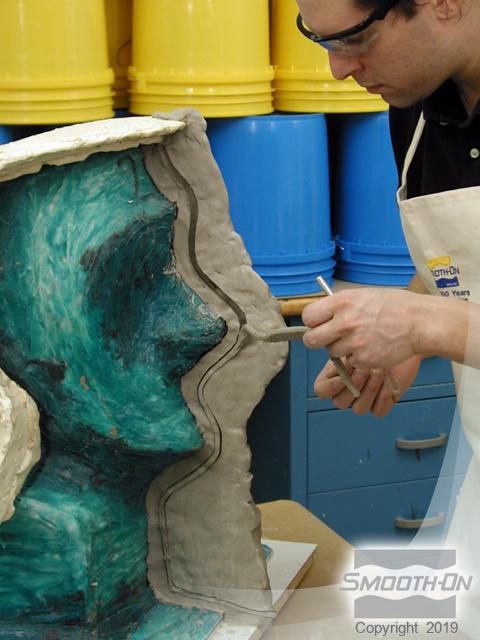
Build a new clay shim to separate the front halves of the support shell. Cut keys into the clay shim.
Plasti-Paste® will stick to itself if not properly released, so begin by brushing Sonite® Wax over all surfaces. Spray an even coat of Universal Mold Release over all surfaces that will come in contact with Plasti-Paste®. Mix and apply Plasti-Paste® to section 2. Build Plasti-Paste® support shell to an ultimate thickness of 3/8'' (1 cm). Allow Plasti-Paste® to fully cure (approximately 90 minutes) before proceeding to the next step.
Once section 2 has fully cured, remove clay shim. Use a Dremel tool to trim sharp edges and corners.
Step 9: Applying Third Part of Support Shell and Demolding Original
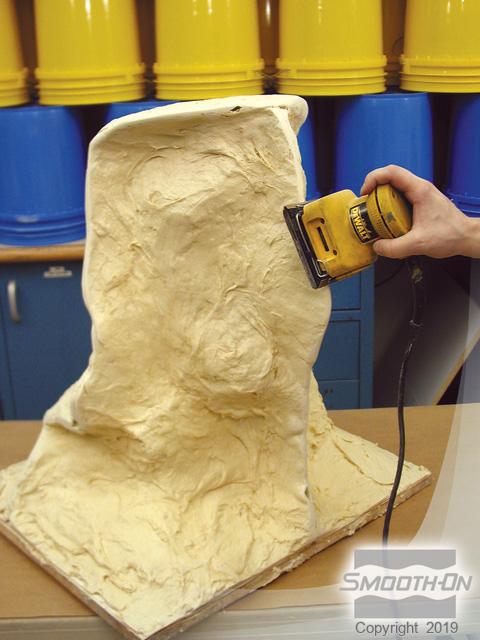
Brush Sonite® Wax over all surfaces. Spray an even coat of Universal Mold Release over all surfaces. Mix and apply Plasti-Paste® to section 3. Build Plasti-Paste® support shell to an ultimate thickness of 3/8'' (1 cm). Allow Plasti-Paste® to fully cure (approximately 90 minutes). Edges can be sharp and uneven so you can sand all edges smooth to make handling the mold easier.
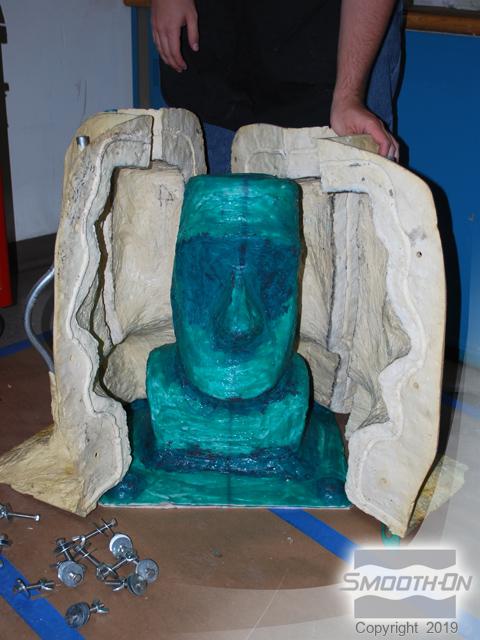
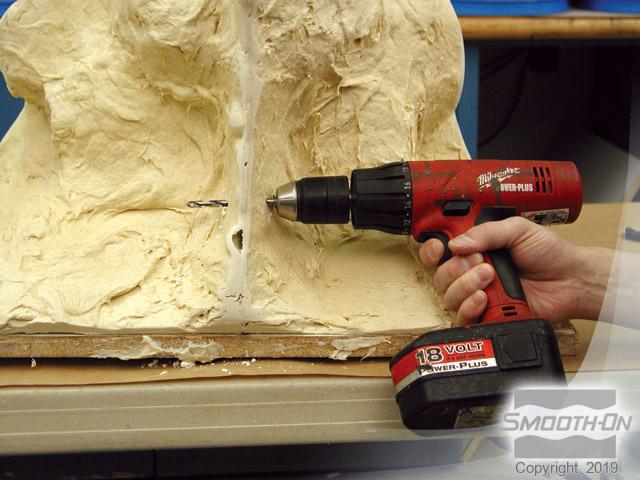
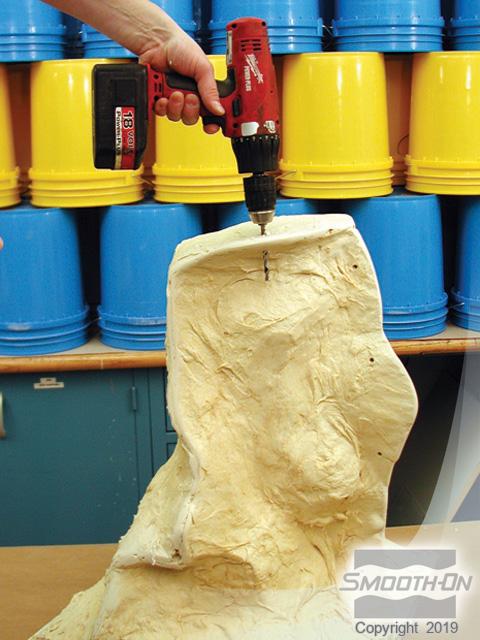
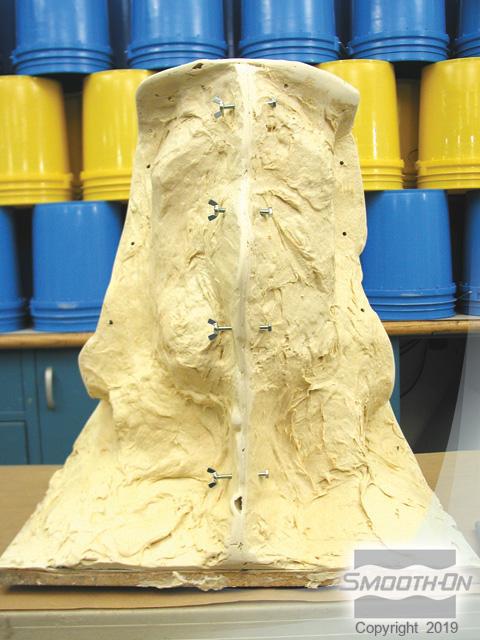
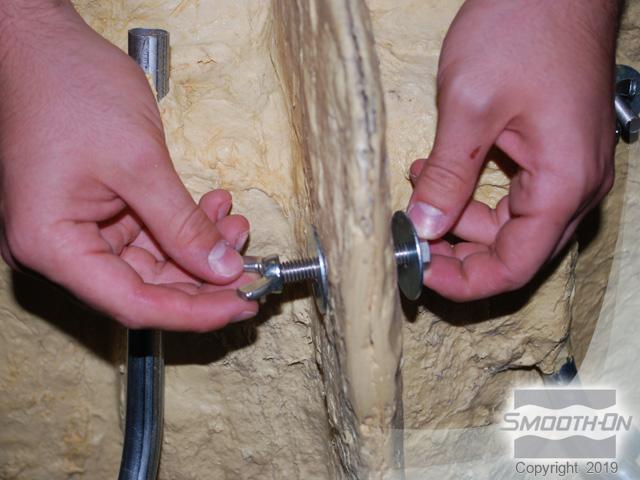
Bolts can be used to help lock the support shell sections together securely. Begin by drilling holes between sections. Bolts can also be placed though the top section of the support shell. Now the shell can be securely bolted together. Separate shell sections and remove the original model from the mold.


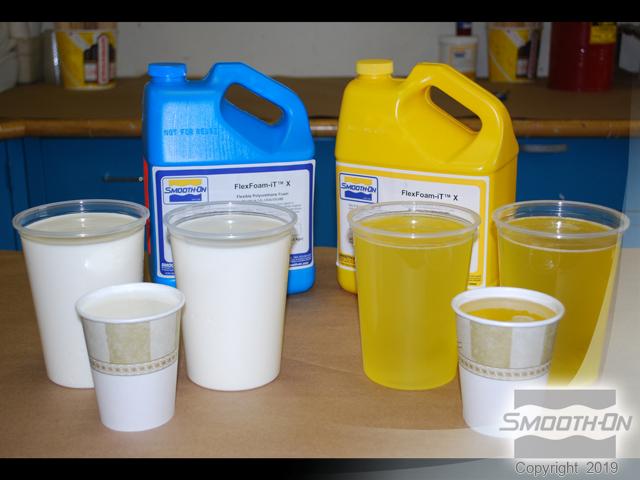
Step 10: Preparing & Casting FlexFoam-iT X
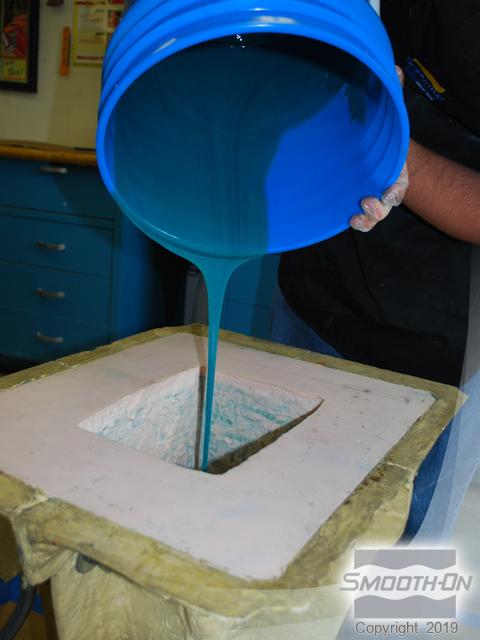
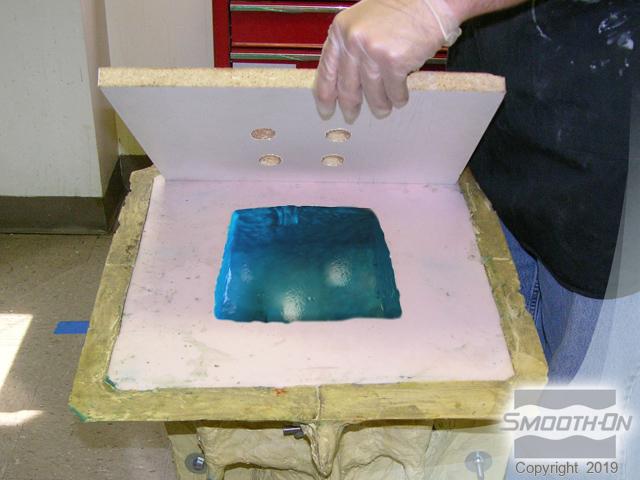
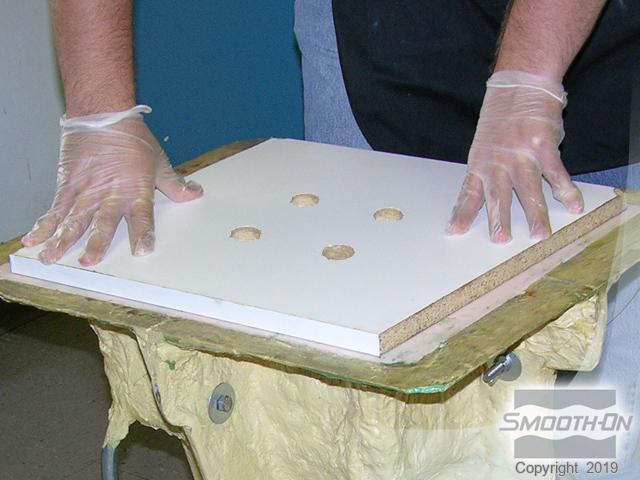
The hollow mold cavity is ready for casting. Smooth-On's FlexFoam-iT® X can be used to make a lightweight reproduction. Expanding urethane foams, like Smooth-On's Foam-iT!® and Flexfoam-iT!® series, produce the best detail and fill mold cavities better when back pressure is used. Back pressure can be applied by laying a board over the open cavity while the foam expands. Drill holes in the board for adequate pressure release while the foam is expanding inside the mold.
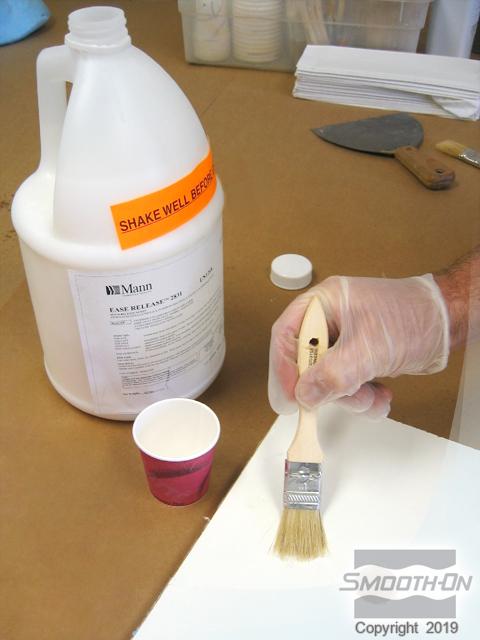
Important: Apply a liberal coat of Ease Release® 2831 over the board and into all holes to release the foam from the melamine board.
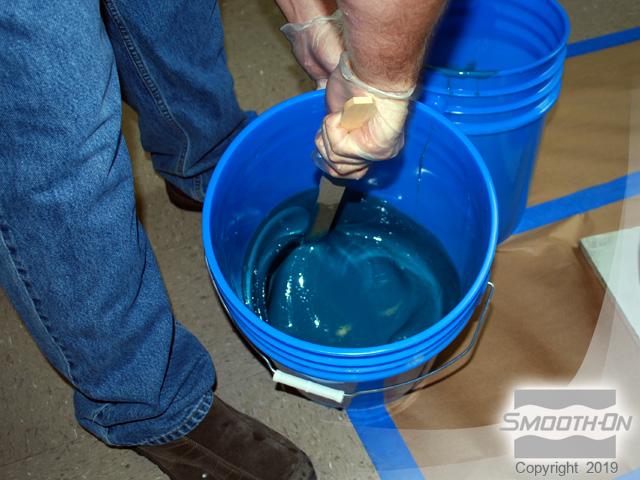
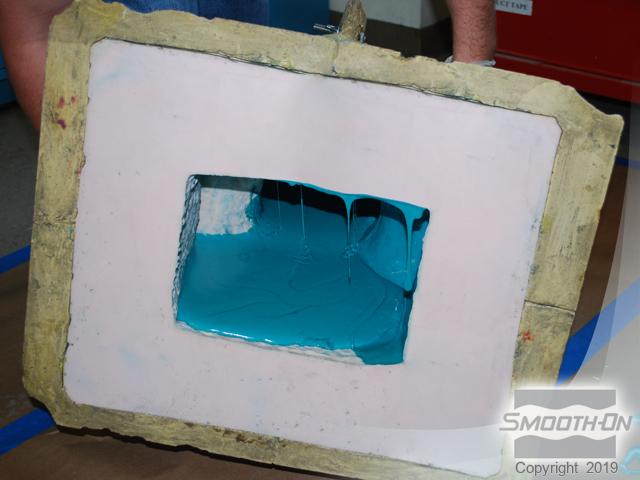
Mix FlexFoam-iT® X in a ratio of 1 Part A to 1 Part B by volume. Then dispense Part B into a larger mixing container and add SO-Strong® Green tint. Thoroughly mix the tint into Part B prior to adding Part A. Combine Part A with tinted Part B.
Quickly, yet thoroughly, mix Parts A and B. Be sure to scrape sides and bottom of the mixing container.
Reminder: FlexFoam-iT!® X has a 50 second working time - it is important to move quickly. For best results, do a double mix.
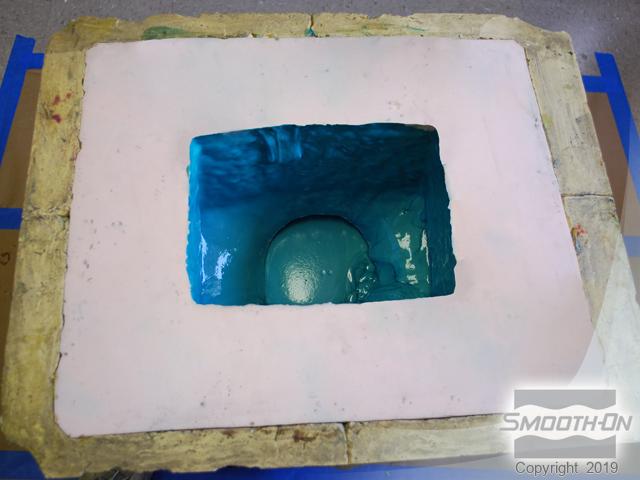
Start by pouring the entire mixture into a second container. Continue mixing until there are no color striations present. Pour mixture into the mold cavity.
Mold Maker's Tip: Rolling the entire mold will help ensure FlexFoam-iT!® achieves thorough coverage over all surfaces.
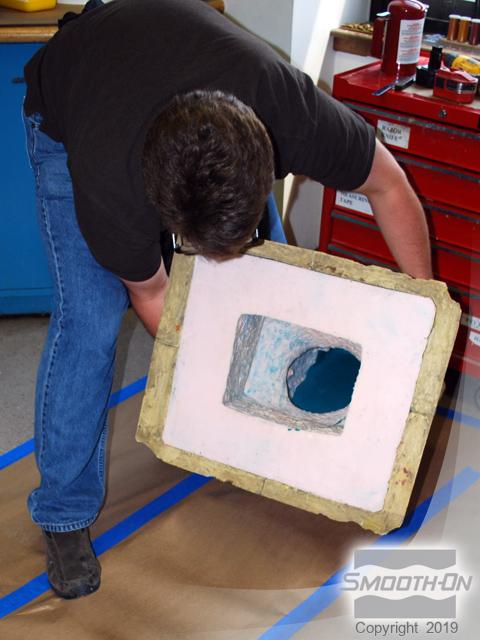
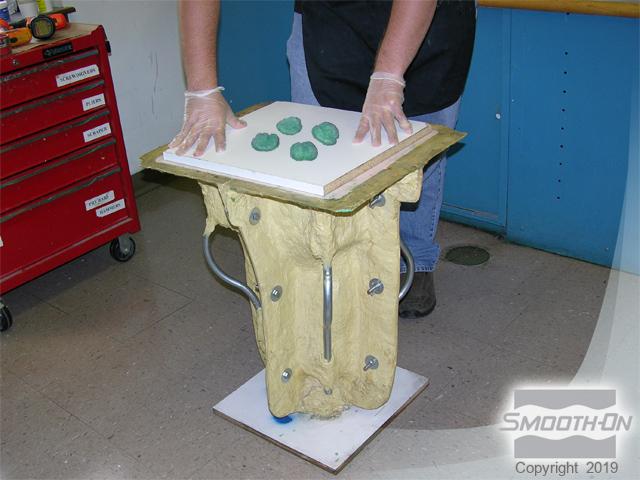
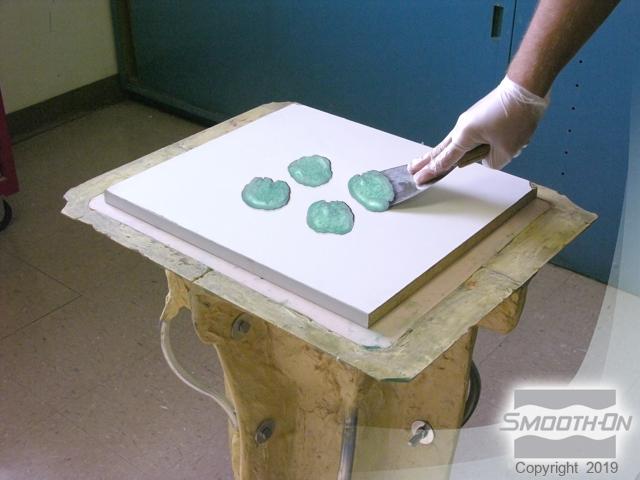
Allow the foam to pour to the very edge of the mold cavity prior to turning to next side. Continue turning the mold until all interior surfaces are covered. Once the foam begins to expand, return the mold to a vertical position and allow foam to rise. Cover the mold opening with the board created in previous steps. Position the board with holes centered over the cavity. Press down firmly as the pressure from the rising foam can force the board out of position. Depending on the pressure, locking straps may be necessary to keep the board in place. FlexFoam-iT!® X expands 6 times its original volume and develops a uniform 10 lb./cu. ft. cell structure. Excess foam will rise out of the holes in the board creating ''mushroom caps'' on the top of the board. Using a scraper, remove the excess foam. The board can then be removed from the opening of the mold.


Step 11: Demold / Finishing
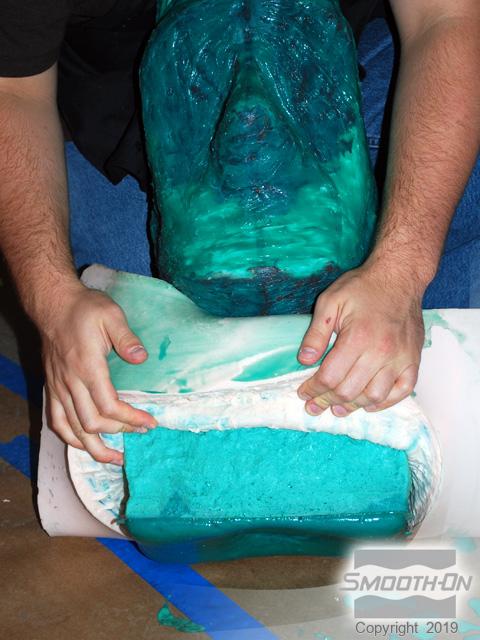
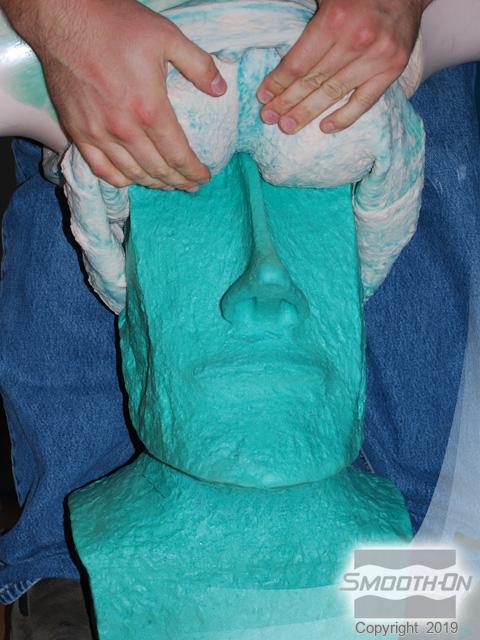
Once the FlexFoam-iT!® X has fully cured (approximately 2 hours) the casting can be removed from the mold. Begin by removing the bolts and taking apart the support shell sections. Then remove the Dragon Skin® mold by rolling the edges up the base of the casting. Continue stretching and rolling the mold carefully over high points of the foam casting. Ultimately the Dragon Skin® 10 Fast mold is completely inverted to allow for removal of the casting. Dragon Skin® is one of the only silicone rubbers that is both strong and stretchy enough to allow for this kind of manipulation repeatedly.
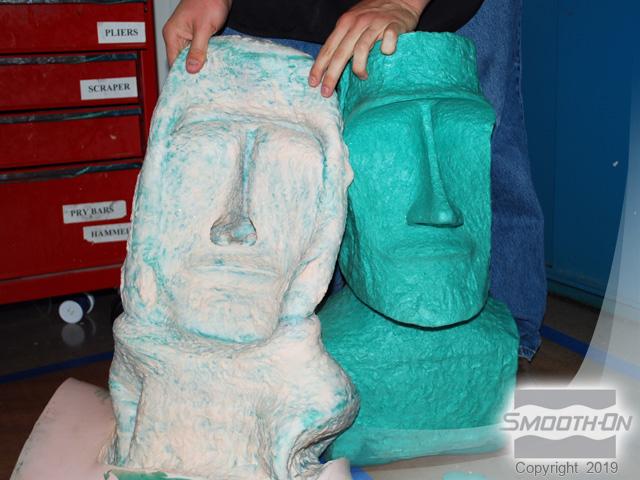
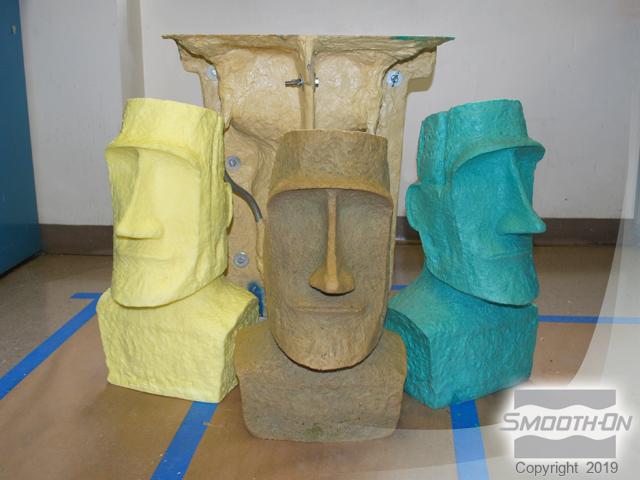
The finished castings reflect perfect detail captured by the Dragon Skin® silicone. Many castings can be produced from a single mold.