How To Make a One Piece Mold of a Head Using Body Double™
Overview
Body Double™ Silicone Rubber is used by both professionals and hobbyists to make ultra-high definition impressions directly off the human body. In their cured state, molds made using Body Double™ Silicone Rubber exhibit virtually no shrinkage. Furthermore, Body Double™ molds will maintain their dimensional stability for many years even after being cast many times. Body Double™ is skin safe and certified by an independent laboratory.
There are two versions of Body Double™ available - STANDARD SET & FAST SET. There are only three distinct differences between the two versions:
- Pot Life - the amount of time you have to work with the material to get Part's A & B mixed thoroughly and applied before it gels. The STANDARD SET has a 5 minute Pot Life; the FAST SET has a 90 second Pot Life.
- Cure Time - how long it takes for the silicone rubber to fully cure. The STANDARD SET has a 25 minute Cure Time; the FAST SET has a 6 minute Cure Time.
- Color - the STANDARD SET has a purple color when thoroughly mixed; the FAST SET has an Aqua Green color when thoroughly mixed. We gave them different colors so users will know which version they are working with.
It is possible to incorporate both versions of Body Double™ into one mold, especially in situations where a longer Pot Life in the silicone rubber is desired in order to pick-up ultra-high definition on the surface of the skin, such as facial features. In the sequence below, both versions of the silicone are used in the mold of the model's head.
This photo sequence details creating a one piece cut seam mold of an entire head. One piece molds are useful because seam lines can be more easily hidden and removed from finished castings.
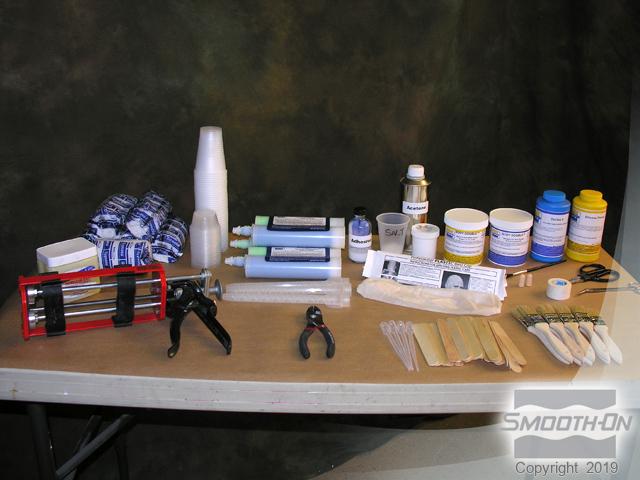
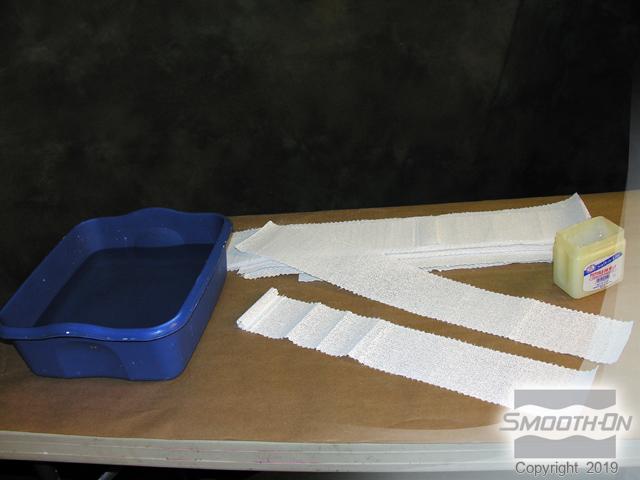
Materials Used in this Tutorial
- Mixing Sticks
- Mixing Containers
- Body Double Fast Set
- Gypsum Bandages
- Paint Brushes
- Scissors
- Thi-Vex
- Body Double Standard Set
- Bald Cap
- Acetone
- Body Double Release Cream
- Cast Magic
- Smooth-Cast 320
- So-Strong
- Ure-Fil
- Foam-iT 5
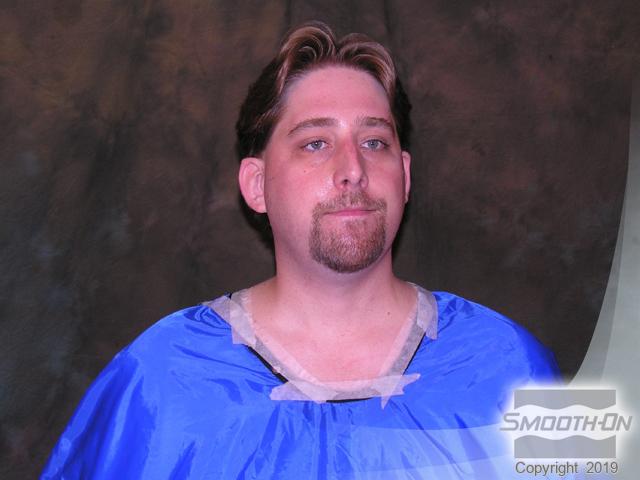
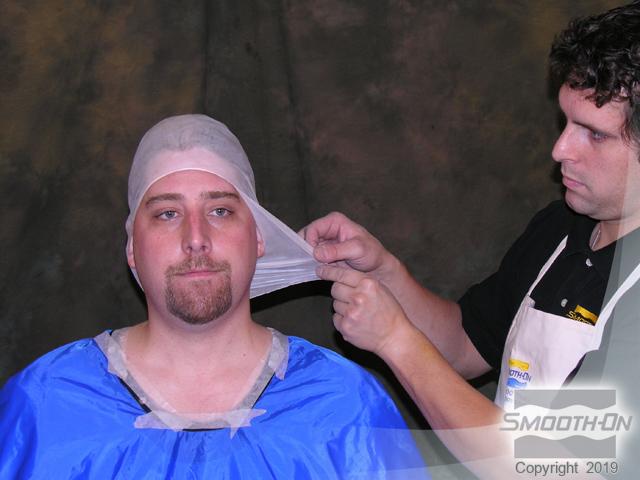
Step 1: Preparing Model
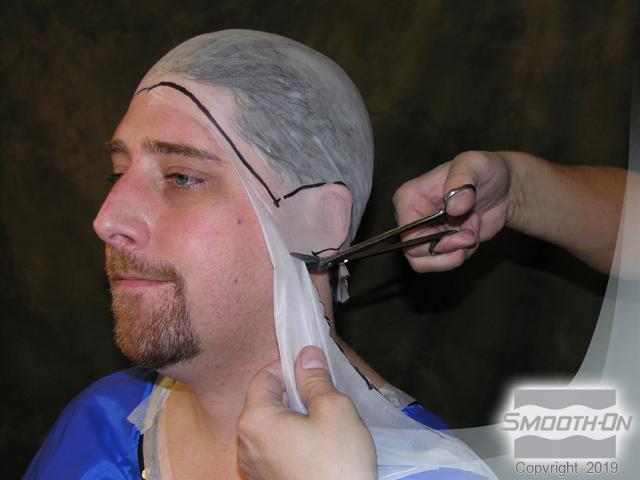
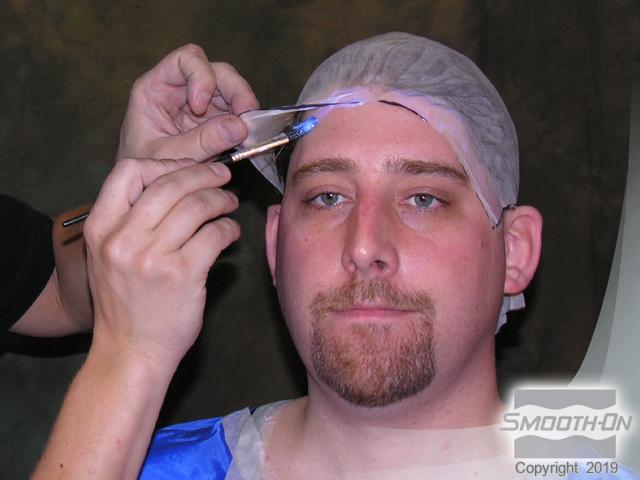
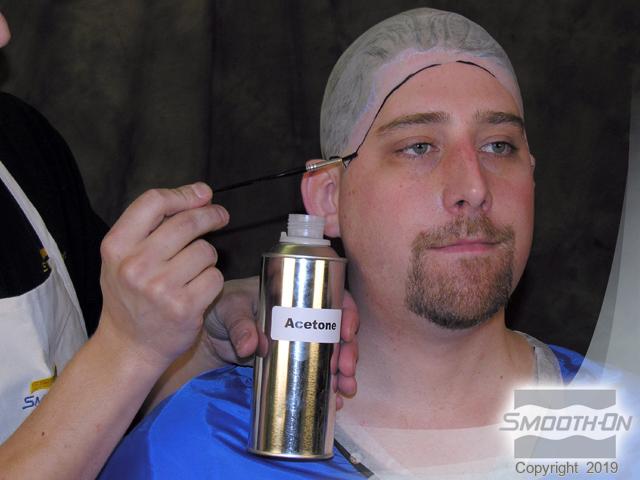
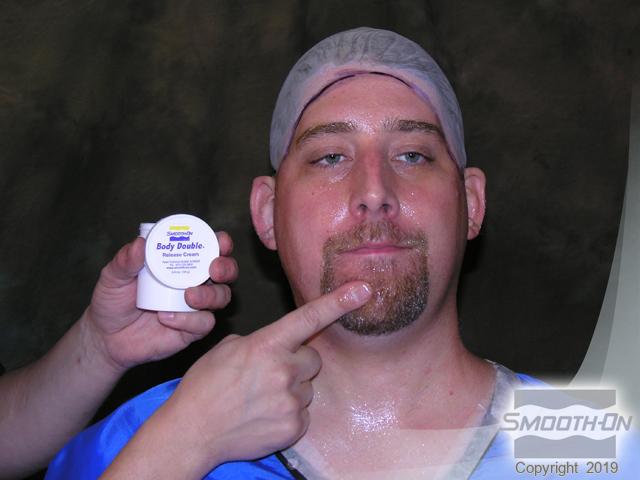
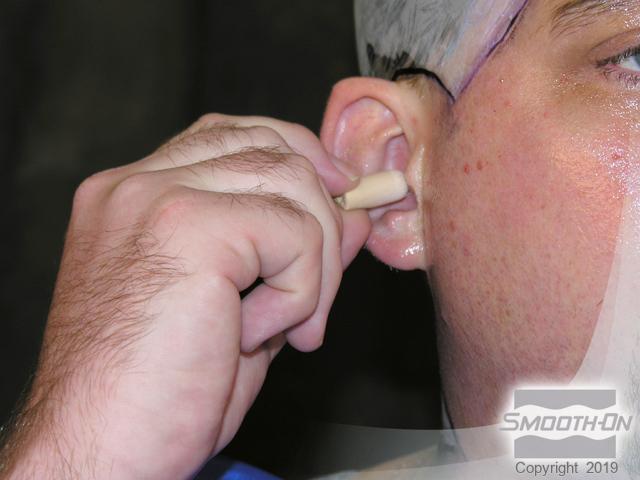
First, assemble and prepare all of the supplies necessary. Then, prep the model for the mold making process by putting the bald cap into place to protect the model's hair. Cut and carefully fit the bald cap around the model's ears and hairline, adhering it to the model's skin. Use acetone to blend the edges of the bald cap. Prepare any exposed skin surfaces by applying a thin layer of Body Double® Release Cream. This will hold down hairs so that they do not get encapsulated by the silicone rubber. Use earplugs to prevent Body Double® from running into the ear cavity.
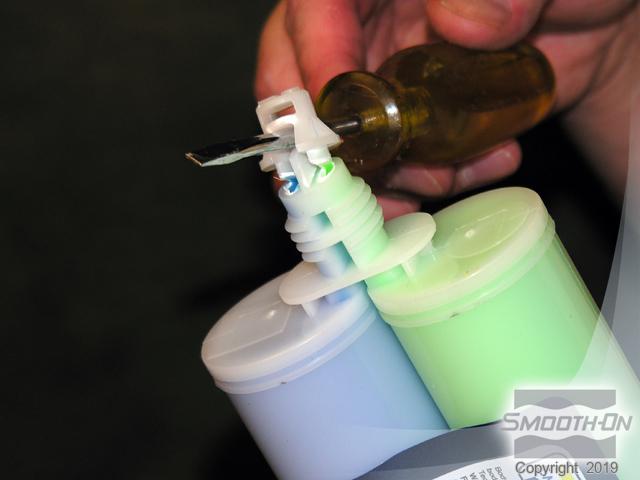
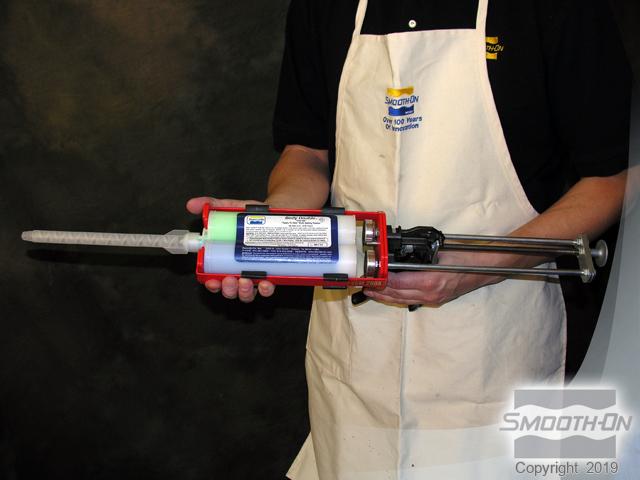
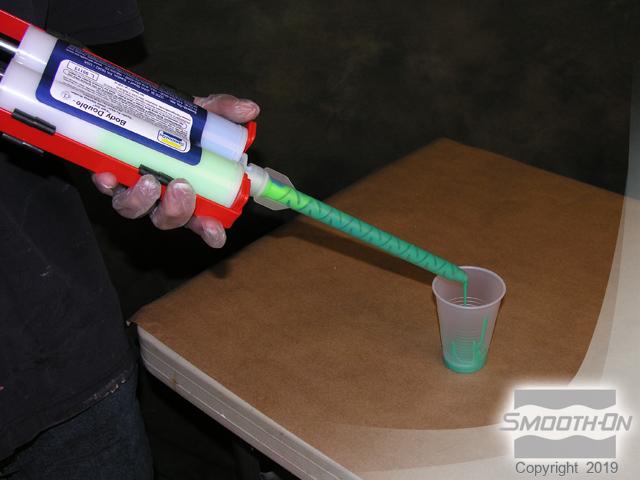
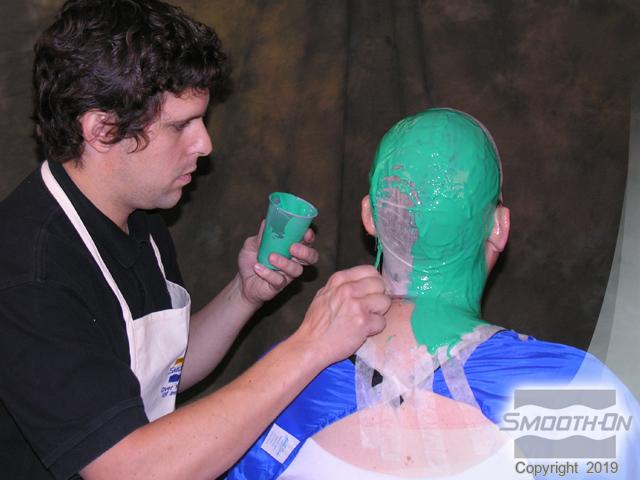
Step 2: Preparing and Dispensing Body Double Fast Set
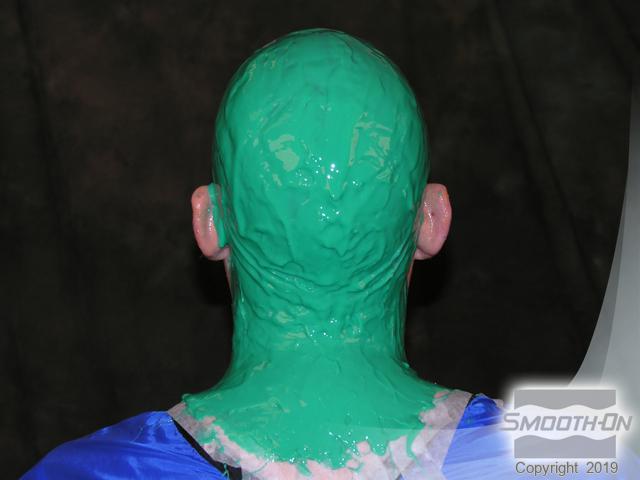
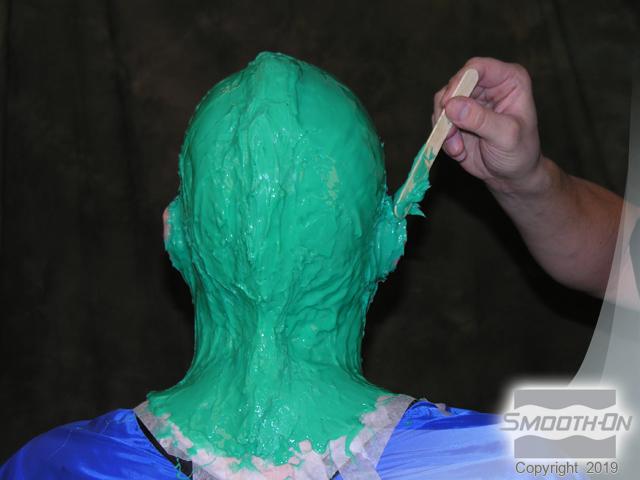
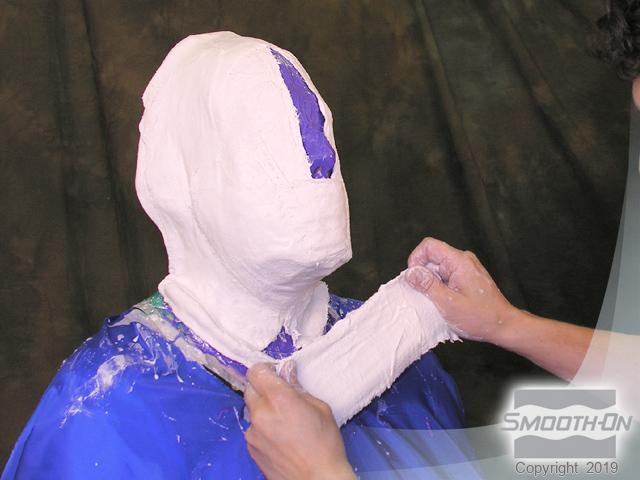
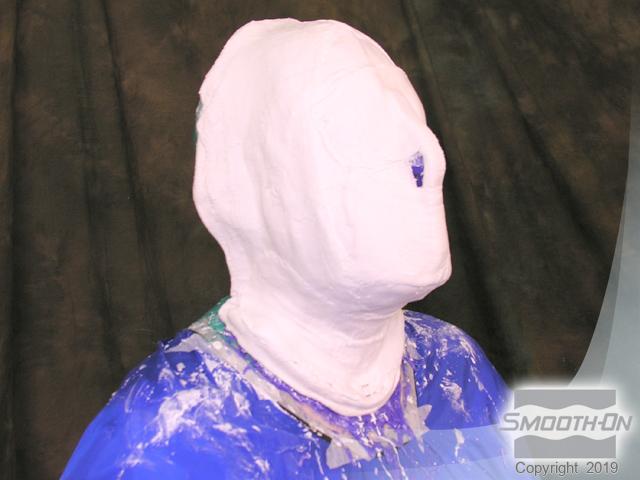
Remove the cap from the Body Double® FAST SET cartridge and attach the meter mix tube. Secure the cartridge in the dispensing gun so that it is ready for use. For easier application to the model, dispense the Body Double® into a cup first. Apply two layers of the Body Double® FAST SET to the back of the model's head in order to reach an adequate thickness. Mix a batch of Body Double® FAST SET that has been thickened with Thi-Vex® II and apply. Be sure to build a cut seam down the back of the mold while you work; this will not only provide an easy place to split the finished mold, but will also lock into the support shell.

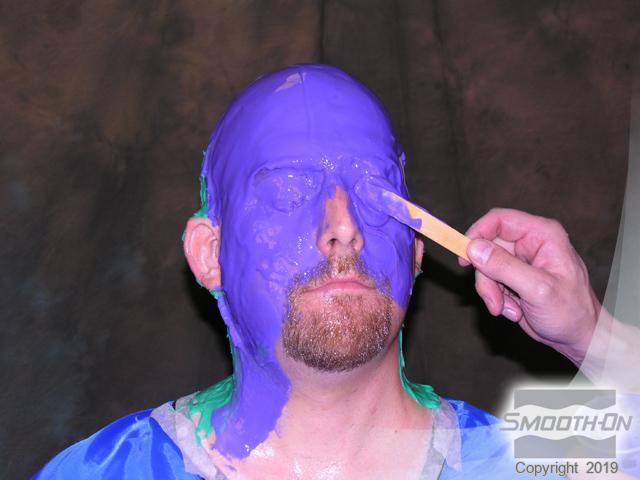
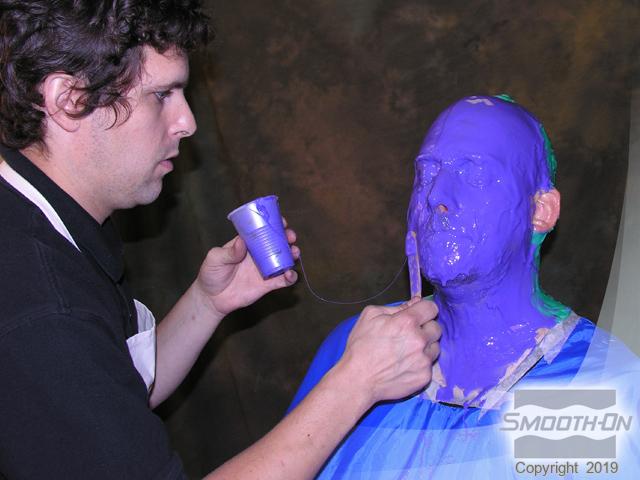
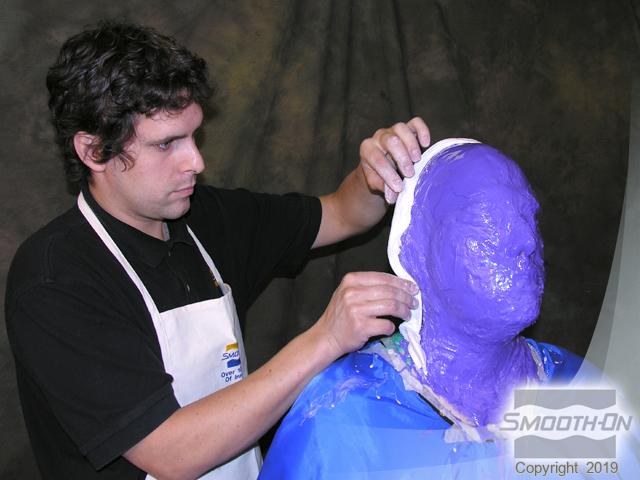
Step 3: Applying Body Double Standard Set
Mix a batch of Body Double® STANDARD SET with Silicone Thinner® added to loosen-up the consistency of the silicone rubber and apply to the model's face. This thinner will ensure that the material picks up even the most minute of detail on the skin. Apply the second layer of Body Double® STANDARD SET directly onto the first layer after the first layer develops a tacky surface.
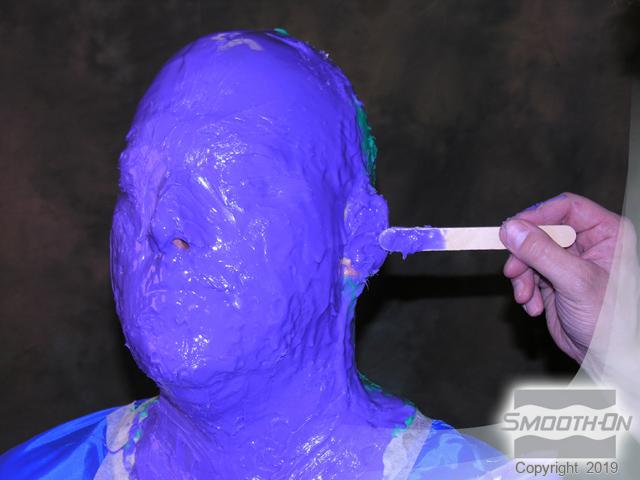
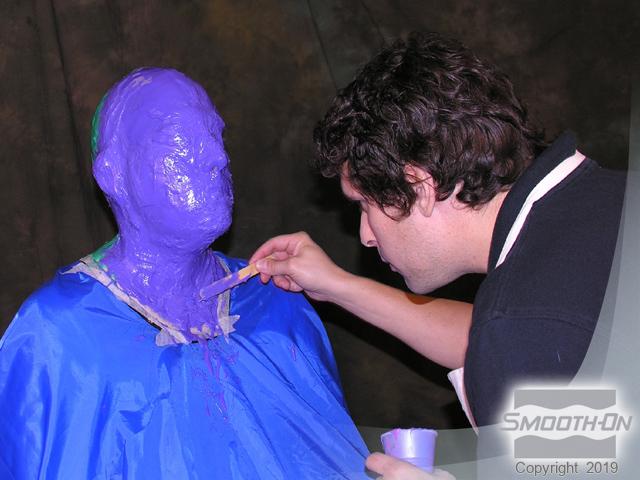
Mix another batch of Body Double® STANDARD SET thickened with Thi-Vex® II and apply. Thickened material is used to build undercuts (under the chin/eyebrows), fill in gaps (ears), and to quickly build thickness of the mold. Continue applying Body Double® STANDARD SET thickened with Thi-Vex® II to fill in gaps and increase mold thickness.
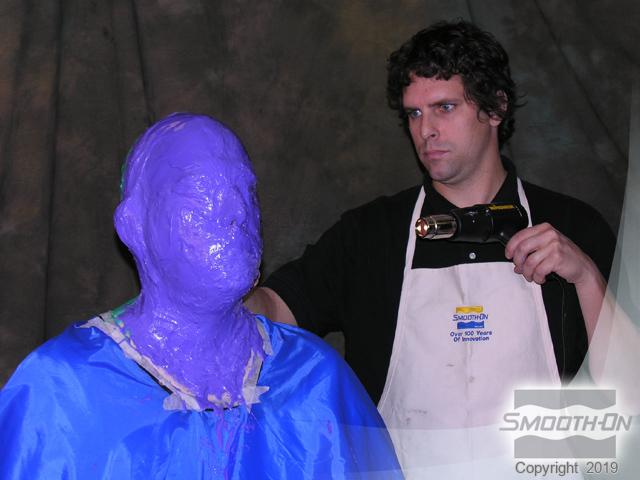
To speed up the process,use a heat gun to decrease the cure time of Body Double®. Be sure the heat gun does not get too hot and make the model uncomfortable. Once the Body Double® has fully cured, apply a plaster bandage support shell.
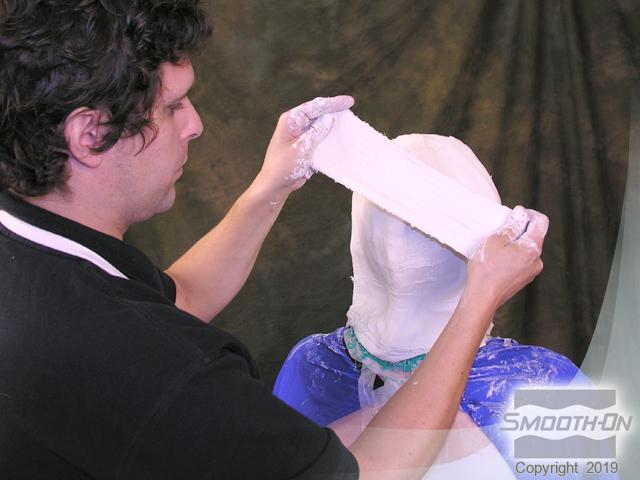
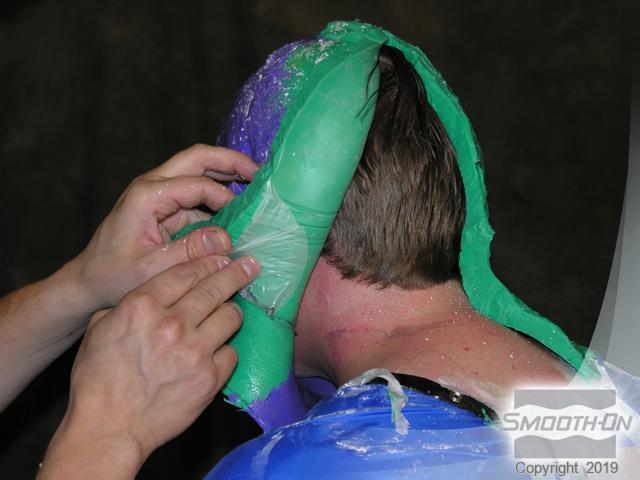
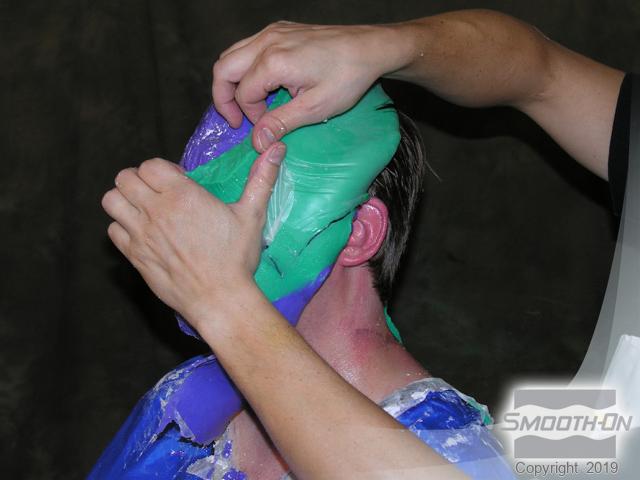
Step 4: Preparing and Applying Plaster Bandages
Use pre-cut plaster bandages for the support shell which will be built in two halves. The first step is to create a parting line along the high point of the model's head. When applying the plaster bandages, be sure to NOT cover the breathing holes for the model. (In this application, the model is breathing through his nose.)
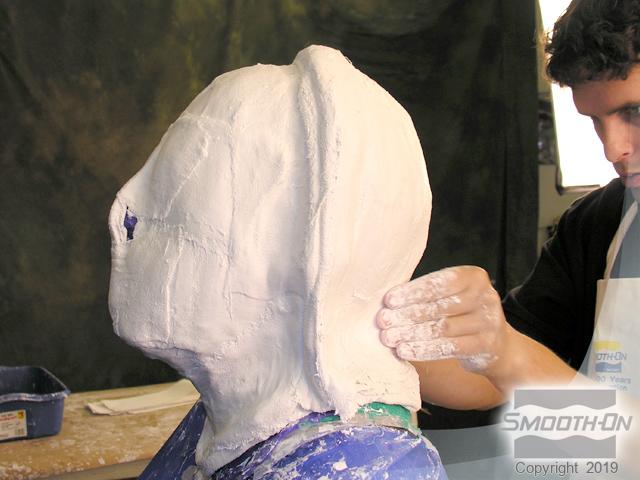
Prior to applying the second half of the support shell, apply a layer of petroleum jelly to the seam line to serve as a parting agent between the two halves. Build up more plaster bandages on the back of the mold.
After the plaster bandages have been completely applied, it is necessary to let the bandages cure solid. This will usually take about 7 - 10 minutes. Once the bandages are fully cured, the support shell can be removed.

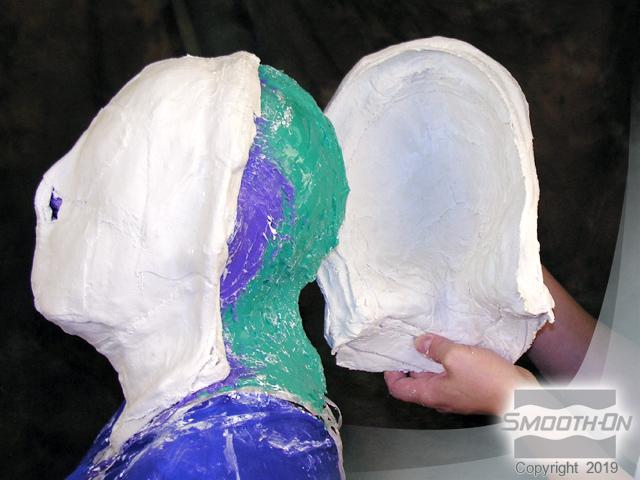
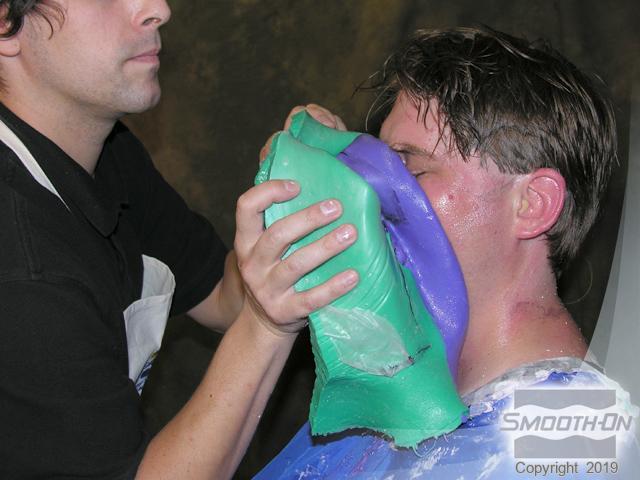
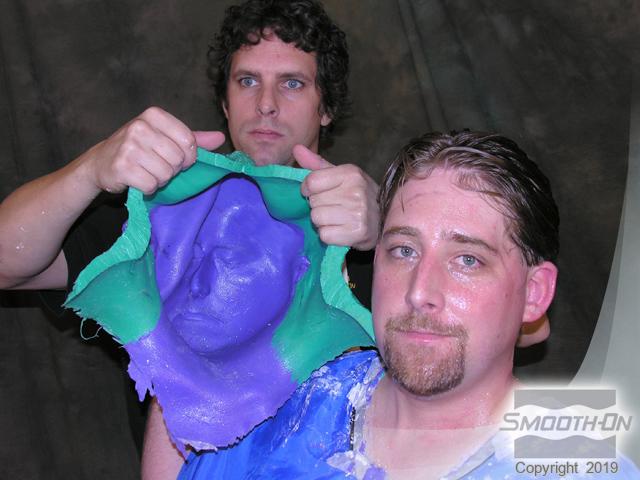
Step 5: Demolding
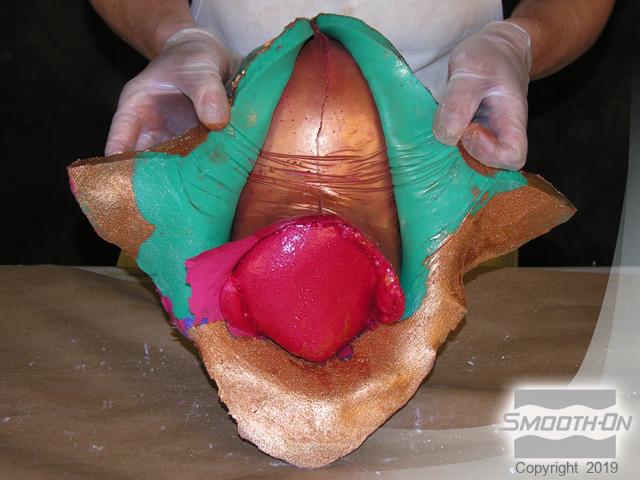
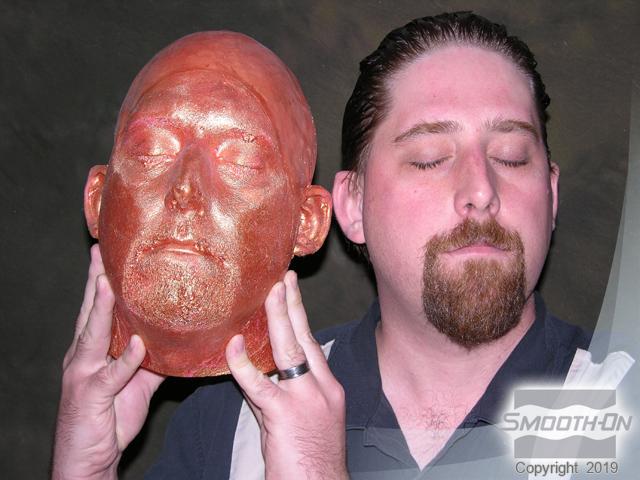
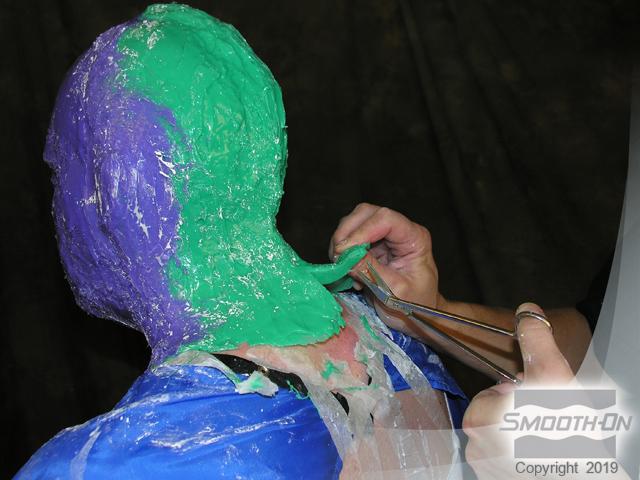
Use the thickened cut seam as a guide for carefully splitting the mold. Once the seam has been cut, peel the Body Double® mold away from the model's head. Carefully peel the mold away from the ears. Slowly pull the Body Double® mold away from the face. This should be done with care so as to not pull out any of the model's facial hair. The finished mold has picked up perfect detail from the model's head!
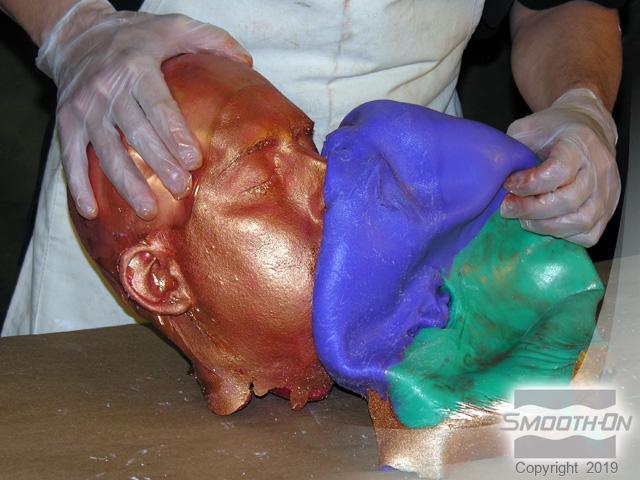
Step 6: Preparing Mold and Dispensing Smooth-Cast 320
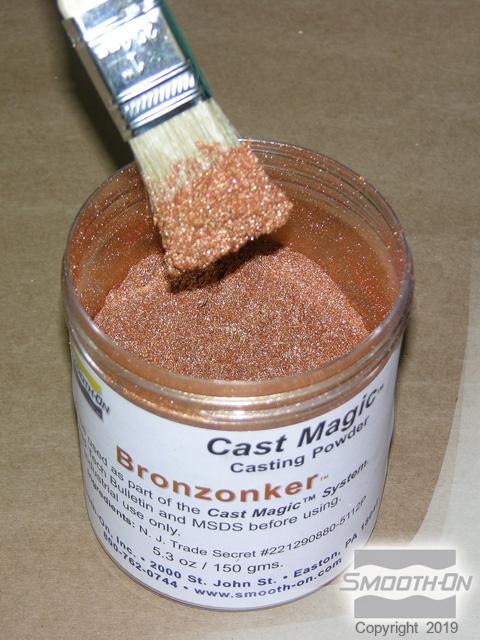
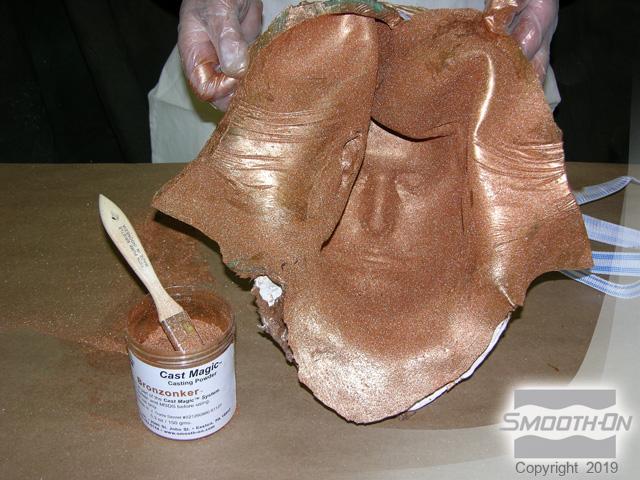
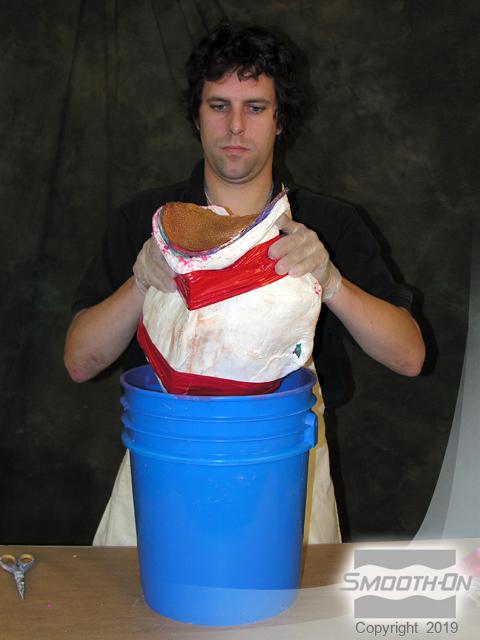
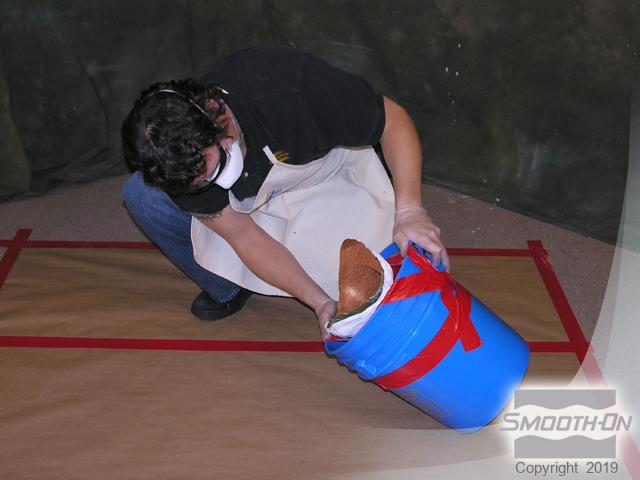
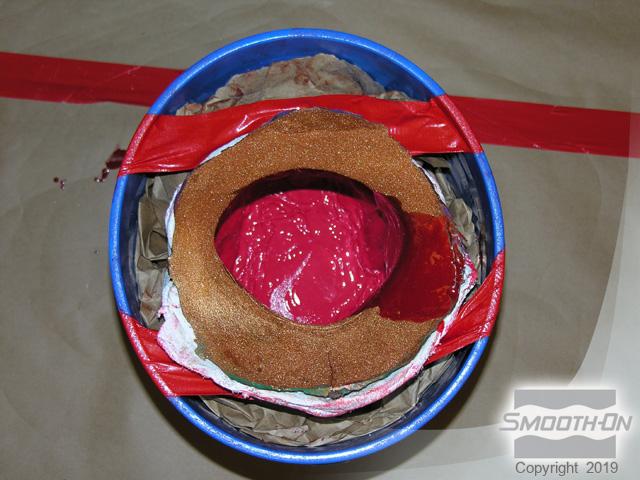
Ready for casting: For added effect, brush Cast Magic® Bronzonker powder onto the surface of the mold and into the mold cavity. Be sure to cover all areas, including deep-set spaces like the ears and nose. Remove excess Cast Magic® to prevent imperfections in the finished casting. Then, seat the Body Double® in the support shell. Tape the shell securely together and then tape it into a bucket. This will help keep the mold level and will make handling easier.
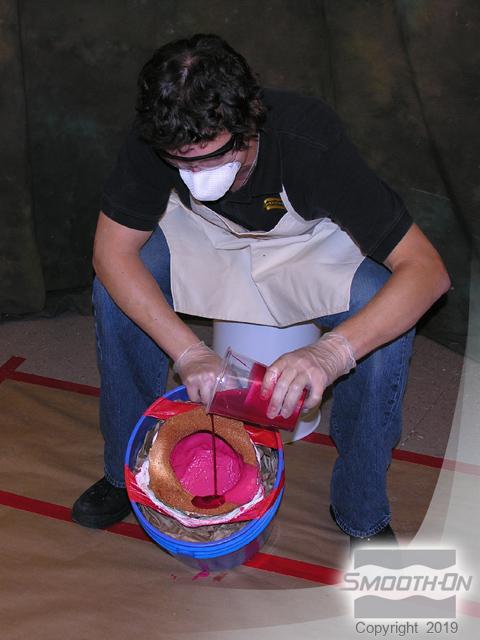
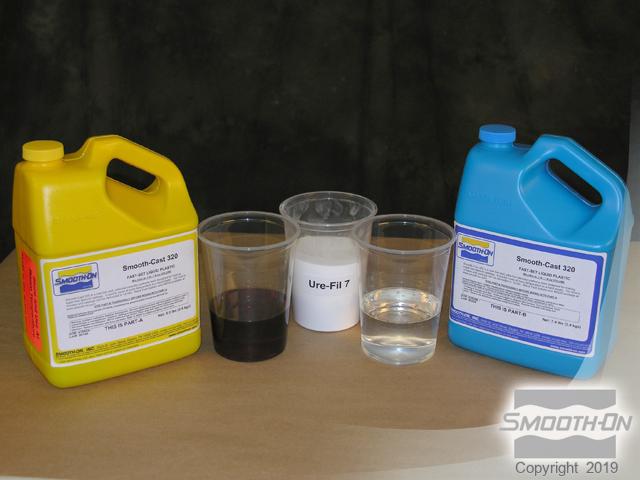
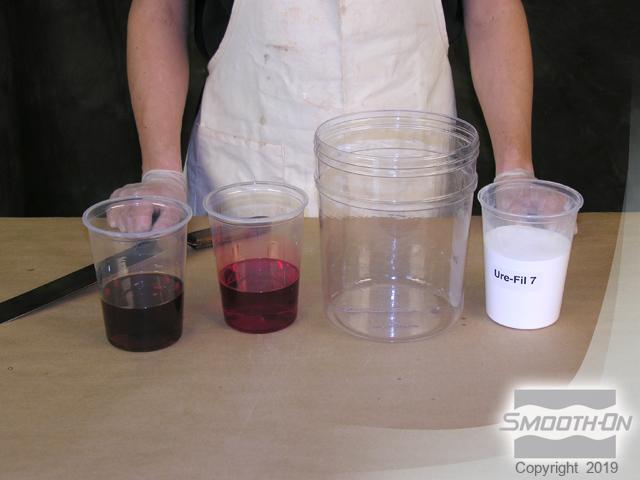
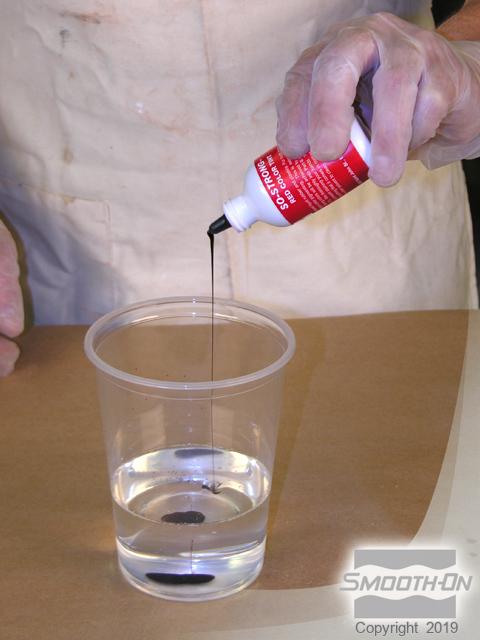
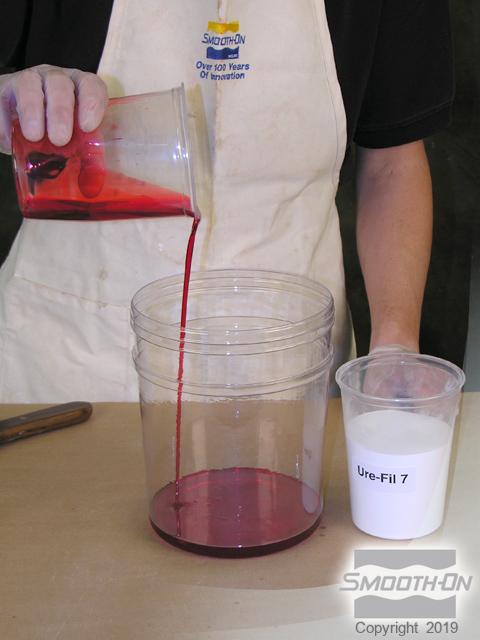
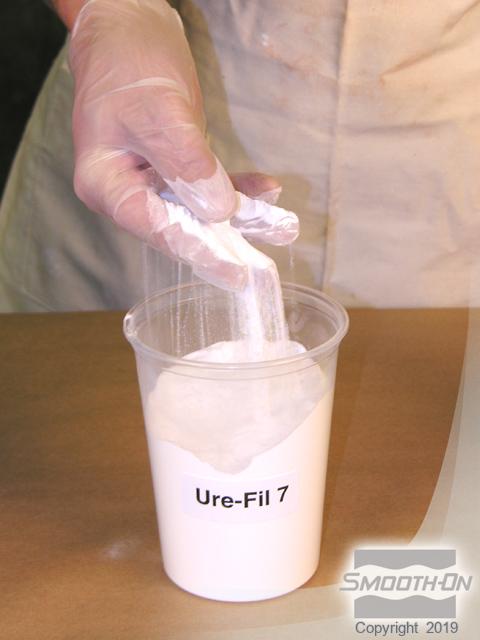
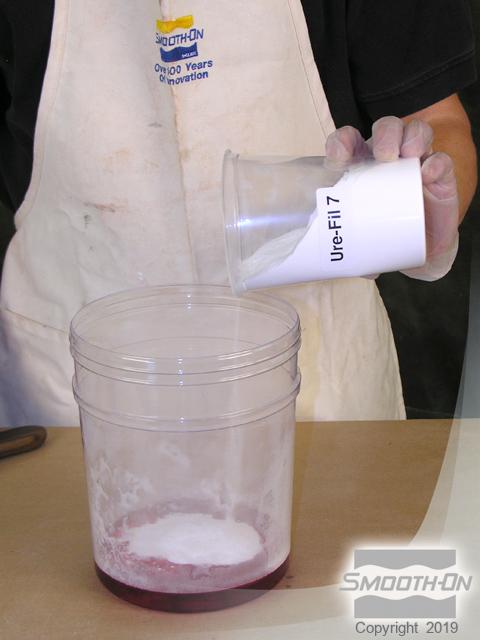
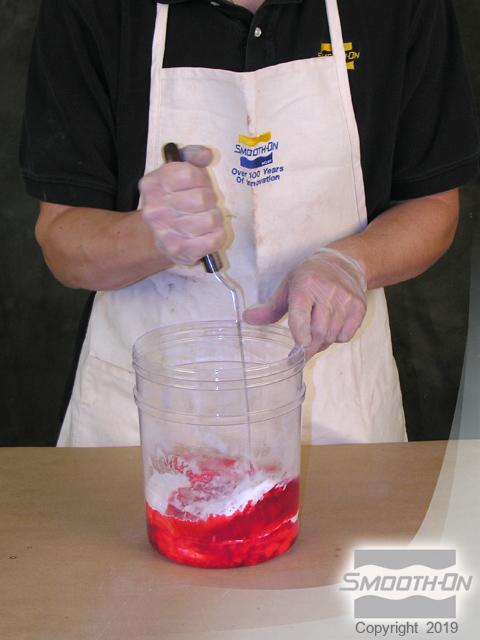
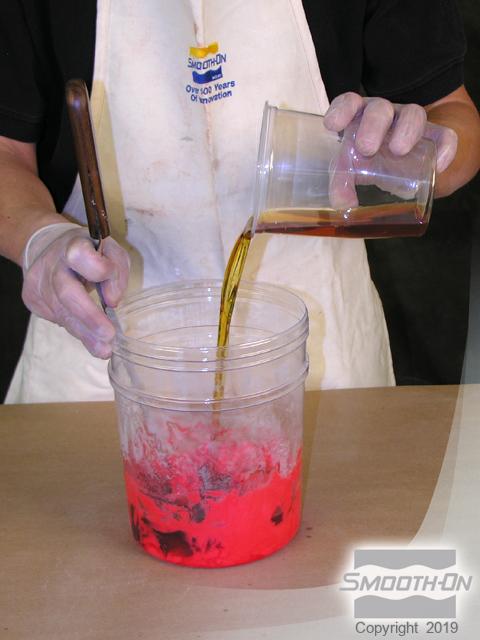
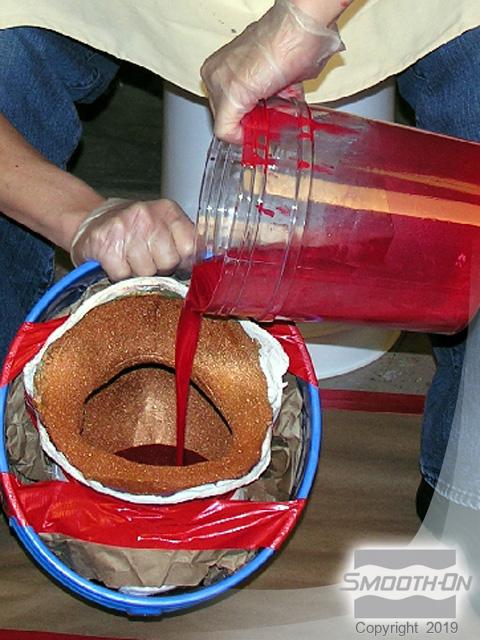
Casting: Mix Smooth-Cast® 320 with Ure-fil® 7 and cast rotationally into the mold. The mix ratio is 1 Part A to 1 Part B to 2 Parts Ure-fil® by volume. For added effect, start by adding some red SO-Strong® tint to Part B of the resin. Start by pouring Part B into a mixing container. Ure-fil® is a fine powder that will make the resin more dimensionally stable and slightly thicker, perfect for rotational casting. Add filler to Part B. Mix Ure-Fil® with Smooth-Cast® 320 Part B thoroughly prior to adding Part A. Then, add Part A to the mix.
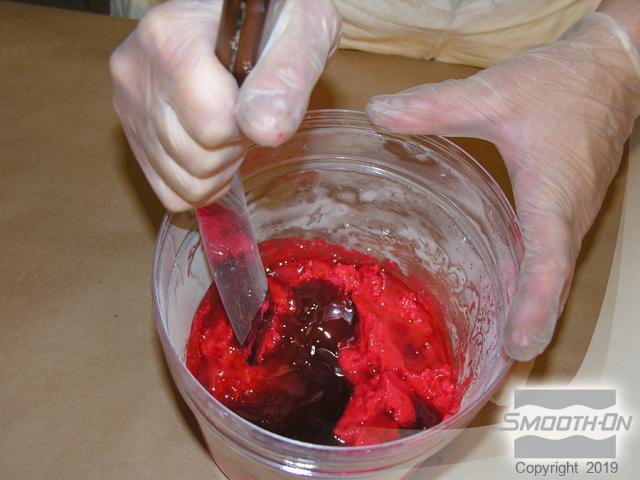
Continue mixing all components until there are no color striations in the material, making sure to scrape the sides and bottom of the mixing container.
Step 7: Casting With Smooth-Cast 320
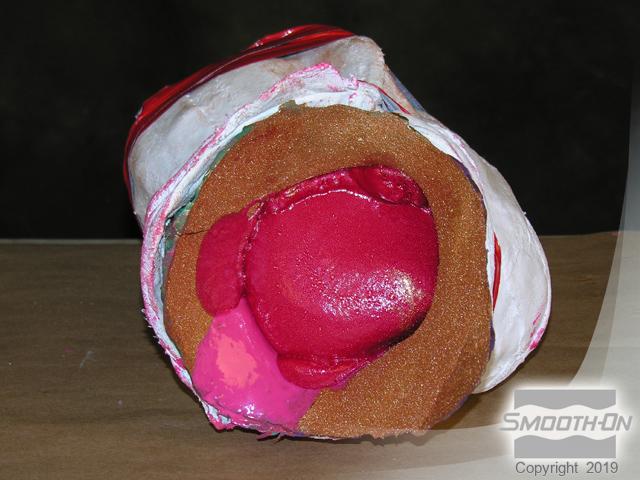
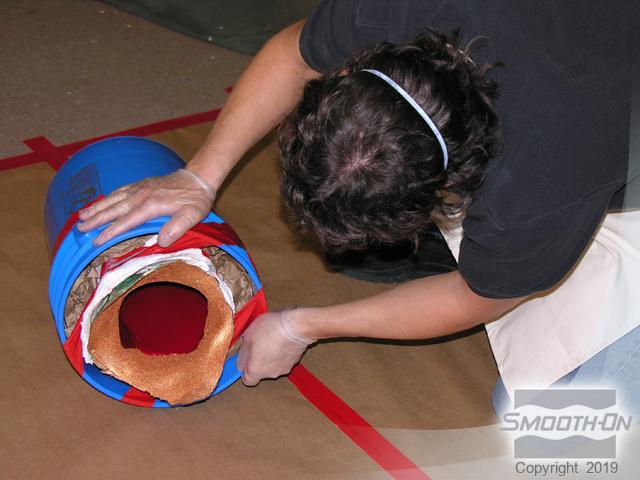
Pour the resin mixture into the mold. Rotate and roll the mold to move the resin around the surface. Turn the mold on its side and allow the resin to flow to all surfaces of the mold. Be careful not to spill the resin. Continue rotating the mold until the resin sets. The mold is left with with a hollow shell of resin which can then be backfilled with a lightweight foam.
Step 8: Casting Foam-iT 5 and Demold
Tint, mix, and pour Smooth-On's Foam-iT!® 5 expanding urethane foam into the mold cavity. Foam-iT!® 5 will serve as a strong, lightweight backer, saving material costs while maintaining good structural integrity. Once the resin and foam have fully cured, the casting can be demolded.
Body Double® can be peeled away from the casting and is strong and flexible enough to be turned inside out. This versatility makes Body Double® an ideal lifecasting material. Finished casting reflects perfect detail from the original model captured by the Body Double® silicone. Many different castings can be produced with a single Body Double® mold with endless possibilities for finishes.