How To Rotocast Resin for Lightweight Displays
Overview
Jacob Johnston of Little Rock, AR, was contracted to supply 250 bust replicas of President Bill Clinton for the opening of the Clinton Presidential Library in Little Rock, AR in November 2004. The castings had to be lightweight and be able to be handled and dropped without breaking and Mr. Johnston was convinced that rotational casting these pieces was the way to go. His original prototypes were rotationally cast by hand in plaster, and even though hollow, the customer rejected plaster as being too heavy and fragile. But hand rotationally casting plaster for production of 250 pieces would also take a long time and this project most definitely had a deadline. There had to be a better way.
After contacting the Smooth-On technical help line, he narrowed his options down to two materials: Task® 15 and Smooth-Cast® 65D. Not needing the high performance properties (and cost) of TASK® 15, he decided to try Smooth-Cast® 65D. Mr. Johnston rented a rotational casting machine for producing the castings. What remained was creating the final sculpture and mold.
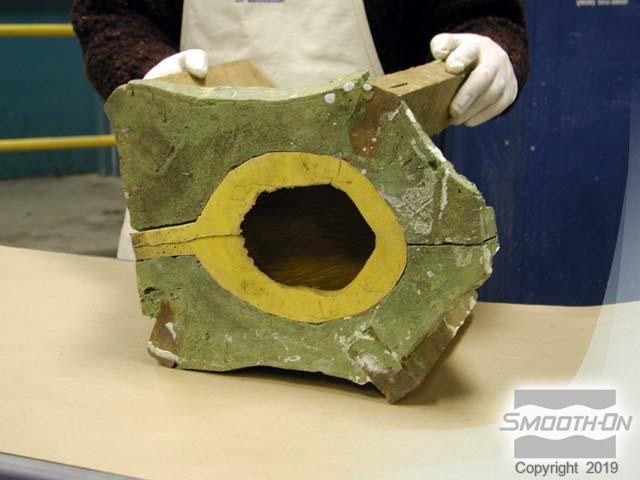
The original model was sculpted in clay and Brush-On® 40 mold rubber was used to make the rubber mold. Plasti-Paste® support shell material was used to make the mother mold with 2 x 4 pieces of wood being imbedded to make level supports.
With the rotational casting machine set up and ready to go, Mr. Johnston determined the optimal amount of Smooth-Cast® 65D resin to be used in the mold to generate a uniform hollow casting surface.
Smooth-Cast® 65D performed flawlessly, yielding hollow castings that looked as though they were cast solid but weighed just under 2 lbs. (0.9 kgs) each. All 250 castings were then back filled with Foam-iT® 5 rigid foam to provide lightweight support and additional impact resistance. Each pieces was then painted and delivered in time for the opening of the library.
Mr. Johnston calculates that he saved thousands of dollars in material and labor costs by rotationally casting these pieces.
Materials Used in this Tutorial
- Brush -On 40
- Ease Release 200
- Baby Powder
- Mold Straps
- Plasti-Paste
- Smooth-Cast 65D
- Rotational Casting Machine
- Foam-iT 5
- Mixing Containers
- Mixing Sticks
Step 1: Preparing Mold For Casting
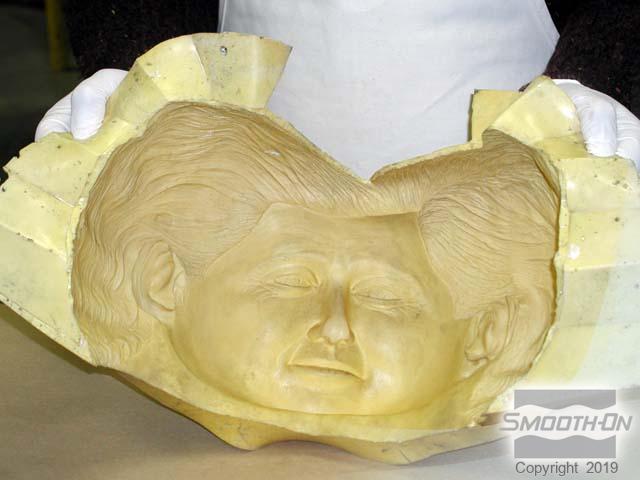
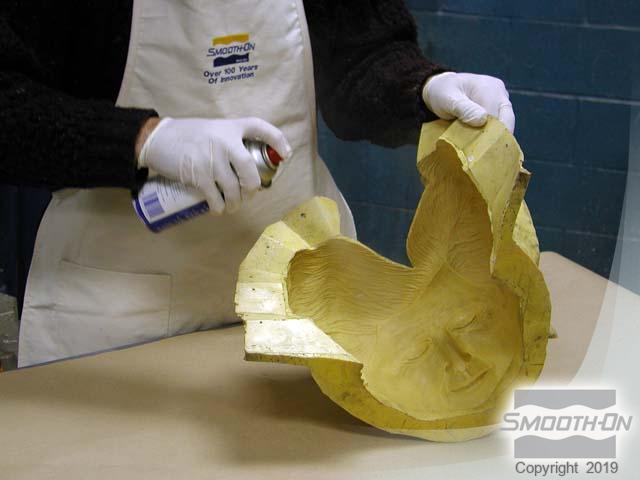
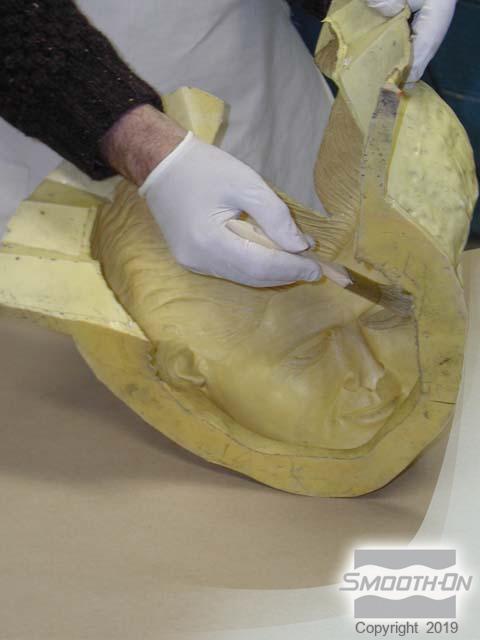
This mold is created using Brush-On 40 mold rubber to capture the detail from the original sculpted clay model. The rubber captured perfect detail that will be reflected in the finished castings. Then ease Release® 200 is applied to the mold.
Mold Maker's Tip: Brushing a thin coat of baby powder into the mold leaves the castings with a dry, matte finish - ready to be primed and painted.
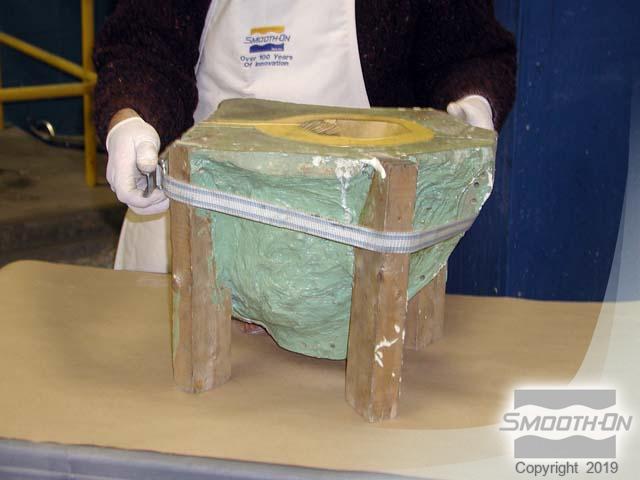
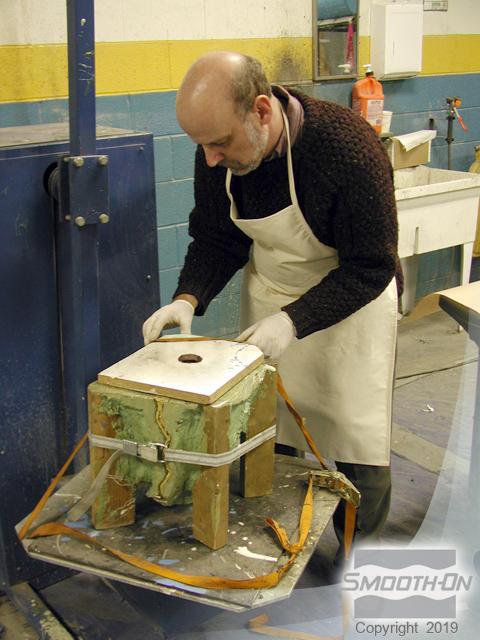
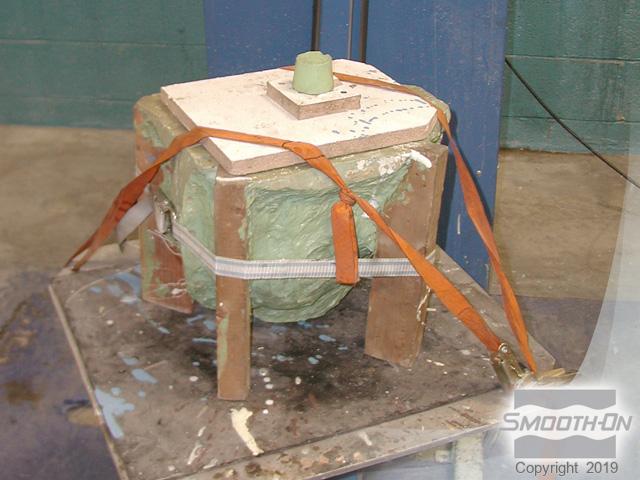
The seam on the rubber mold is aligned, and the rubber mold is seated into the one half of the Plasti-Paste® support shell. The other half of the support shell is put in place and mold straps are used to secure the rubber mold inside the support shell.
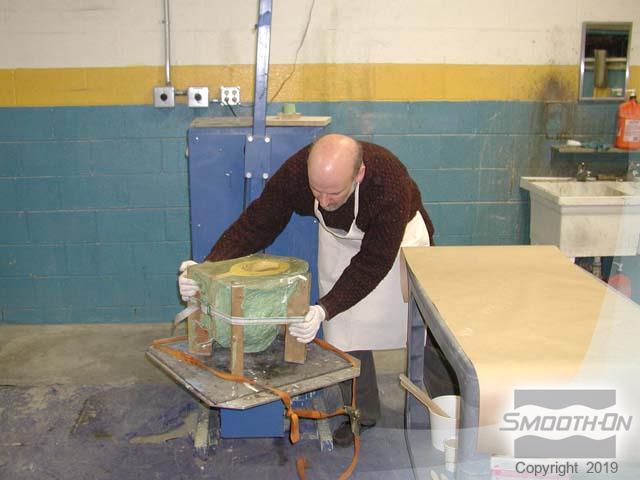
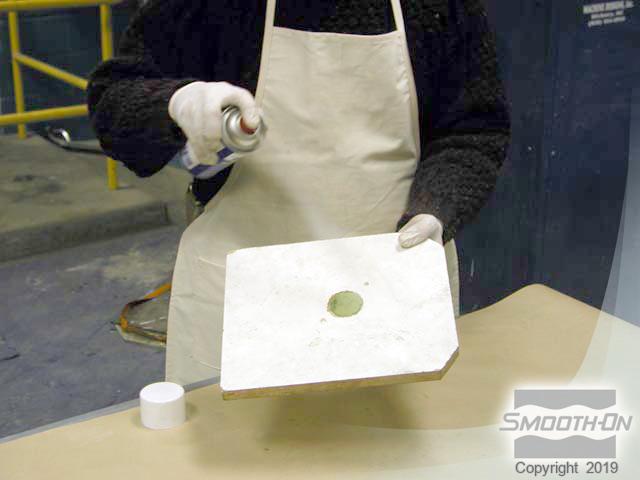
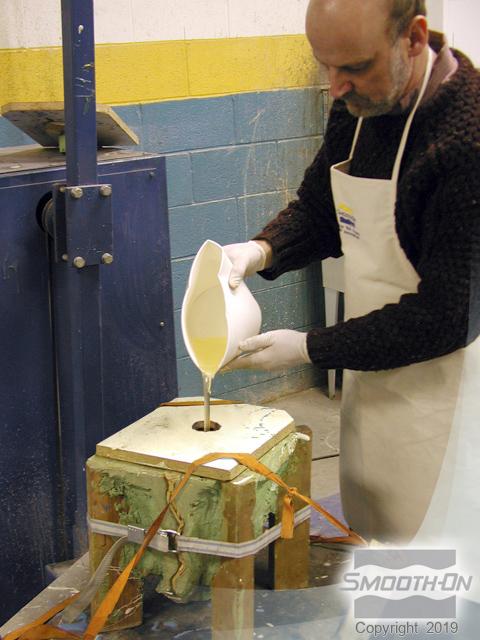
The mold is then placed on the base of a rotational casting machine. A release agent is applied to the 'capping' board that will contain the resin in the mold as it is being rotationally cast. The cap board is placed over the mold opening, and the mold is secured to the base with adjusted straps.

Step 2: Roto-Casting Smooth-Cast 65D
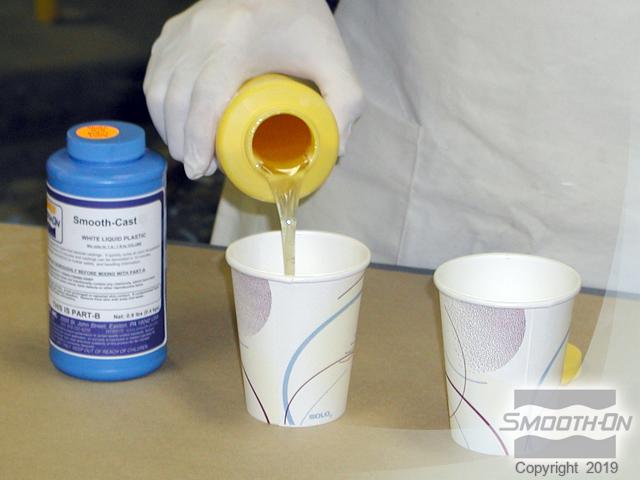
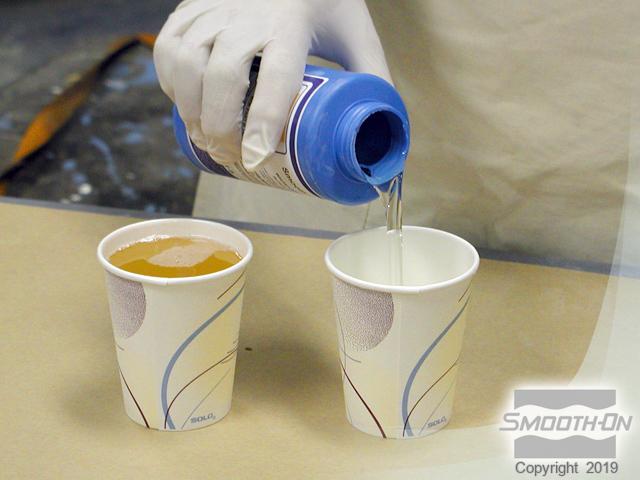
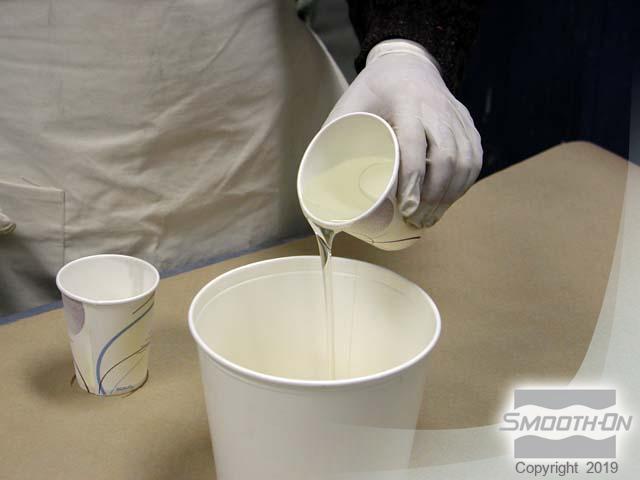
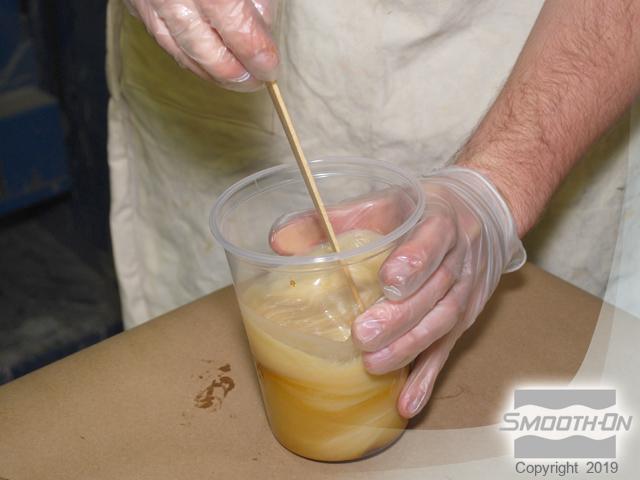
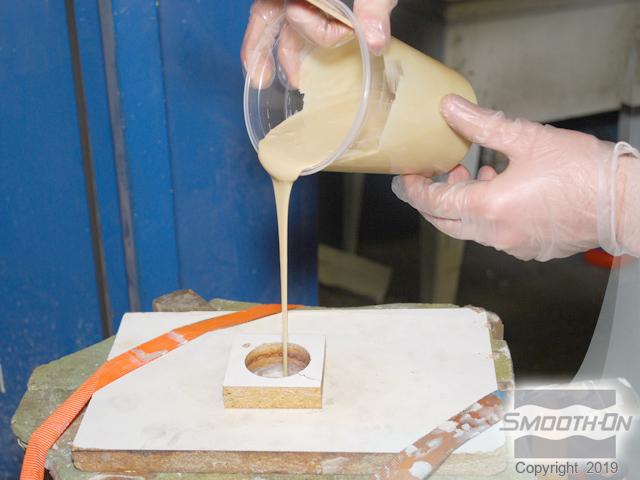
Part A and B of Smooth-Cast® 65D are dispensed and combined in a mixing container. Both parts are then thoroughly mixed for 30 seconds. The mixture is poured into the mold through the opening in the cap board. A silicone plug is used to seal the hole in the cap board.
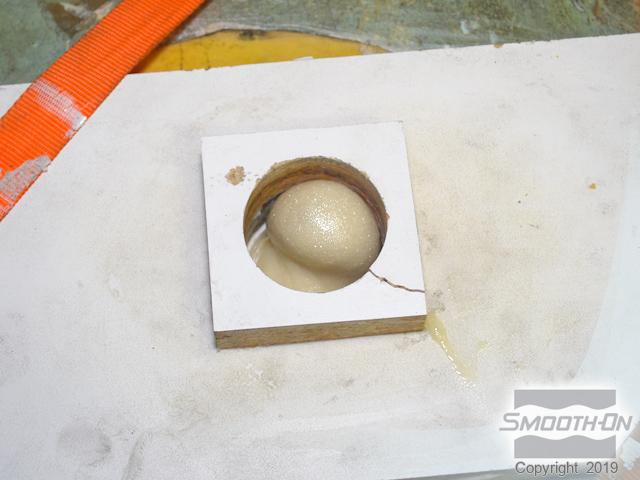
The rotational casting machine is turned on and the large arm rotates one way, while the base rotates the other way. This 360° rotation ensures that the liquid plastic is being uniformly distributed to all parts of the mold surface. After about 10 minutes the machine is stopped and the silicone plug is removed and a punching tool is used to punch a small hole in the partially cured casting.


Step 3: Casting Foam-iT 5
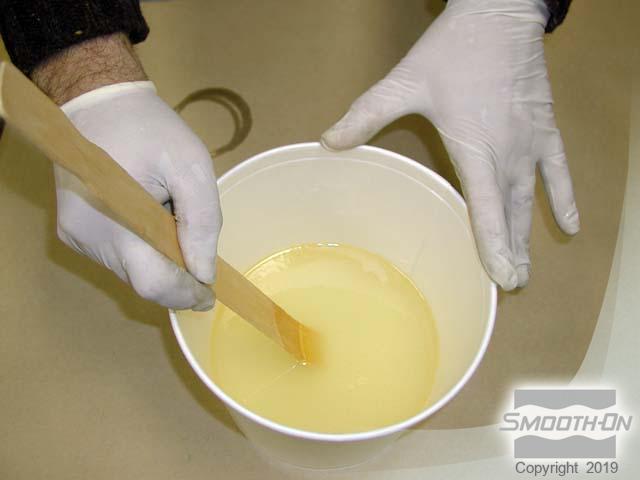
Now, Foam-iT!® 5 Parts A and B are measured and mixed. The expanding foam will be used to fill the hollow casting, keeping it lightweight and maintaining its strength. The Foam-iT!® 5 mixture is poured through the small hole in the casting. In a few minutes the Foam-iT!® 5 rises to entirely fill the hollow casting. Residual foam exits the top of the casting.
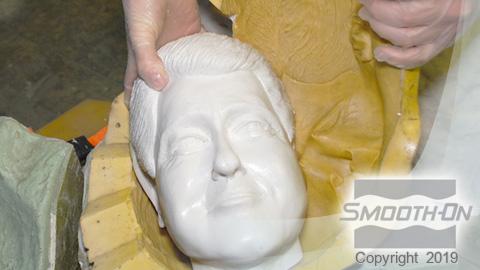
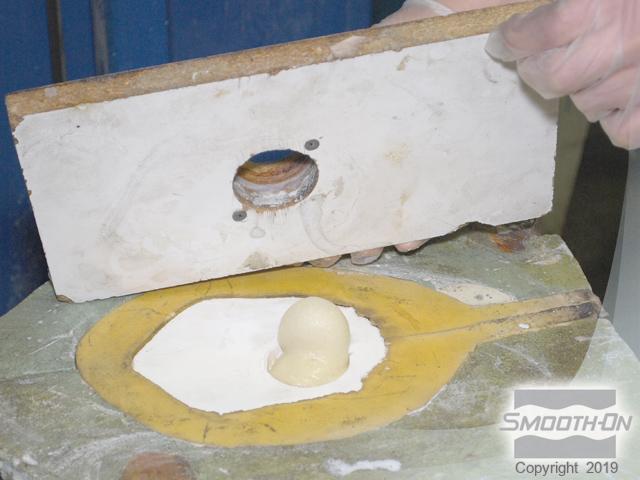
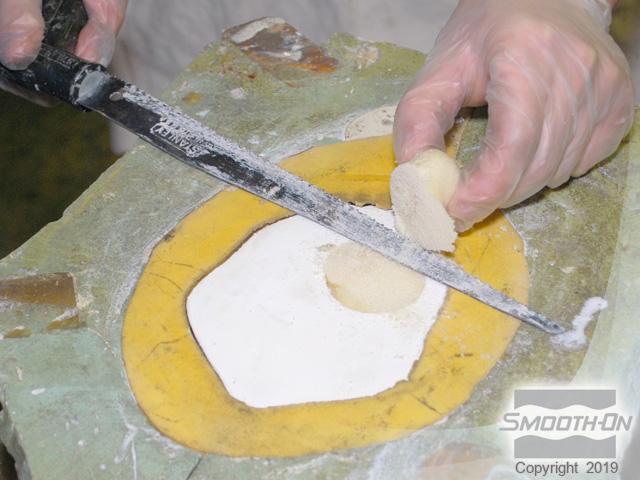
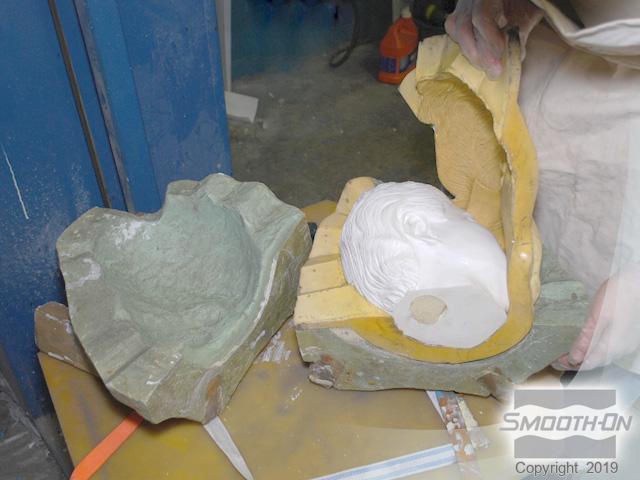
The cap board is removed exposing the residual foam. A saw is used to remove the residual foam. The mold and support shell are disassembled and the cured casting is removed.
Step 4: Demold & Finsihing Piece
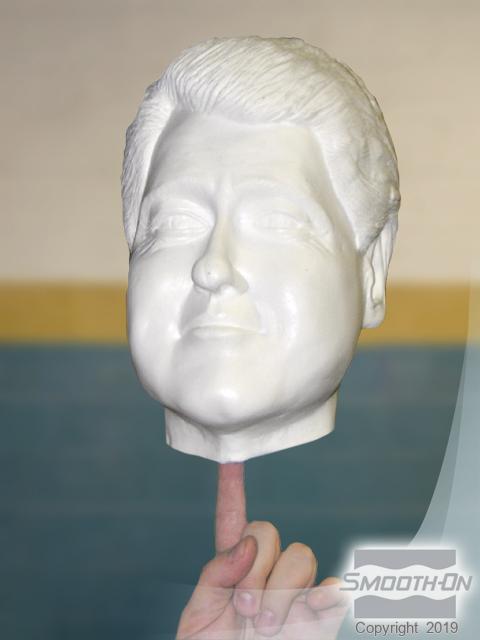
The cured casting reflects perfect detail and looks solid. If this piece was cast solid, it would have weighed 15 lbs./ 6.8 kgs. and cost over $100 in material cost alone.
The casting is ready to be primed and painted for display. The combination of Smooth-Cast® 65D and Foam-iT!® 5 ensures that these castings are almost indestructible. Each foam filled rotational casting weighs about 2 lbs./ .9 kg. and costs under $10. So light, you can balance a casting on one finger!