How To Caste a Prop Engine Block Using FlexFoam® iT! 17
Overview
FlexFoam-iT!® 17 is a 17 lb./cubic ft. (270 kg./m3) flexible urethane foam that is ideal for a variety of art and industrial applications. Like the popular FlexFoam-iT® 25, the 17 is “self skinning”, meaning that the cured foam forms continuous high density skin. With the right amount of back pressure applied during casting, the surface finish of the cured foam approaches that of a urethane elastomer.
The mix ratio is a convenient 1A:2B by volume. Pot life is 60 seconds and handling time is about 30 minutes at room temperature. Cured foam is strong, bendable and tear resistant.
The foam is easily colored with SO-Strong® color tints or Ignite® fluorescent pigments and is compatible with Smooth-On’s Cast Magic System for creating a variety of finish effects. The foam can also be painted with flexible paints.
Applications for FlexFoam-iT!® 17 include making lightweight, durable props and display pieces, special effects and arts/crafts.
Urban Fox Studios was contracted to make flexible foam motorcycle engine display props for a themed restaurant environment. Required; finished props needed to look exactly like a motorcycle engine. The display pieces would be “child” high and therefore needed to be soft for safety and durable to resist wear and tear.
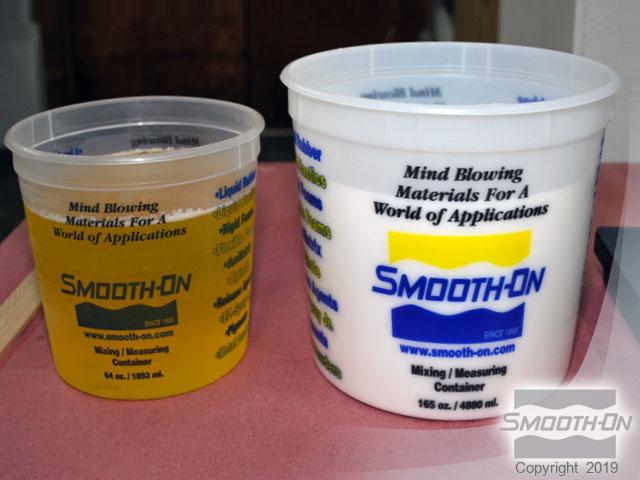
Materials Used in this Tutorial
- Flex Foam-iT! 17
- Mold Max 25
- Cast Magic
- Sonite Wax
- So-Strong Pigment
- Sharp Knife
- Mixing Containers
- Mixing Sticks
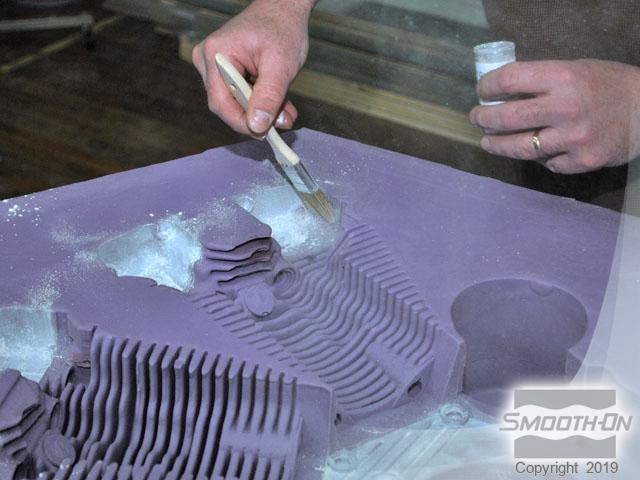
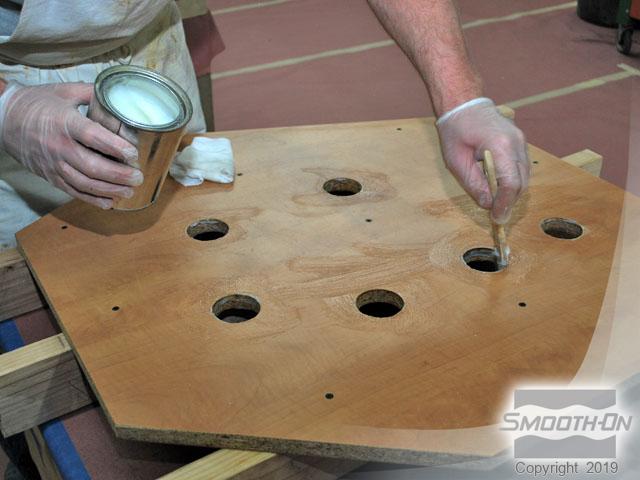
Step 1: Preparing Mold
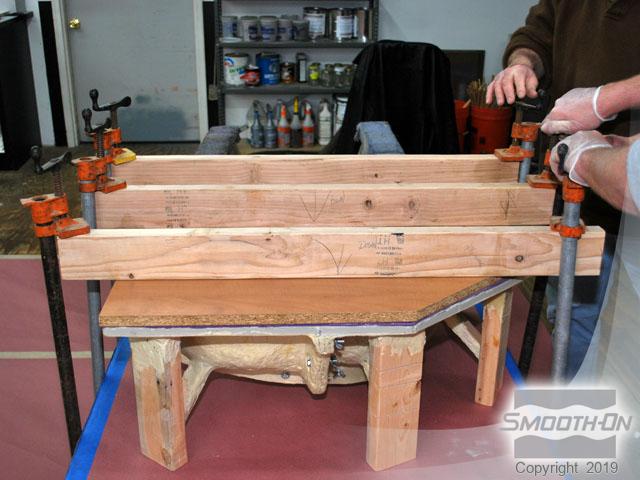
First, cast Magic® Silver Bullet® powder is applied to appropriate places in the Mold Max® 25 silicone mold. Sonite® Wax is then applied to a properly vented backer board.
Step 2: Measuring, Mixing & Casting FlexFoam-it! 17
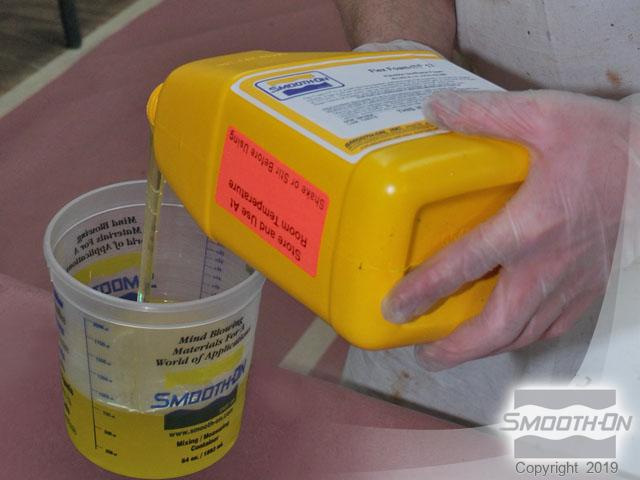
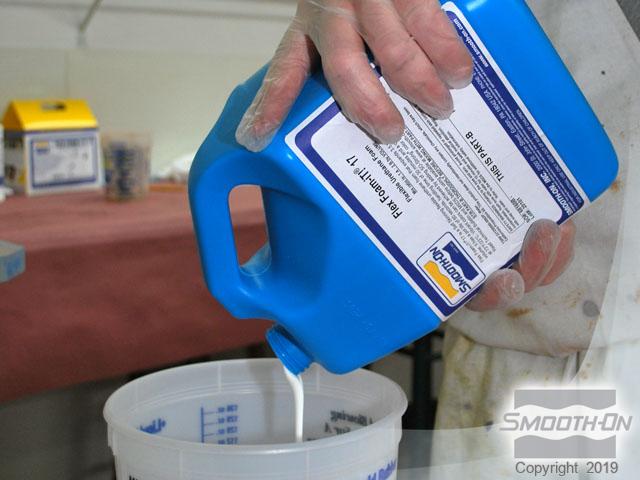
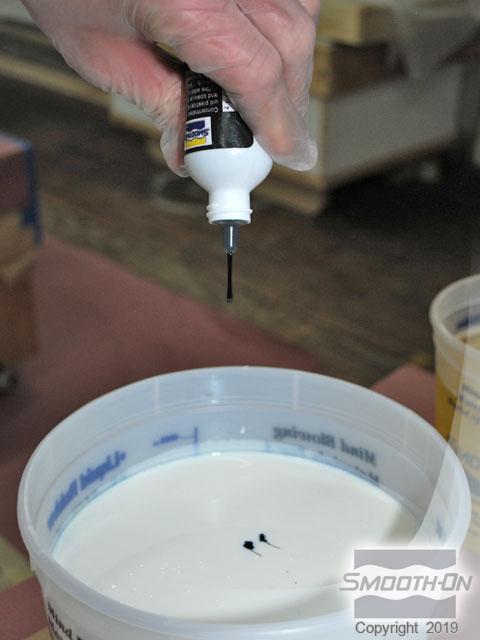
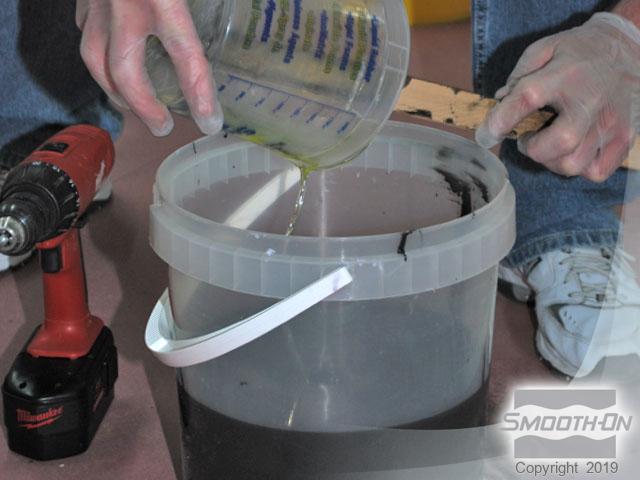
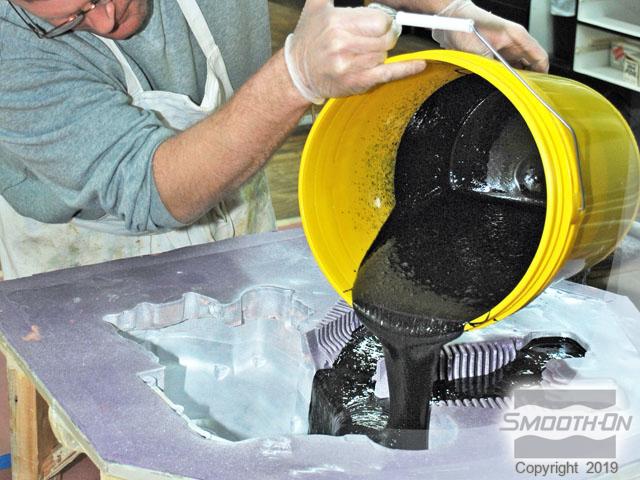
FlexFoam-iT!® 17 Part A is measured out. Then, FlexFoam-iT!® 17 Part B is measured out. The mix ratio of FlexFoam-iT!® 17 is 1A:2B by volume. A few drops of So-Strong® black pigment is added to the Part B. The pigment is pre-mixed into the FlexFoam-iT!® 17 Part B. The FlexFoam-iT!® 17 Part B with pigment is dispensed into a mixing container. The Flex Foam-iT!® 17 Part A is added.
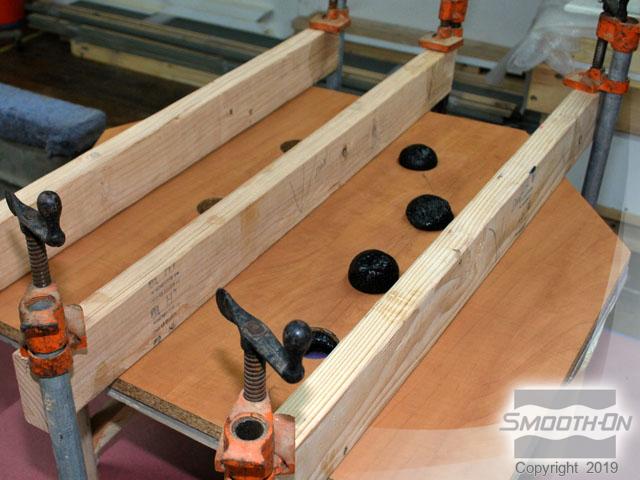
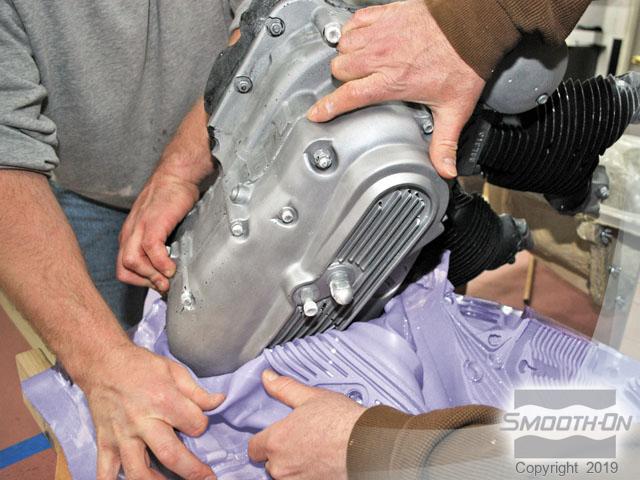
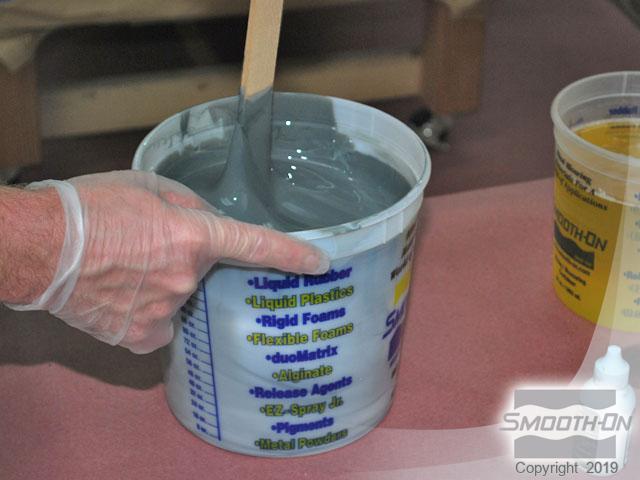
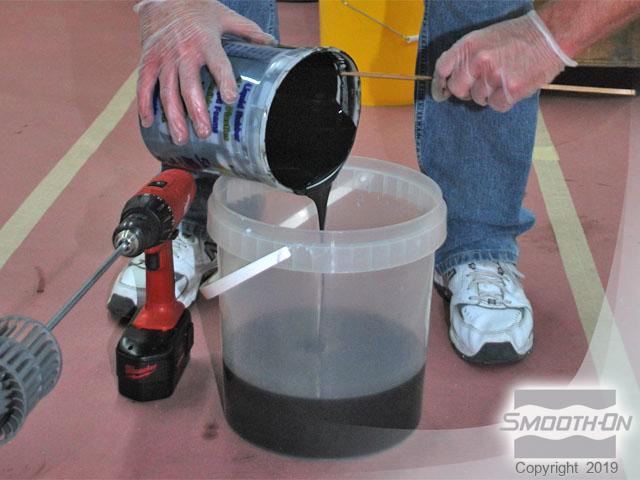
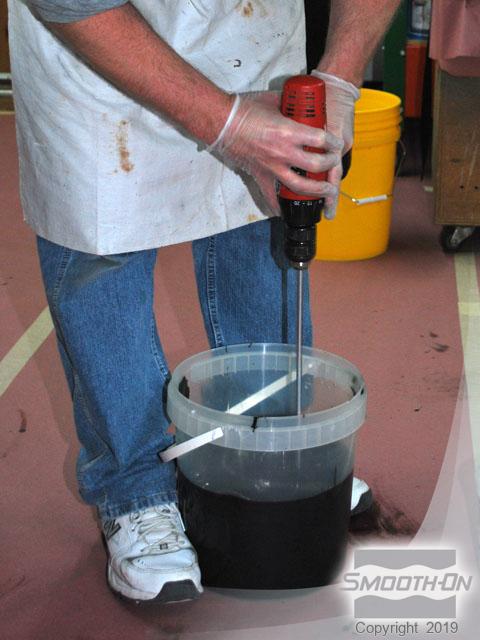
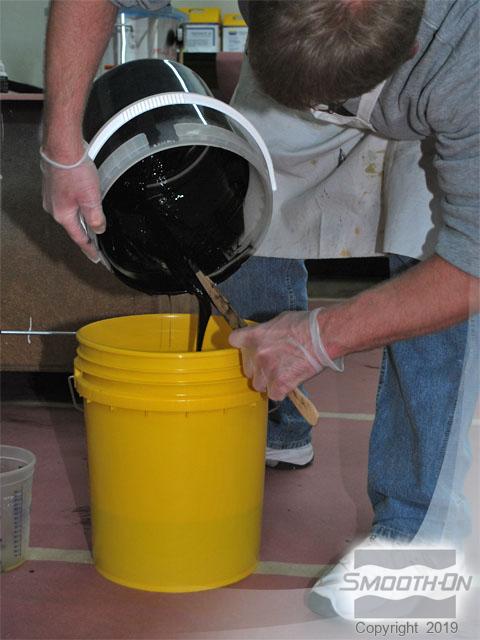
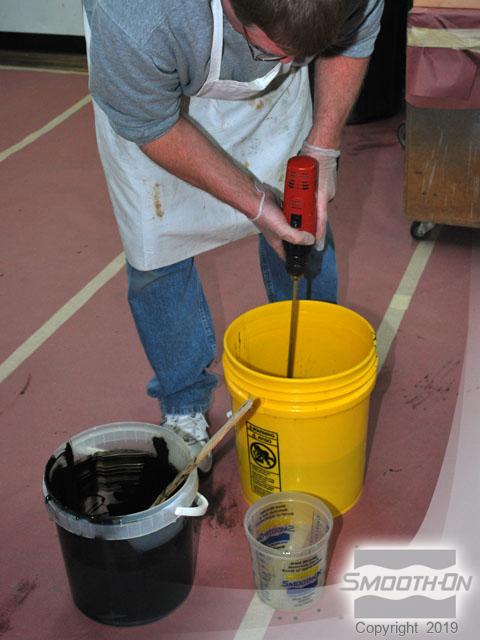
The foam is mixed using an electric drill equipped with a turbine mixer. Then, the mixed foam is dispensed into a new, clean mixing bucket. The foam is mixed again to ensure a thorough blend of Parts A and B. The FlexFoam-iT!® 17 mixture is then poured into the silicone mold. The backer board is held in place using clamps. Back pressure from the board will improve the foam surface detail. After a few minutes, the foam rises through the holes in the backer board.
Step 3: Demold / Finished Piece
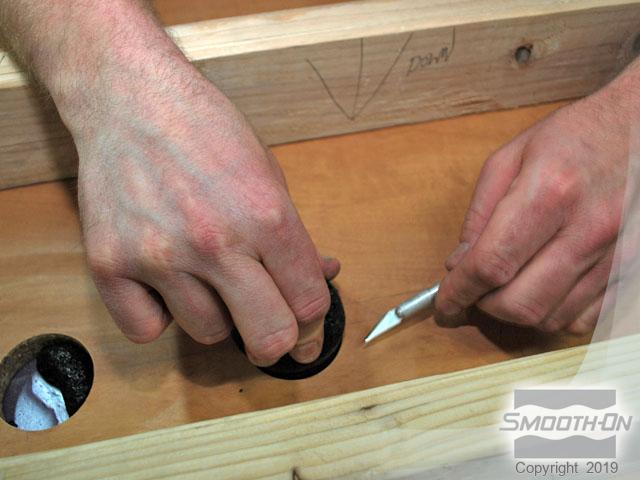
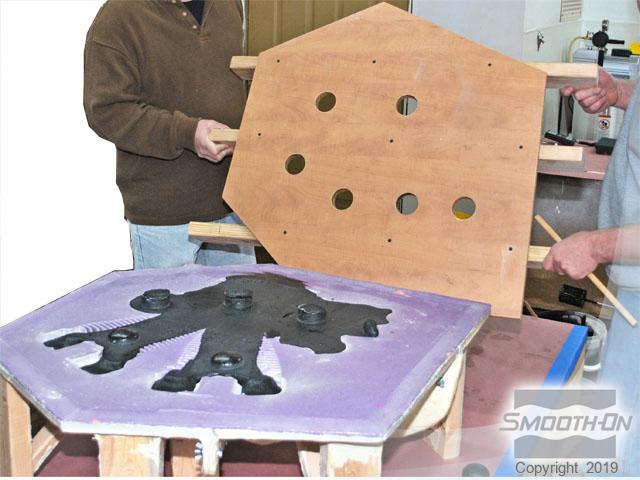
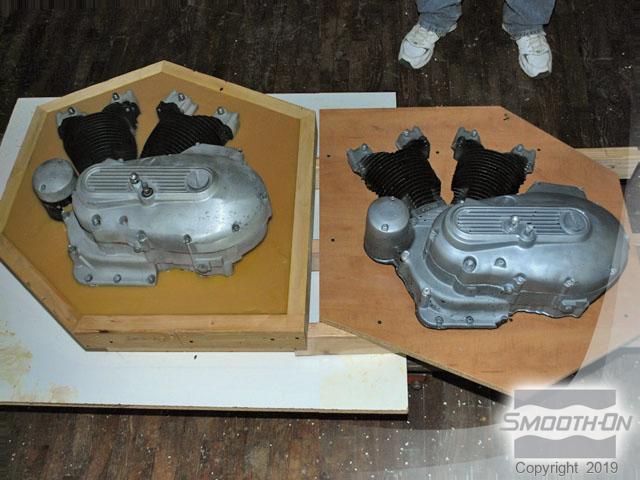
Flex Foam-iT! 17 cures in 2 hours, at which time the expanded foam plugs are cut off using a sharp knife. The Sonite® Wax sealed backer board removes easily from the foam casting. The Mold Max® 25 silicone mold is peeled way from the cured foam piece.
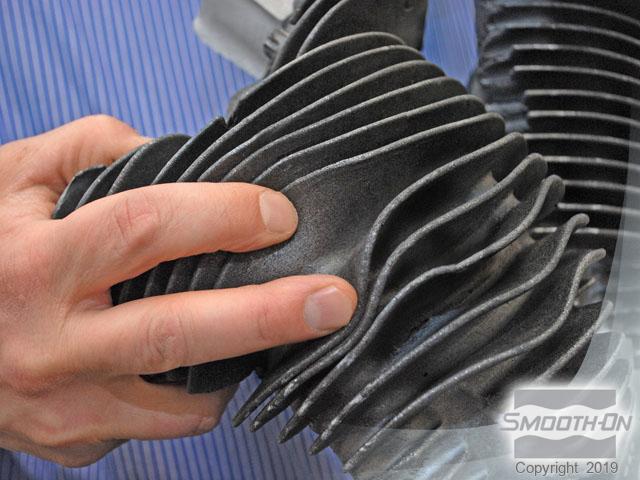
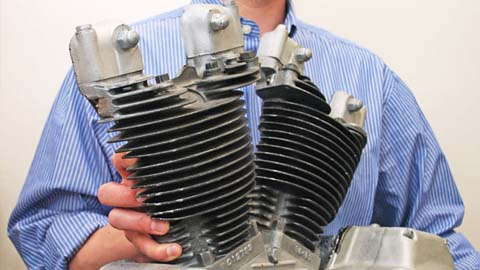
The Flex Foam-iT!® 17 casting (on right) and original engine (on left) are nearly identical in appearance. The Flex Foam-iT!® 17 casting is lightweight and has excellent surface detail. The flexibility and toughness of Flex Foam-iT!® 17 helps reduce wear and tear on the replica engine.