How To Make a 2 Part Silicone Mold Using Mold Max™ 25
Overview
Mold Max® 25 is the newest member of Smooth-On's popular Mold Max® line of high performance tin-cure silicone rubbers. Mold Max 25 is mixed 100A:5B by weight and cures overnight to a Shore 25A.
Whats Different About Mold Max® 25?
Compared to the other Mold Max® products, Mold Max® 25 has a lower viscosity Part A, making the rubber easier to mix and easier to vacuum de-gas.
The working time for the Mold Max® 25 is an extra-long 60 minutes for large mold pours or multiple mold pour projects.
Because it is a Mold Max® silicone, molds made with the new 25A have high tear strength and a long library life. They are suitable for casting urethane, epoxy or polyester resins, wax, gypsum and other materials.
Mold Max® 25 was used recently to make a replacement wheel for equipment that is no longer in production. In this step-by-step photo gallery, a 2-part rubber mold is made to duplicate an industrial wheel.
TASK® 14 black impact resistant plastic is poured into the Mold Max® 25mold (no release agent required) to create a high performance duplicate.
Materials Used in this Tutorial
- Mold Max 25
- Task 14
- Ease Release 200
- Non-Sulfur Oil-Based Clay
- Mixing Containers
- Mixing Sticks
- Melamine Base Board
- Mold Box
- Hot Glue
- Hot Glue Gun
- Pencil
- Sculpting Tools
- Acorn Nuts
- Vinyl Gloves
- Funnel
- Gram Scale
- Rubber Bands
- Utility Knife
- Vacuum Chamber
Step 1: Preparing Model (Constructing a Mold Box)
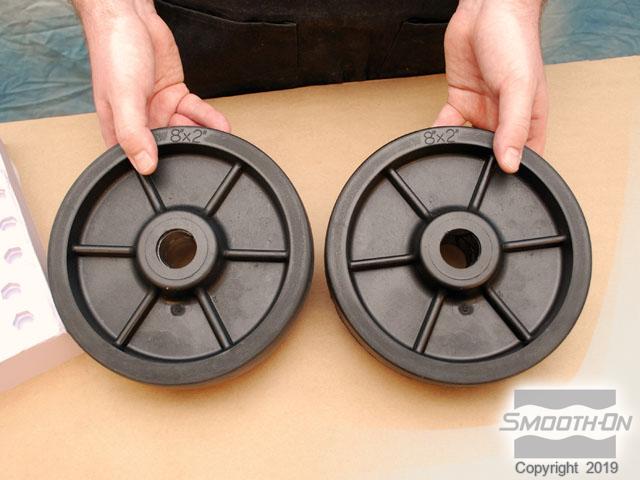
Replacement parts for equipment long out of production are difficult, if not impossible to find. In this example a damaged wheel that is supporting a well-used but still functional industrial pump needs to be replaced. A machine shop would charge over $1,000 to custom machine a replacement wheel. A cheaper, faster alternative is to make a mold of an existing undamaged wheel and then cast a replacement wheel out of a rubber or other material.
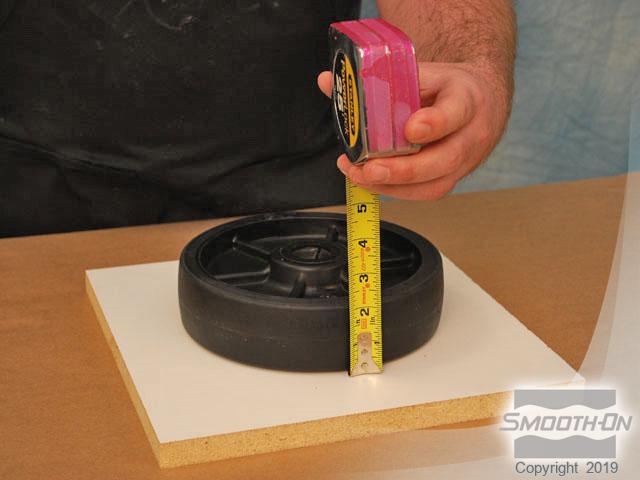
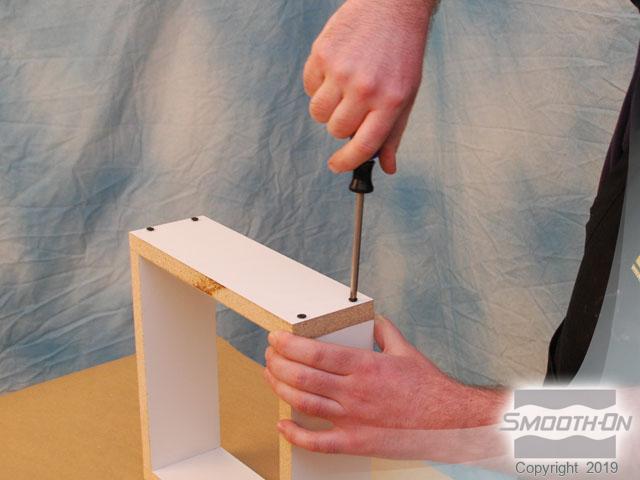
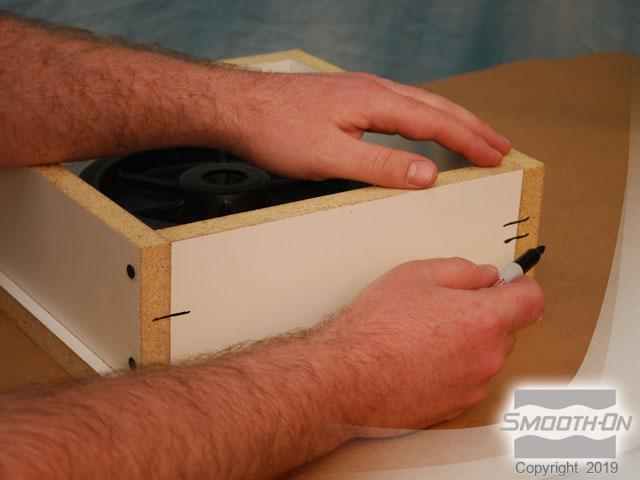
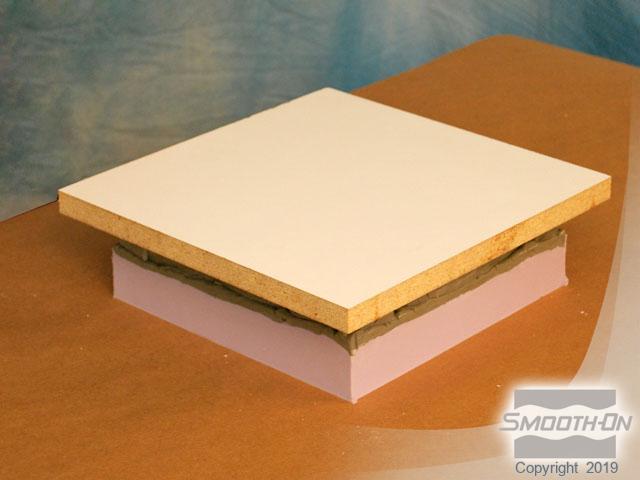
To begin, a functional wheel is removed from the cart platform and cleaned. Any slight imperfections are filled with a two-part epoxy. Then, measurements are taken to build a mold box for containing the liquid rubber. A melamine box is constructed to provide a 1'' (2.54 cm) clearance around the model. The interior of the box is traced onto a melamine base board.
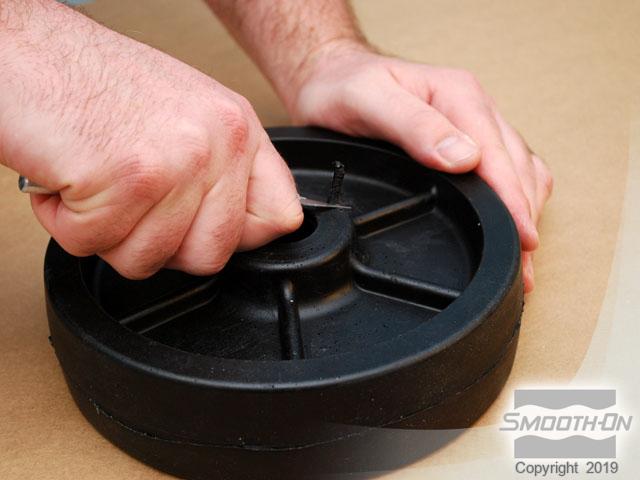
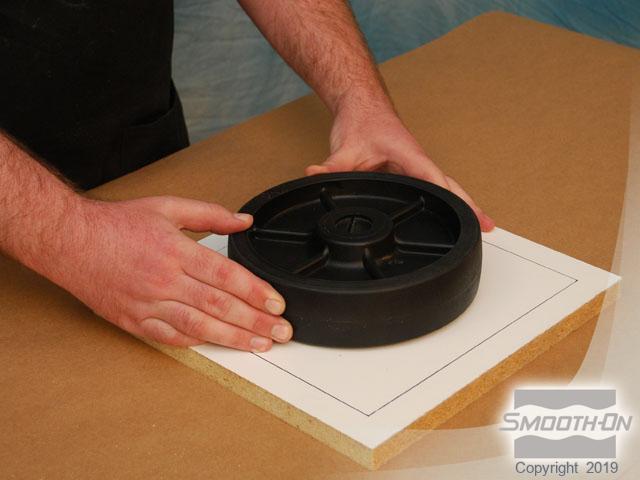
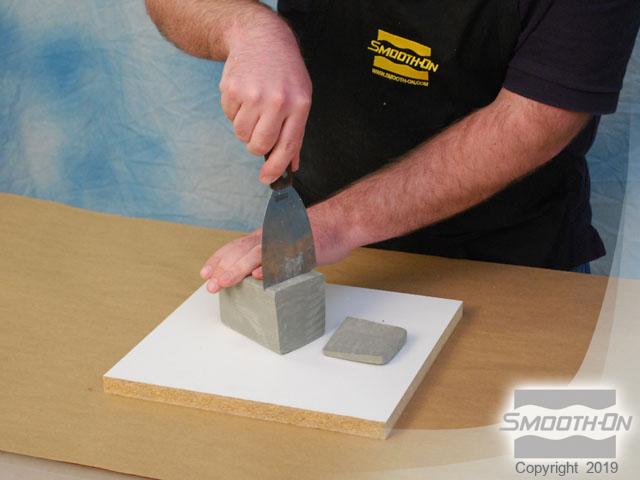
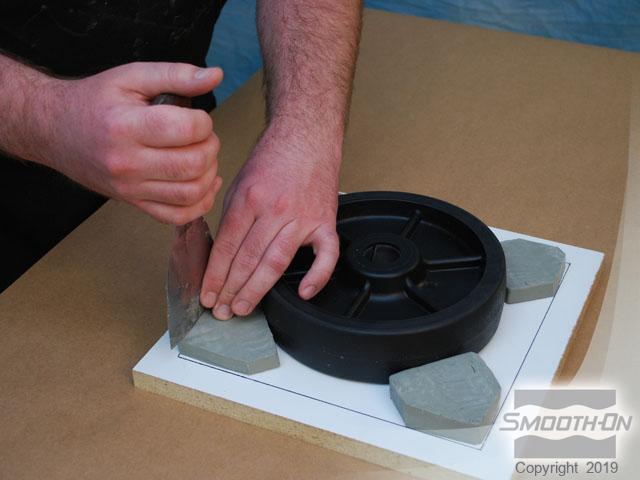
Hot glue is applied to the hub of the wheel and centered in the traced area on the base board. Non-sulfur oil-based clay is sliced to a 3/8'' (1 cm) thickness and then placed on the base board. After a suitable depth of clay is achieved, the box is placed over the model. The clay is smoothed using sculpting tools.
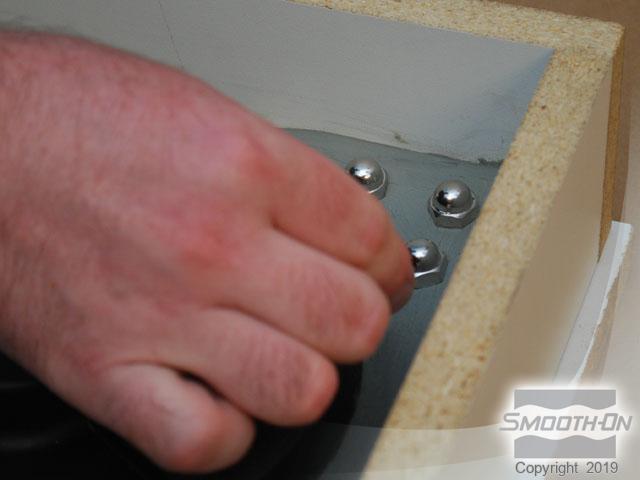
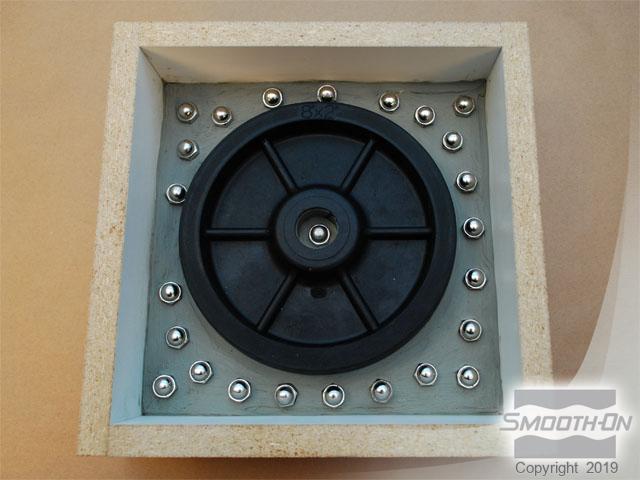
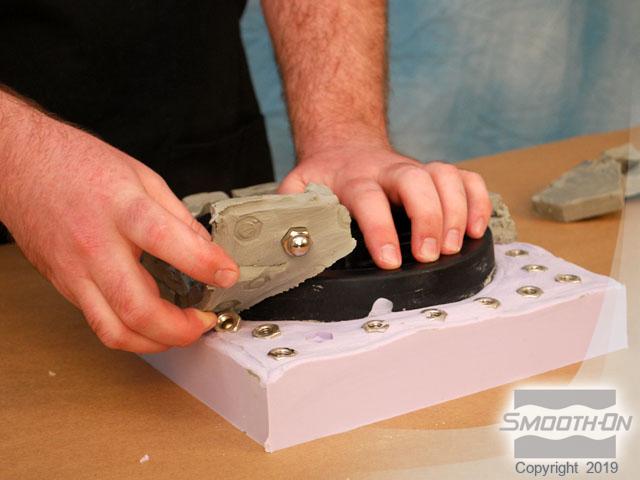
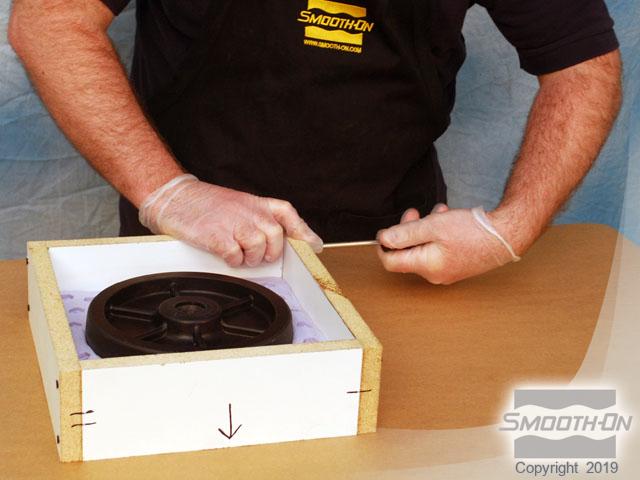
Small 'acorn nuts' are placed around the perimeter and partially imbedded in the clay to make registration keys. Purpose: the positive and negative keys will register the two halves of the finished rubber mold together for casting.
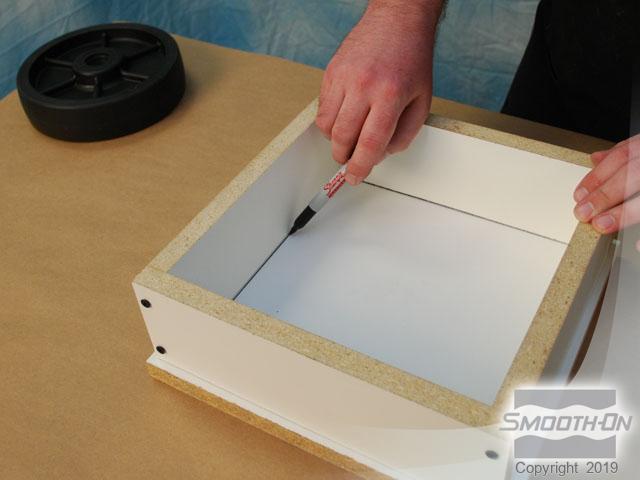
Lines are drawn on the exterior of the box to indicate proper assembly of the box walls.

Step 2: Applying Mold Max 25
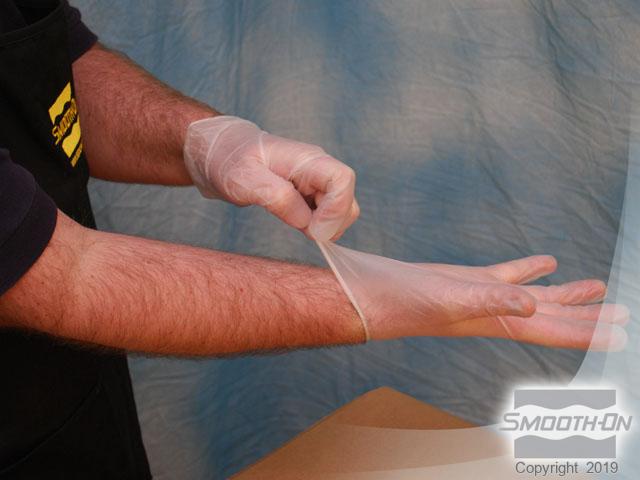
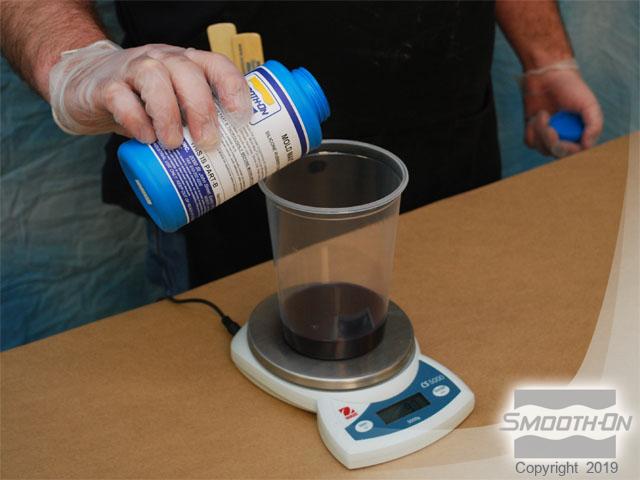
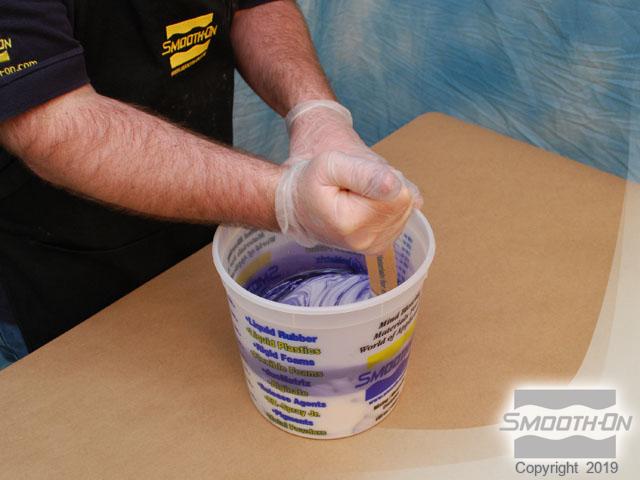
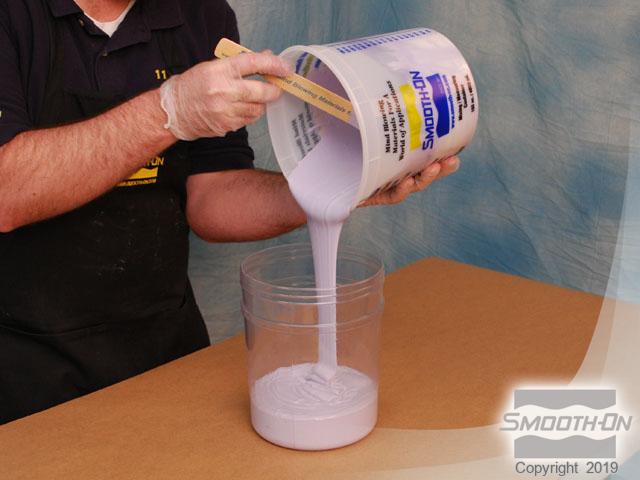
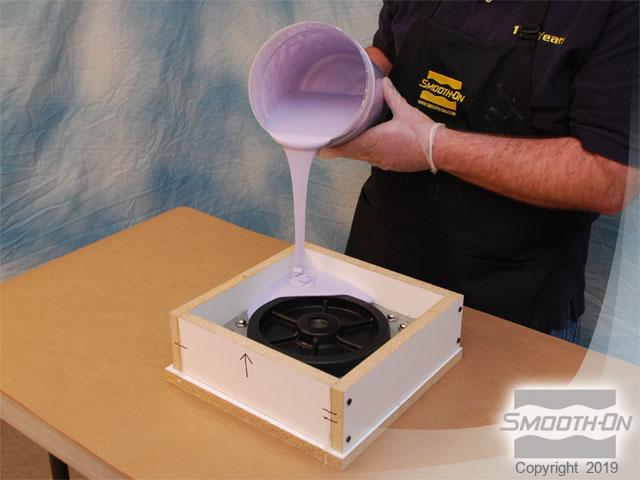
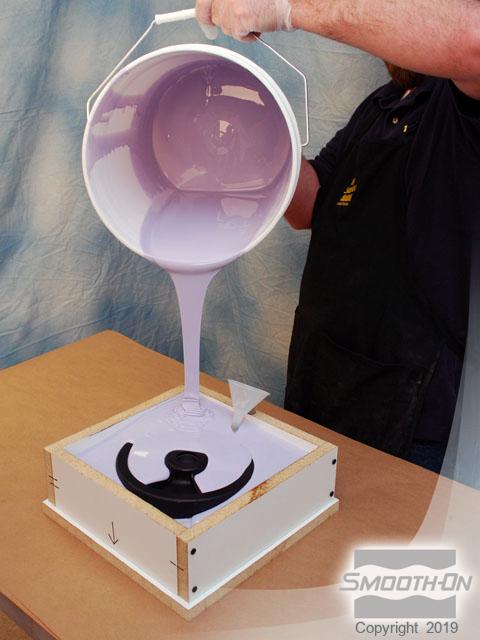
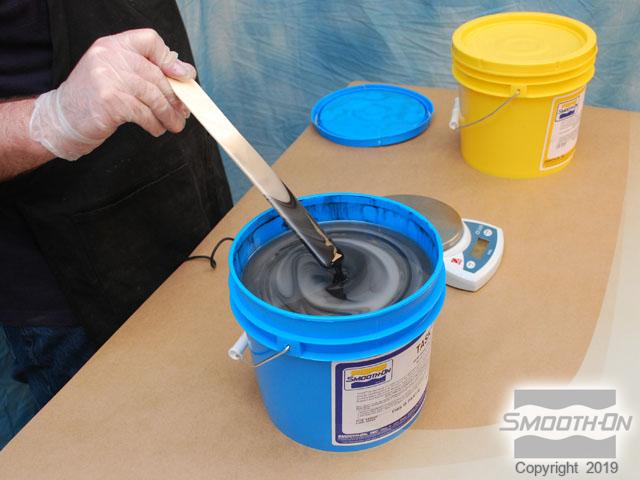
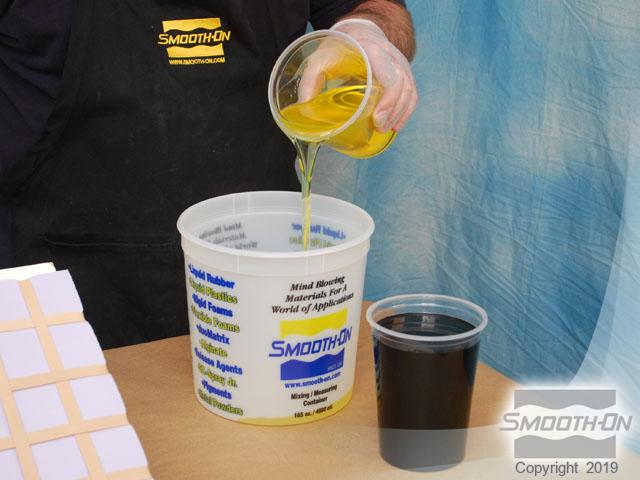
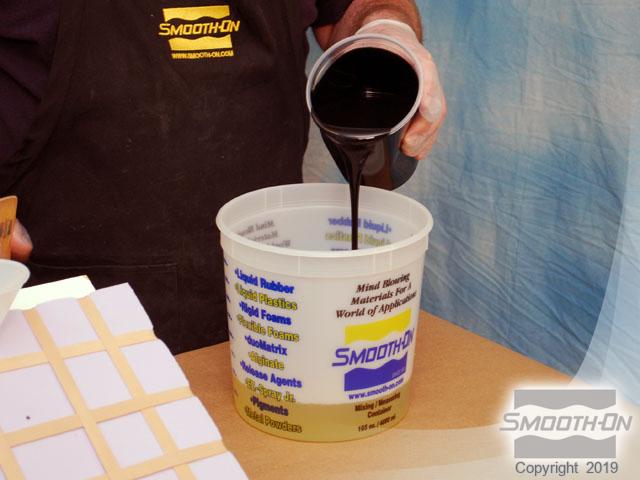
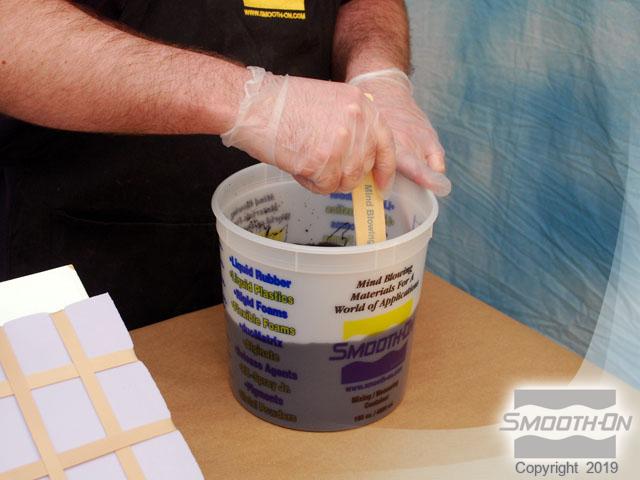
Vinyl gloves are worn for the remainder of the moldmaking process. Mold Max® 25 Part A and Part B are measured using a gram scale. The mix ratio is 100A:5B. The material is very easy to mix and is thoroughly mixed for 3 minutes. After the initial mixing, the Mold Max® 25 silicone is placed in a new container and mixed again for 3 minutes.
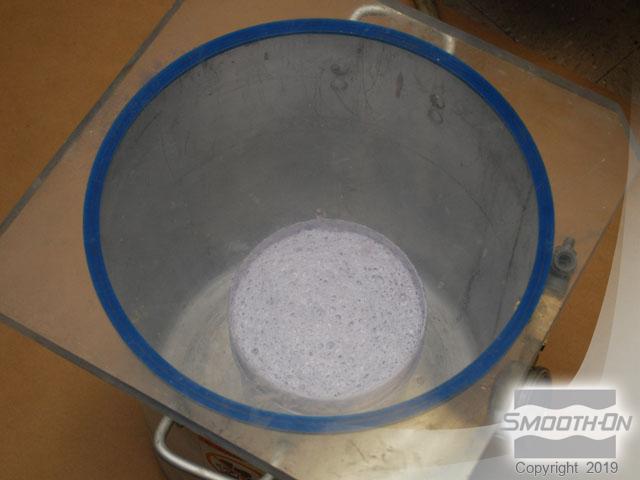
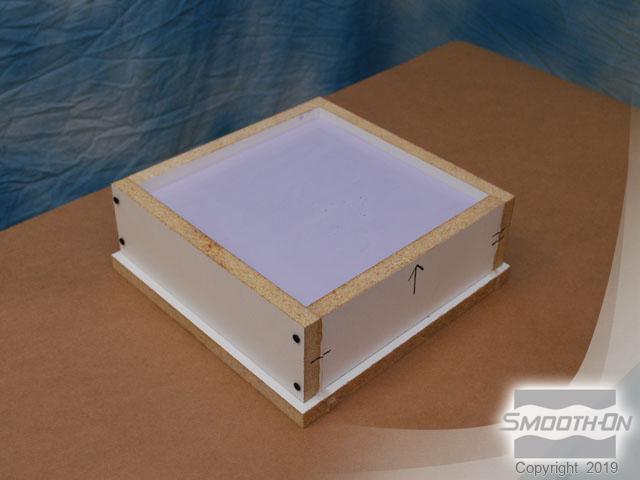
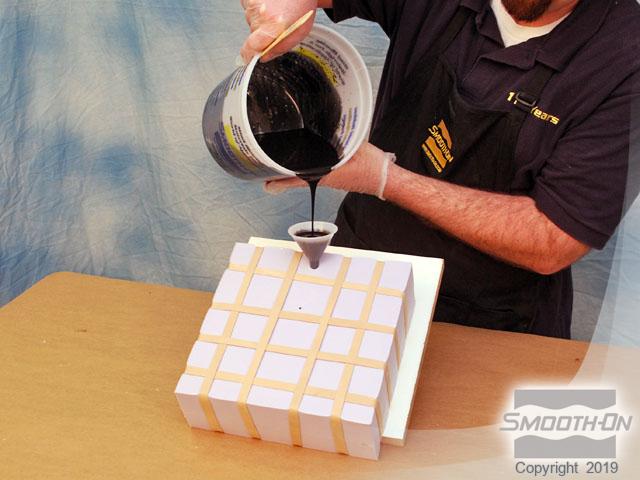
The container is placed in a vacuum chamber and degassed for 2 minutes until the mixture rises, breaks and falls. The mixed and vacuumed Mold Max® 25 is poured over the model in a thin stream. The Mold Max® 25 is left to cure for 24 hours.

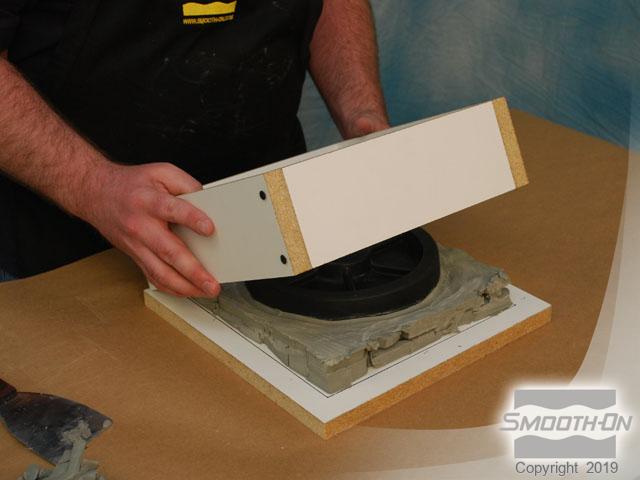
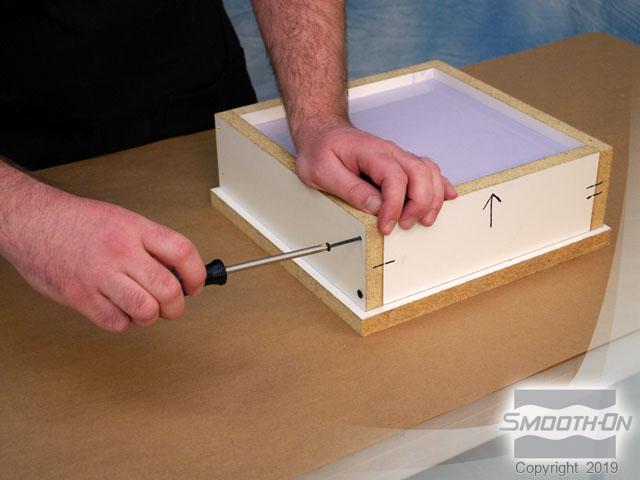
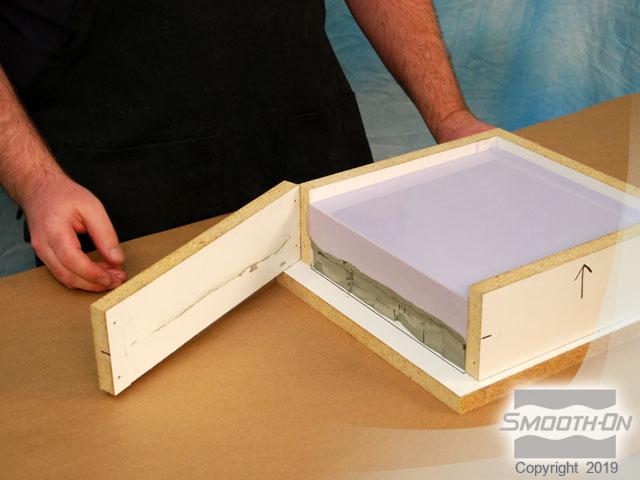
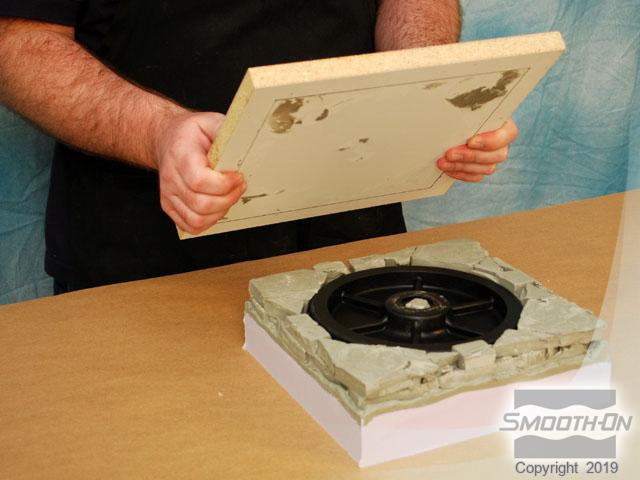
Step 3: Inverting mold and Preparing for Part 2 of Mold Max 25
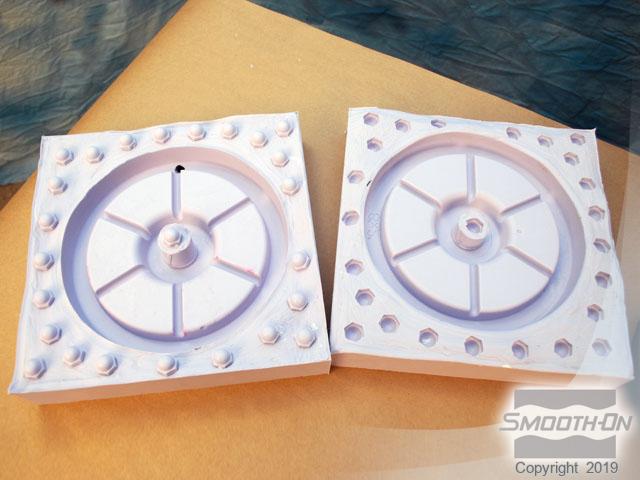
After curing, the box is disassembled. The clay divides the mold in half. The mold is inverted and the base board is removed. The clay and acorn nuts (registration keys) are removed. The second half of the rubber mold will be made over the reverse side of the model now embedded in silicone.
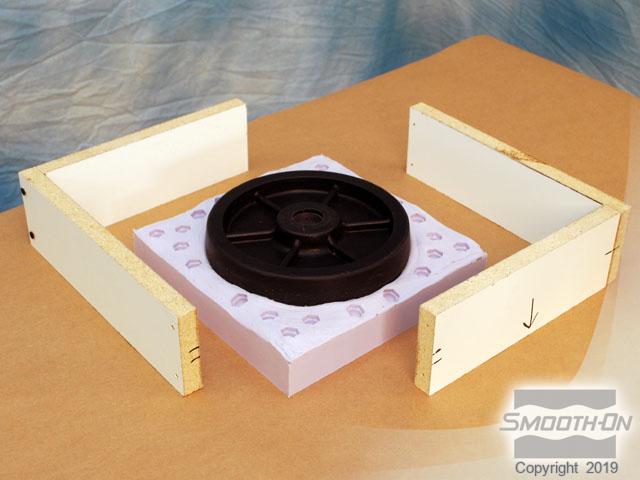
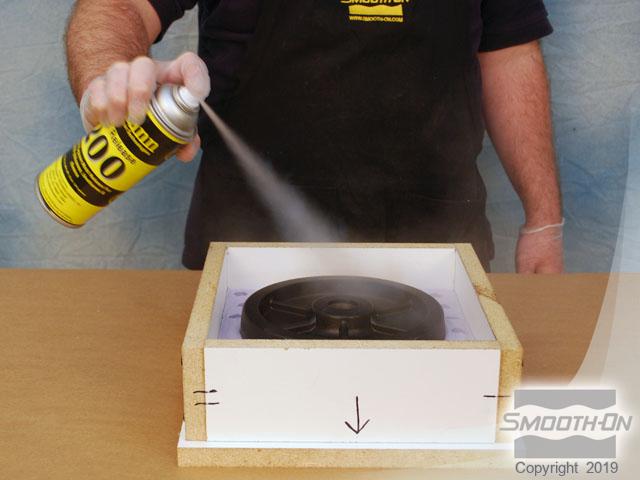
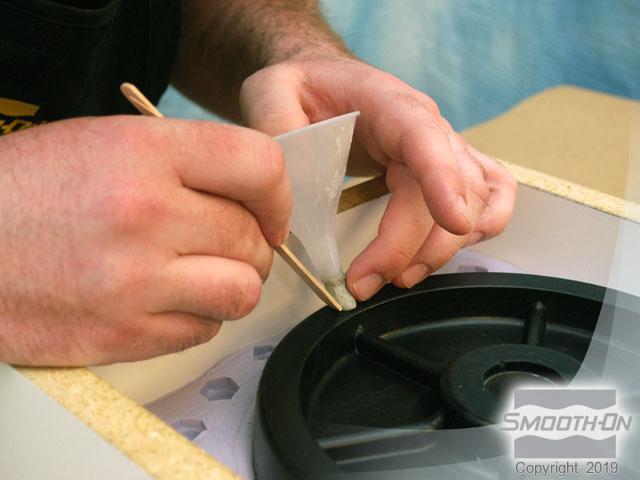
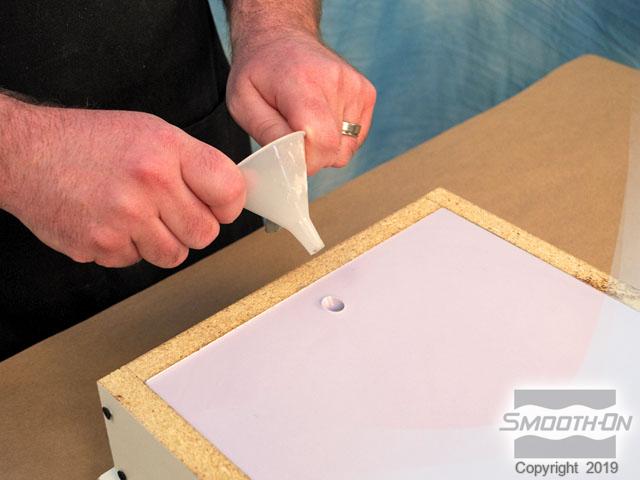
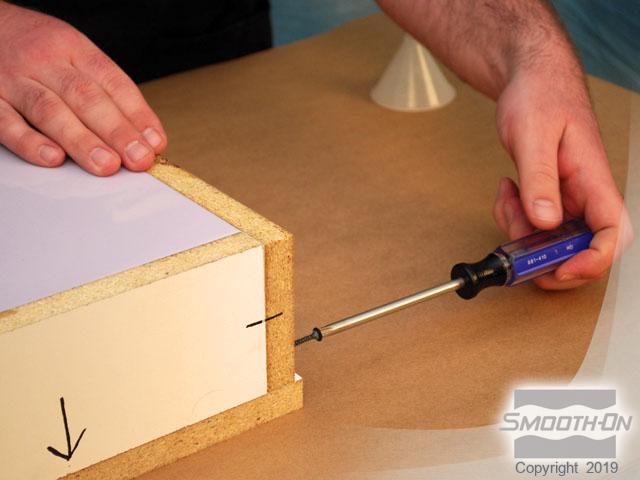
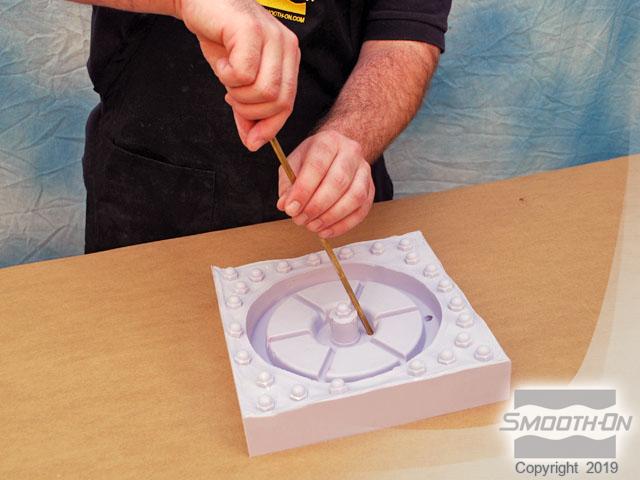
The mold box is reassembled using screws. Ease Release® 200 is sprayed on all surfaces. Ease Release® 200 will keep the new silicone from sticking to the cured silicone. A funnel is added to the model using a small piece of clay. This funnel will make it easier to pour resin into the finished mold.
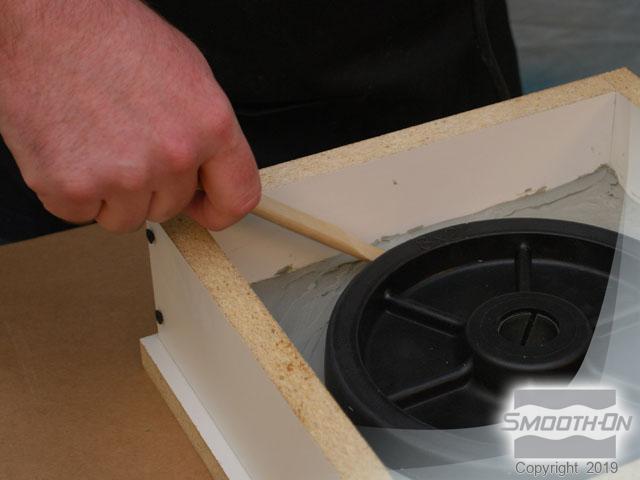
Step 4: Applying Mold Max 25
A second batch of Mold Max® 25 is mixed, vacuumed and poured over the model and cured mold half. The Mold Max® 25 is left to cure for 24 hours.

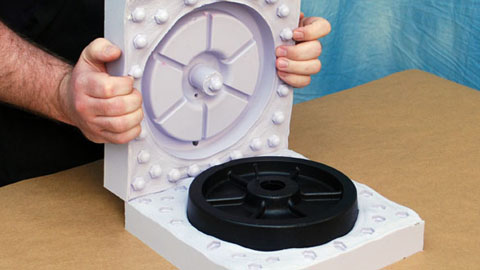
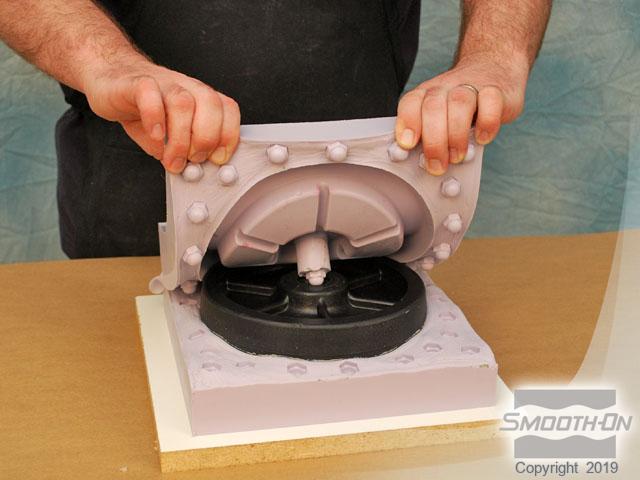
Step 5: Demolding
The plastic funnel, mold box screws, and mold box sides are removed. The two halves of the mold are easily separated thanks to an earlier application of Ease Release 200 release agent. The Mold Max® 25 captured precise dimensional detail from the original and will yield a perfect duplicate part.

Step 6: Preparing Mold for Casting
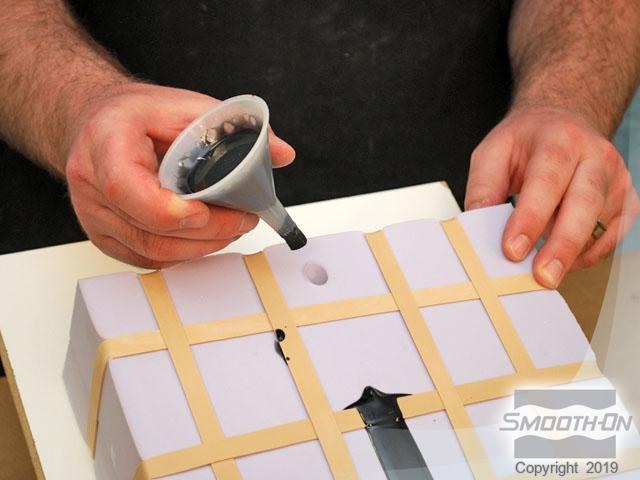
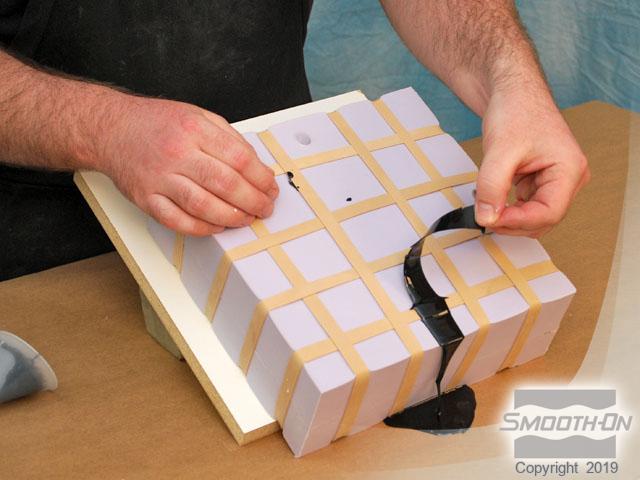
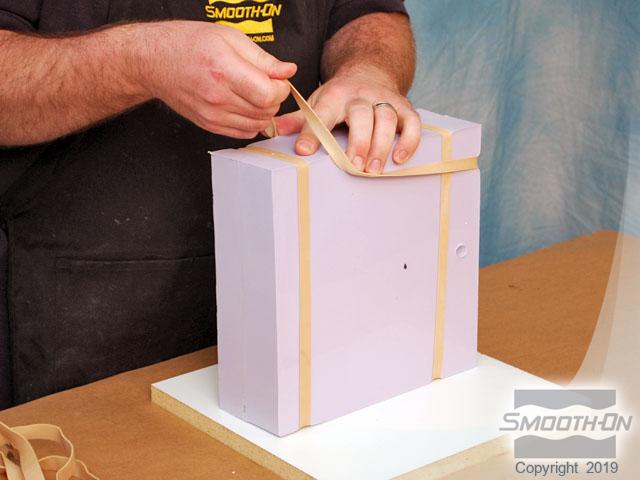
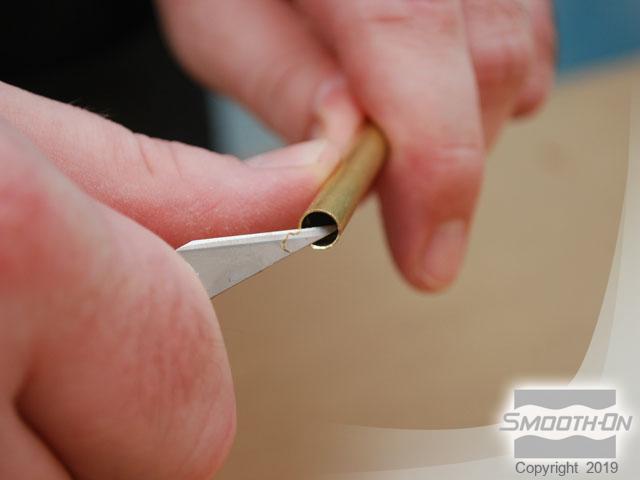
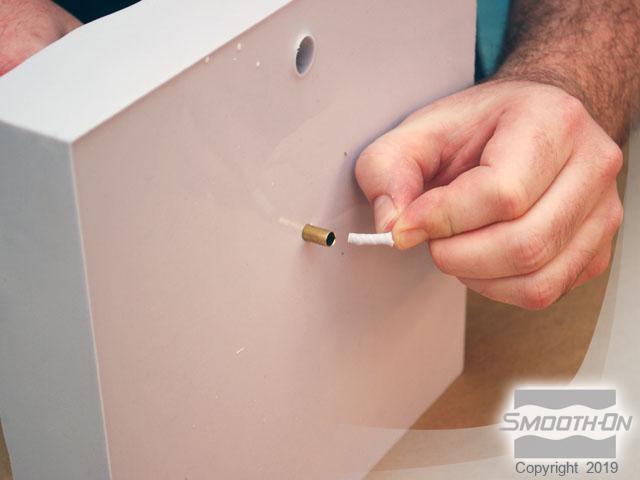
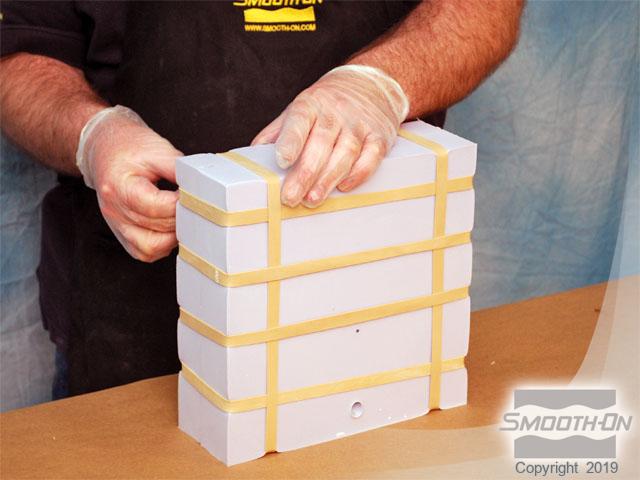
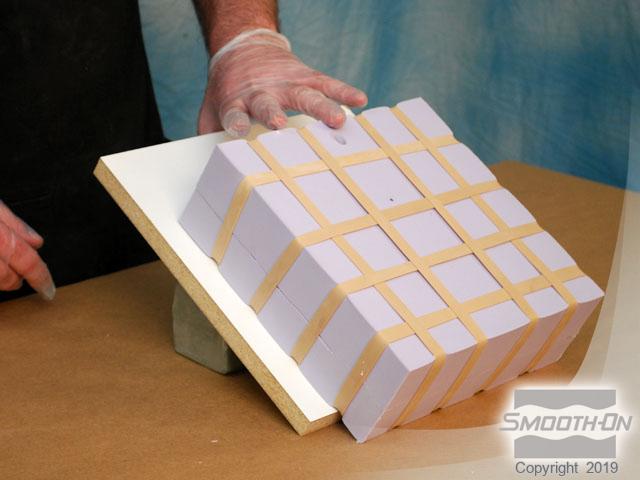
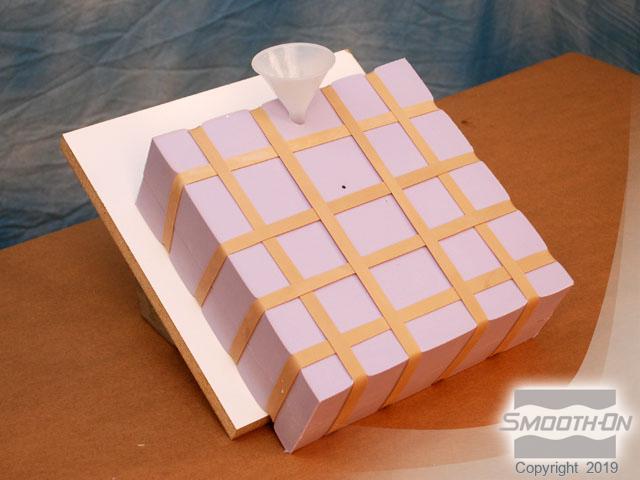
The end of a brass tube is carefully sharpened using a utility knife. The tube is pressed into the mold rubber at a non-critical part of the mold surface. This removes a plug of silicone, creating an air vent. Rubber bands are used to hold the mold halves together. The mold is securely propped up at a 45 degree angle to aid in de-airing the resin as it fills the mold cavity. The funnel is then replaced in the mold.
Step 7: Casting Task 14
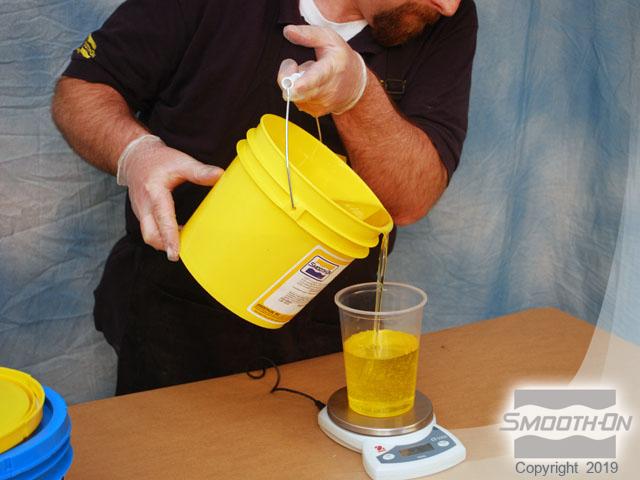
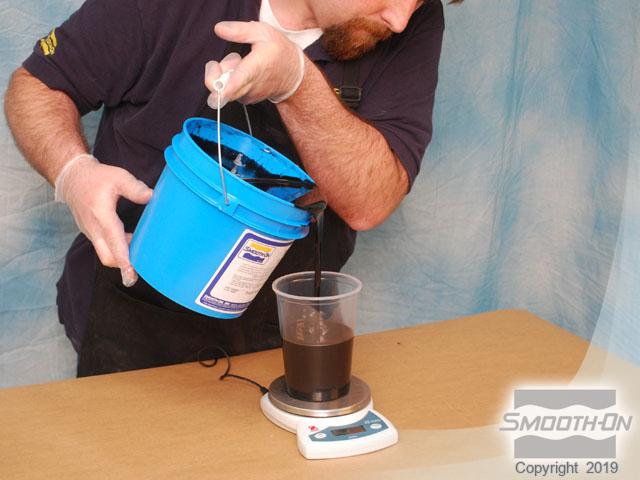
TASK® 14 is an impact resistant black urethane resin. The TASK® 14 Part B is premixed. TASK® 14 Part A is measured out using a gram scale. Then the TASK® 14 Part B is measured out. The mix ratio of TASK® 14 is 100A:150B by weight. The TASK® 14 Part A is poured into a clean mixing bucket. The TASK® 14 Part B is added and the material is mixed thoroughly for 90 seconds. Using the pour vent and funnel, the TASK® 14 is poured slowly in to the mold. Excess resin flows from the air vent and the TASK® 14 is left to cure for 45 minutes.

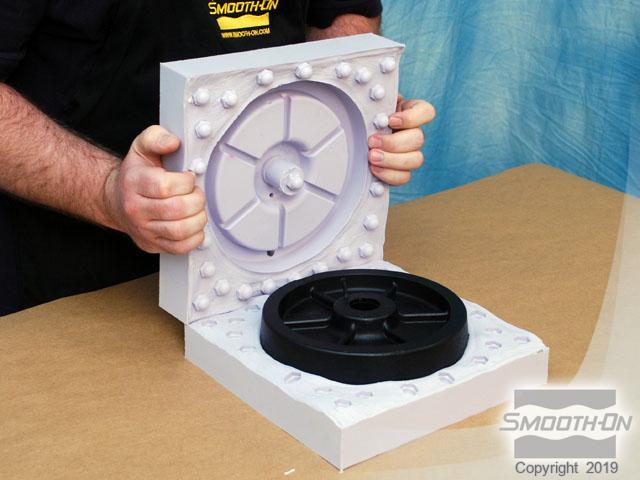
Step 8: Demold
After the resin cures, the funnel is removed. The overflow resin is removed. The rubber bands are removed from the mold. The mold halves are separated, exposing a perfect casting. The excess vent and pour spout flashing is removed carefully using a utility knife. The casting reflects perfect detail. The Mold Max® 25 mold is immediately ready for use again, making it suitable for production casting. The new cast wheel is installed, restoring support to the portable industrial pump.