How to Make a Silicone Gel‑Filled Zombie Prosthetic
Overview
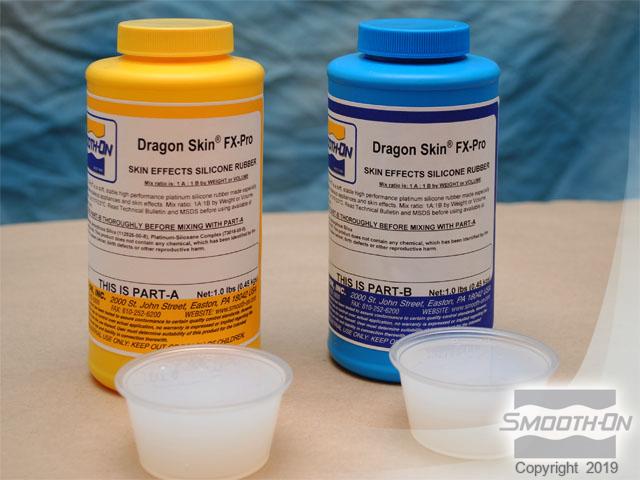
Dragon Skin® FX-Pro is a soft, stable, high performance platinum silicone rubber specifically designed for creating silicone makeup appliances and skin effects. Dragon Skin® FX-Pro is compatible with Skin-Tite® silicone adhesive as well as medical grade pressure sensitive adhesives for adhering silicone appliances temporarily to the skin.
Soft and stretchy FX-Pro has a Shore hardness of 2A. FX-Pro can be combined with SLACKER® deadening agent to create a very soft silicone gel for filling encapsulated silicone pieces. An infinite number of color effects can be achieved by adding Silc-Pig® silicone pigments. Cured rubber can also be painted with the Psycho Paint® system.
The following gallery is an overview of creating a silicone gel filled appliance using Dragon Skin® FX-Pro® and also illustrates painting the piece using Psycho Paint® and adhering it to the actor using Skin Tite®.
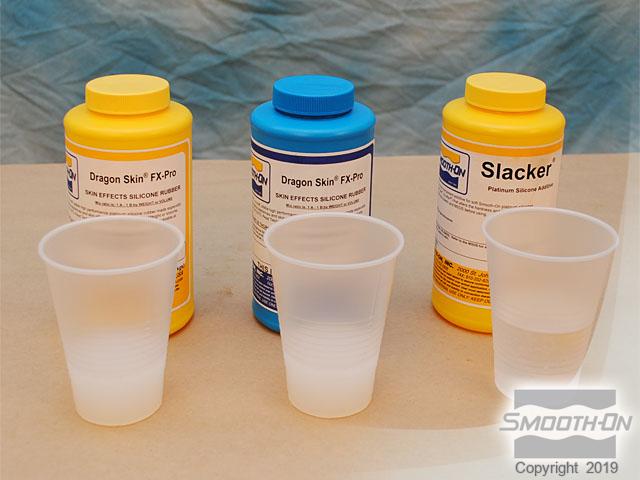
Materials Used in this Tutorial
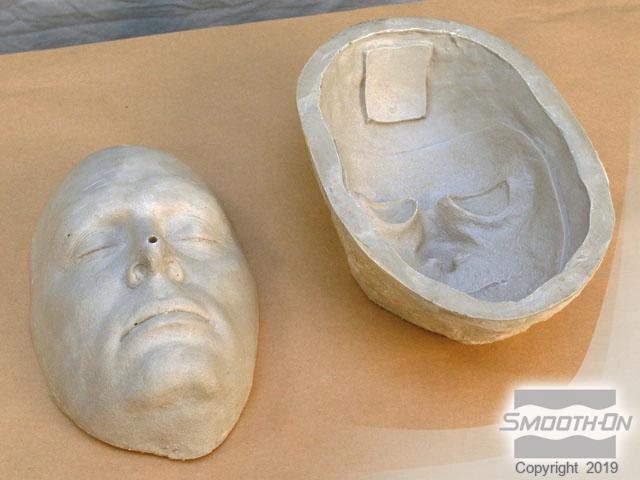
- Lifecast of Actor's Face
- Mold of Appliance
- Sonite Wax
- Ease Release 200
- 1-inch Disposable Chip Brushes
- Dragon Skin FX-Pro
- 2oz Measuring Cups
- Wooden Craft Sticks
- Silc Pig Silicone Pigment
- Wooden Paint Stirring Sticks
- 10oz Mixing Cups
- Slacker Tactile Mutator
- Flat-Head Screwdrivers
- Talcum or Baby Powder
- Scissors
- Psycho Paint
- Toluene
- Round #2 Makeup Brush
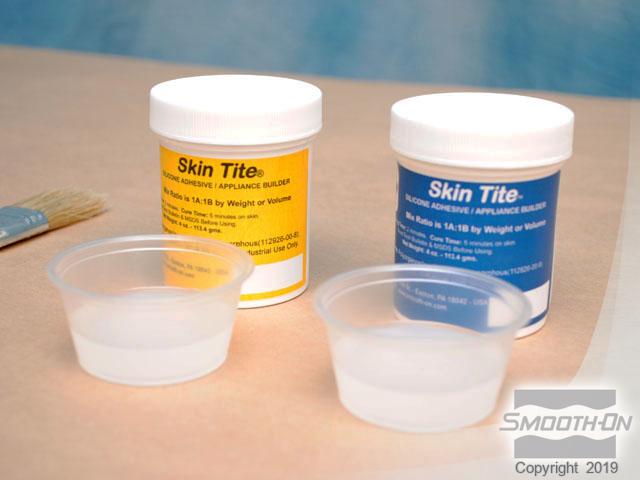
- Skin Tite Adhesive
- Alcohol-Activated Makeup Palette
- Flat Metal Spatula
- Non-Latex Stipple Sponge
- Makeup Removal Wipes
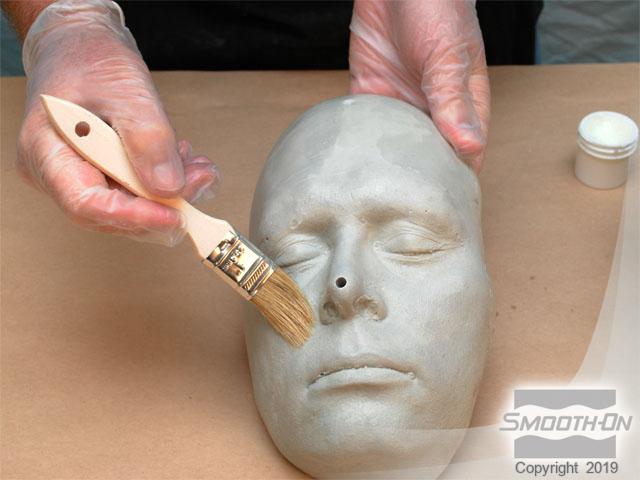
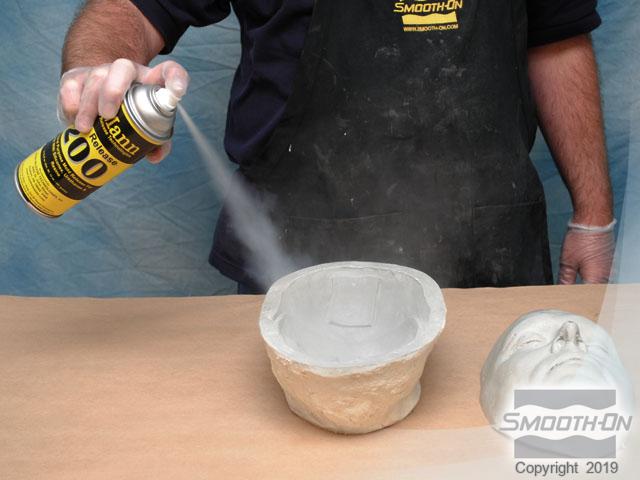
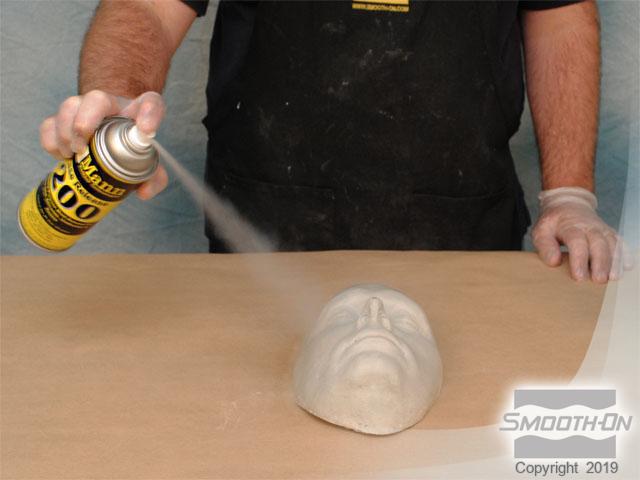
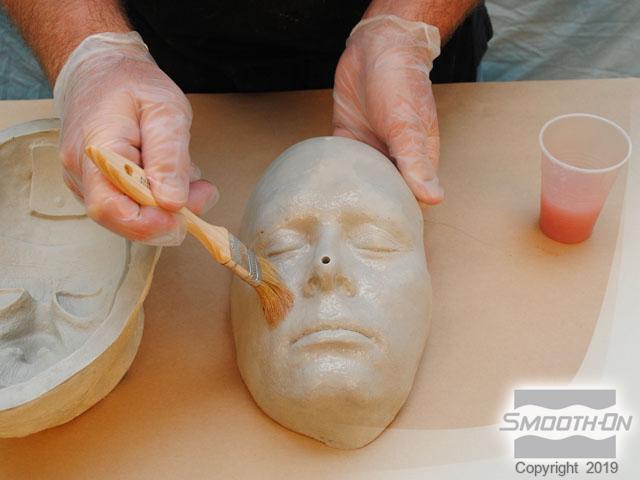
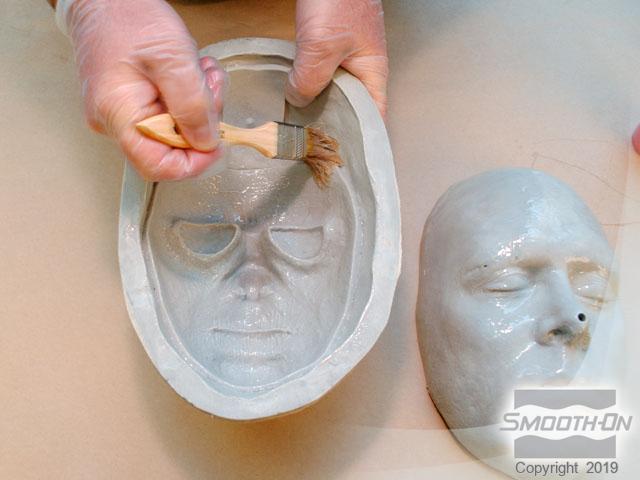
Step 1: Seal and Release Mold
A positive (lifecasting) and negative mold made using Shell Shock® and Plasti-Paste® are used for casting Dragon Skin® FX-Pro. Sonite® Wax is applied to both the negative mold and the positive. A light coat of Ease Release® 200 is applied to the negative and brushed deep into the detail. A light mist coating of Ease Release ® 200 is also applied to the mold positive, brushed over the surface, ensuring even coverage.
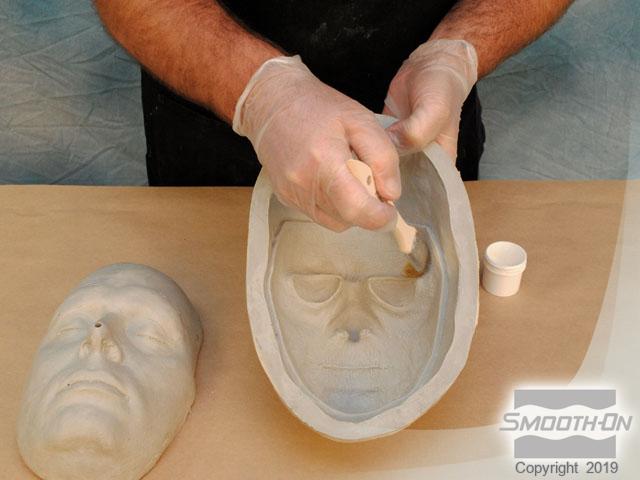


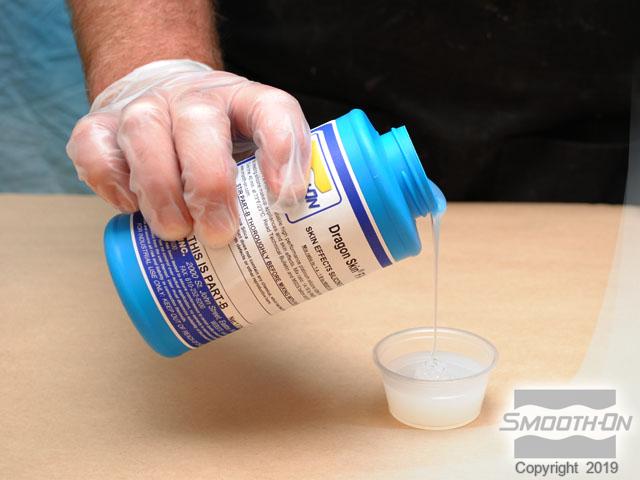
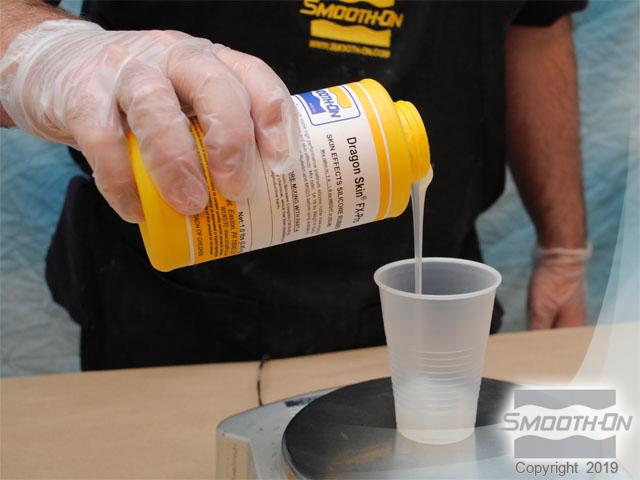
Step 2: Apply Silicone Encapsulant
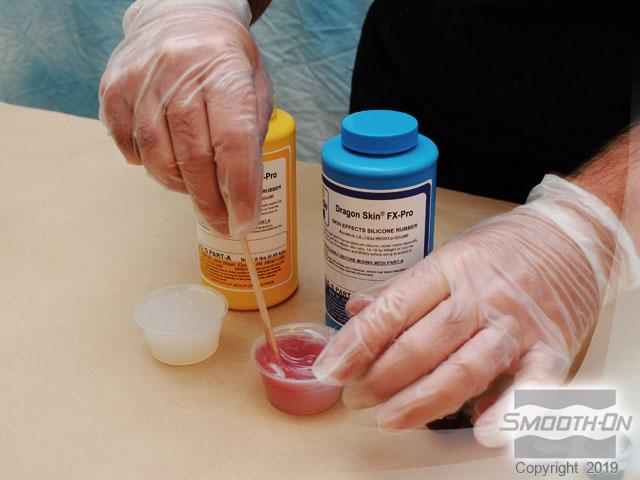
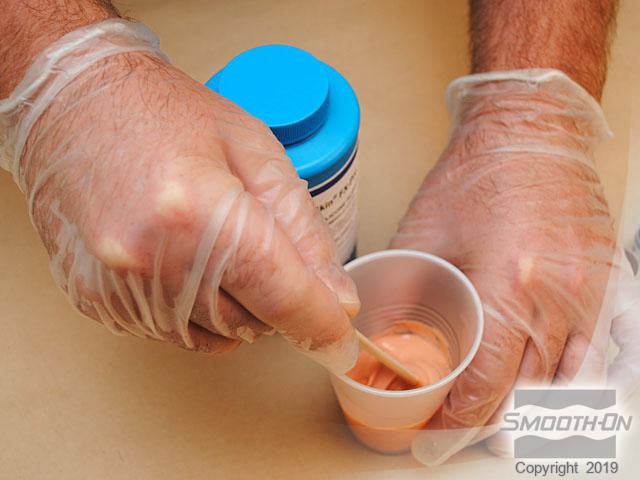
Dispense equal amounts of Dragon Skin® FX-Pro® Part A and Dragon Skin® FX-Pro® Part B. The mix ratio of Dragon Skin® FX-Pro® is 1:1 by weight or volume. Dispense a small amount of Silc Pig® Blood pigment and combine with Dragon Skin® FX-Pro® part B. Mix the material thoroughly. Stipple a layer of Dragon Skin® FX-Pro® on the mold positive using a disposable brush. Also stipple a thin layer of Dragon Skin® FX-Pro® on the mold negative.


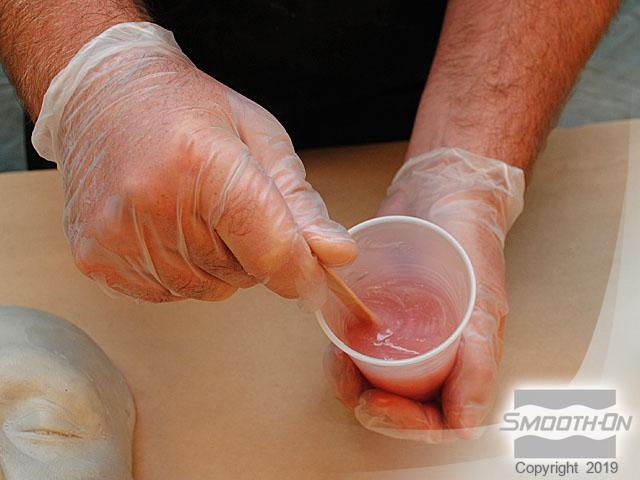
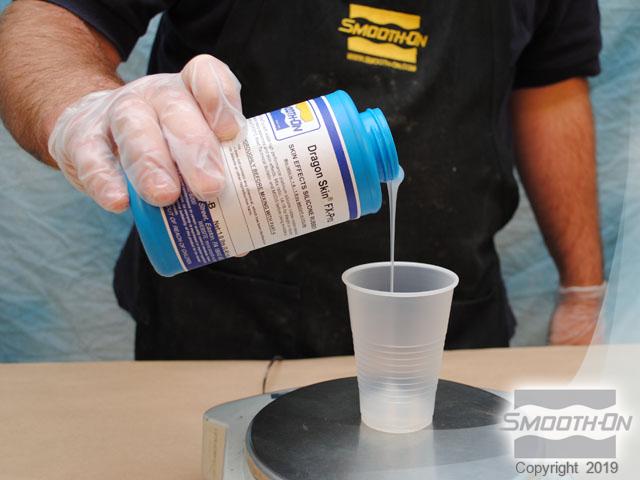
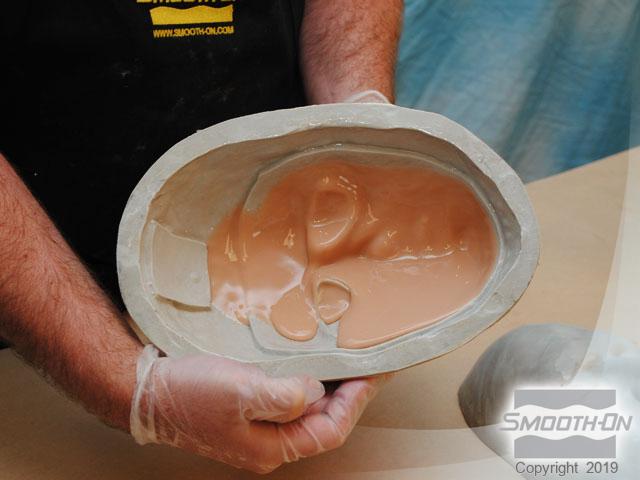
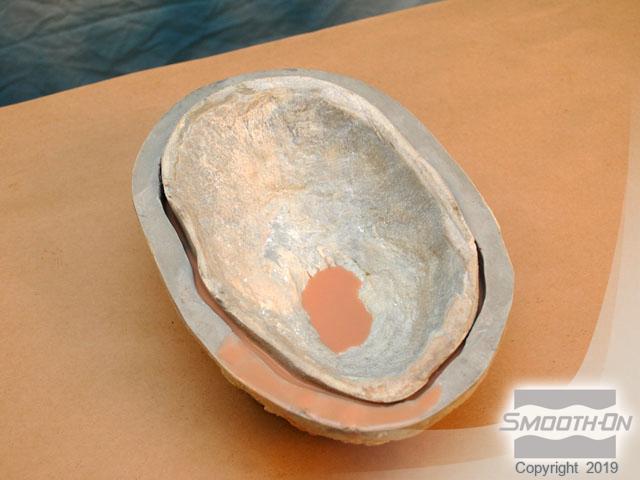
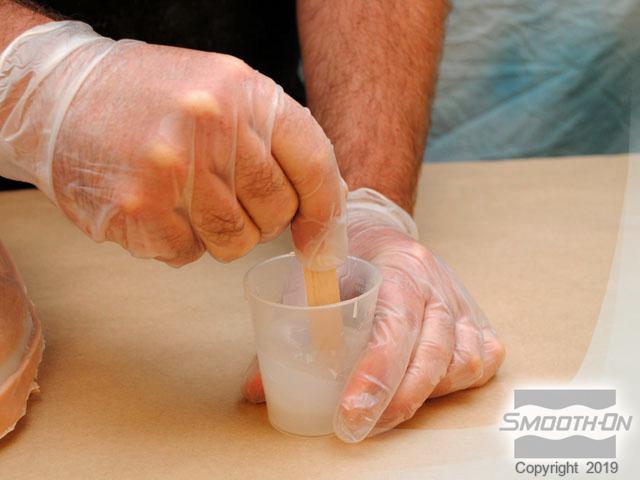
Step 3: Mix and Pour Silicone Gel
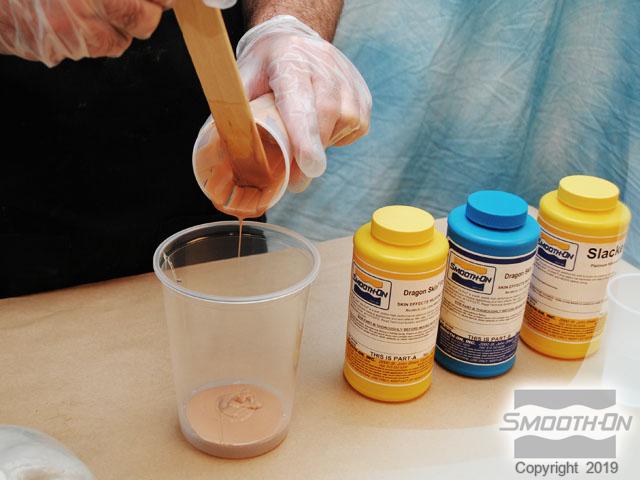
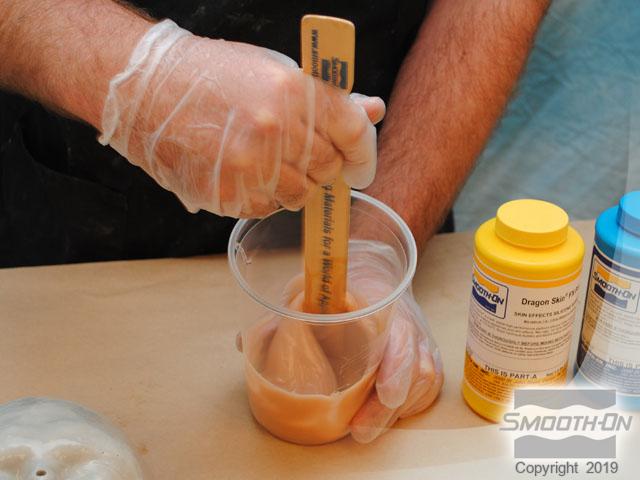
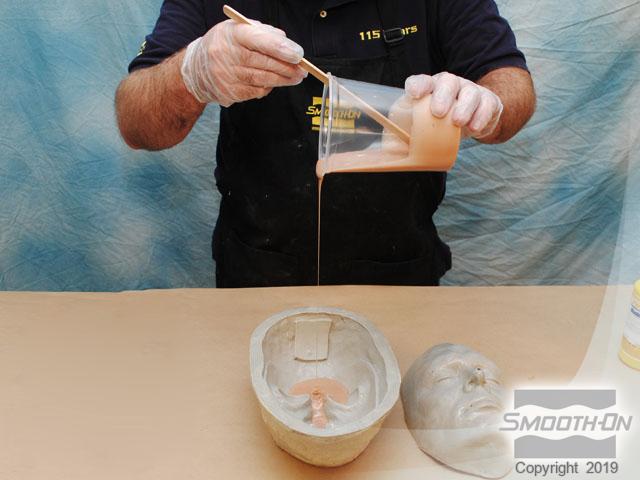
Weigh out 50 grams of Dragon Skin® FX-Pro® Part A, 50 grams of Dragon Skin® FX-Pro® Part B, and 100 grams of SLACKER®. This will produce a soft silicone gel. Dispense a small amount of Silc Pig® Fleshtone pigment and combine with Dragon Skin® FX-Pro® part B. Combine all of the material components and mix the material thoroughly. Slowly pour the material mixture into the mold in a thin stream to eliminate air bubbles. Rotate the negative mold to coat the surface evenly.


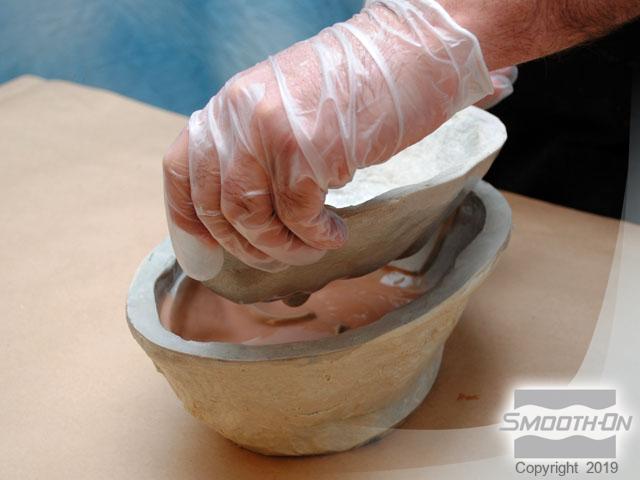
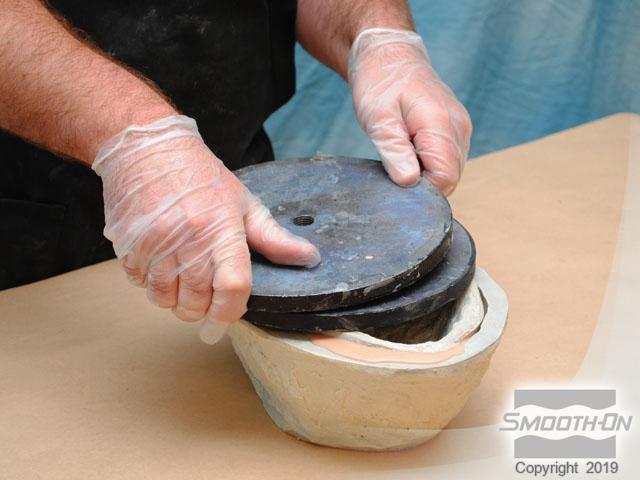
Step 4: Squash Mold
Insert the positive mold into the negative and apply firm pressure. Use weights to help maintain pressure while the silicone cures. Leave the material to cure for at least 60 minutes.
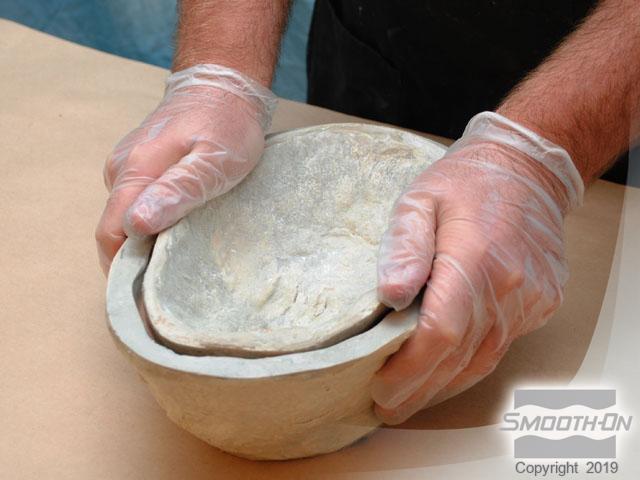
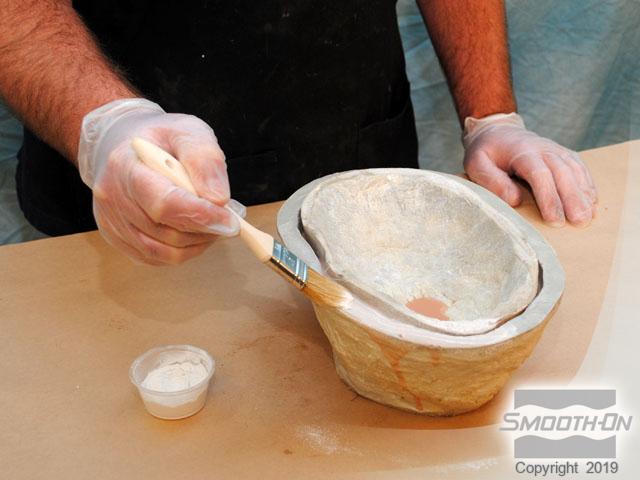
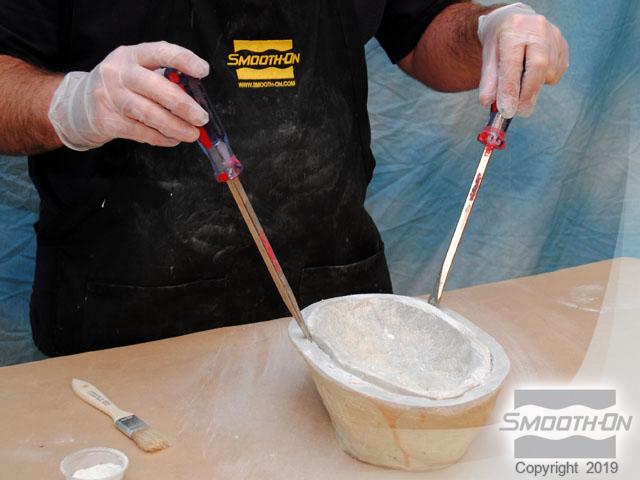
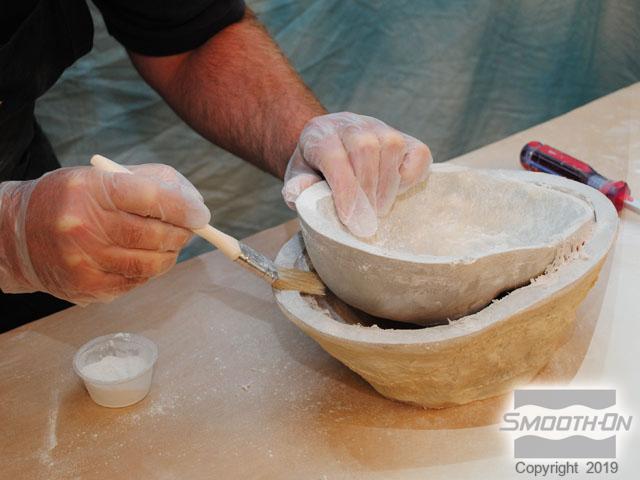
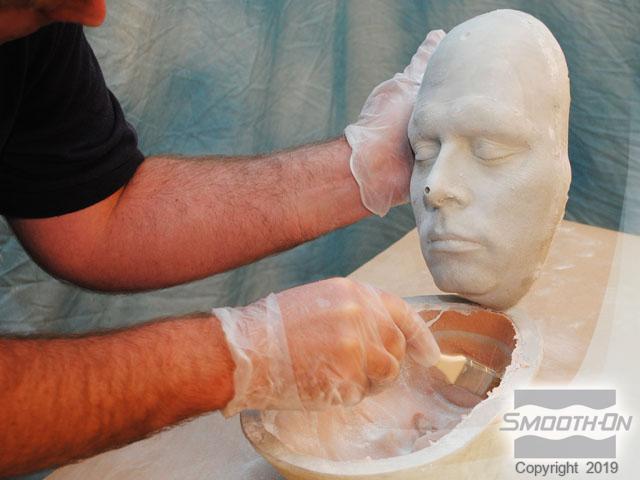
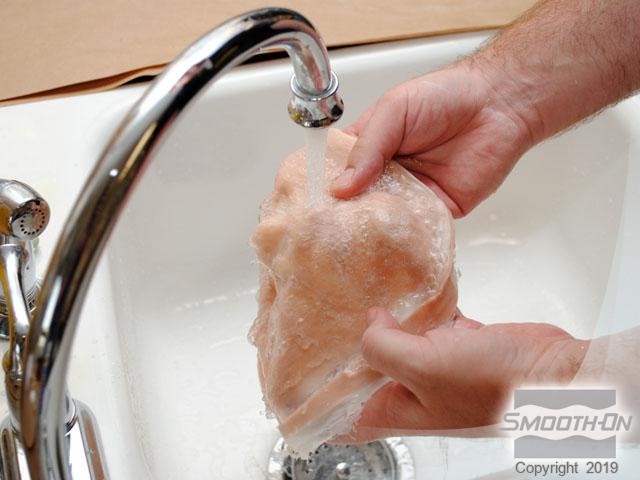
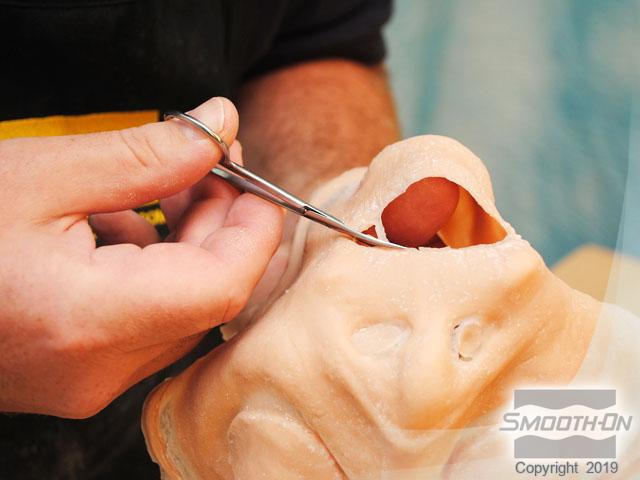
Step 5: Demold
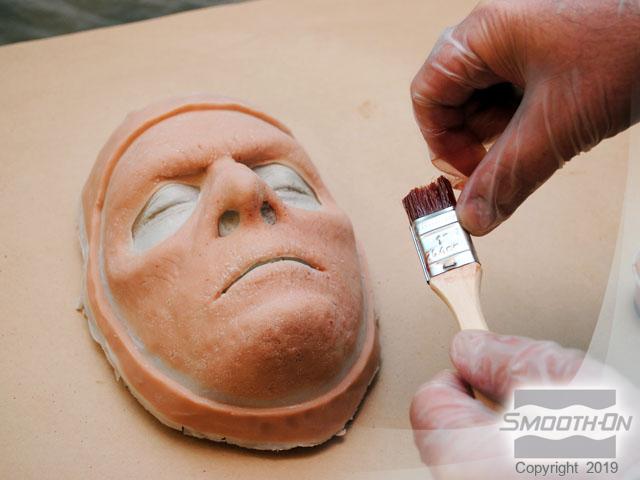
Brush talcum powder around the mold to reduce the tackiness of the silicone gel. Use screwdrivers to slowly and carefully pry open the mold. Slowly take apart the 2 mold halves while applying more talcum powder. You have now removed the mold positive. Use a brush and talcum powder to guide the appliance out of the negative mold. The excess powder can be removed by using warm water. To create the mouth, nose, and eye holes, carefully trim the appliance using sharp scissors. Your finished appliance is now ready for painting with Psycho Paint®.


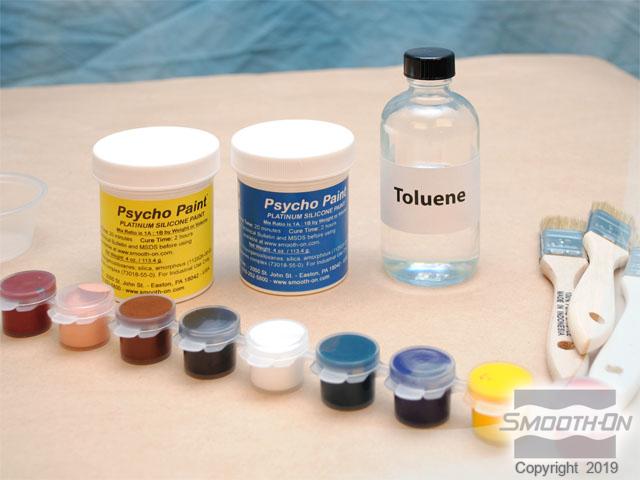
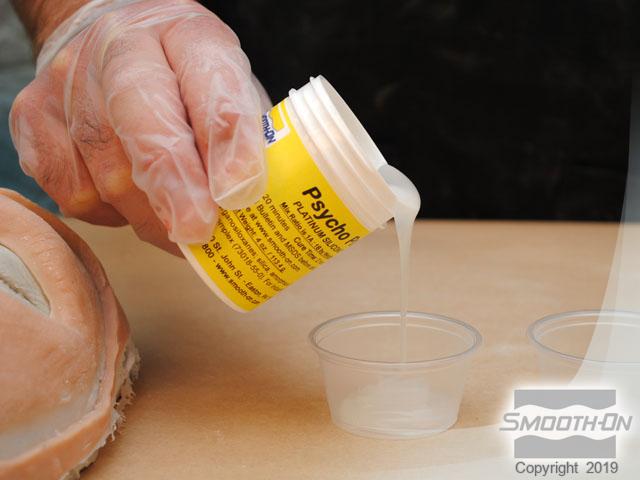
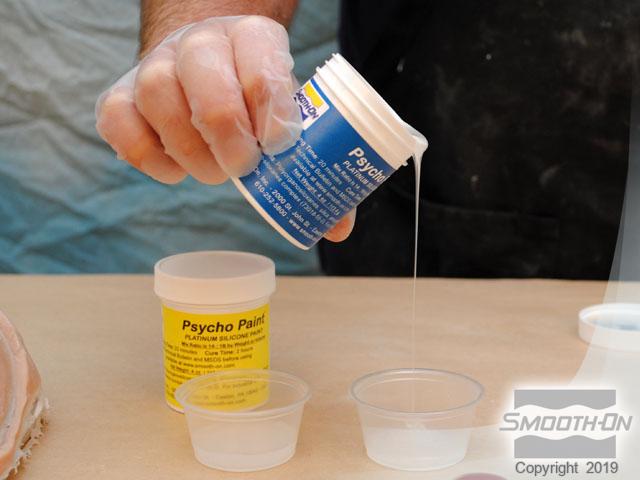
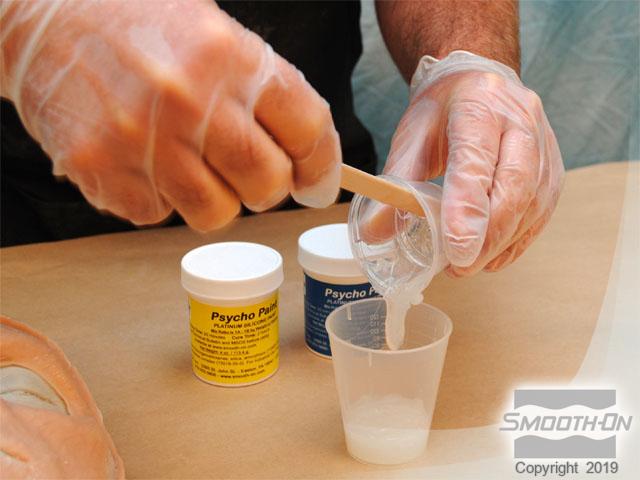
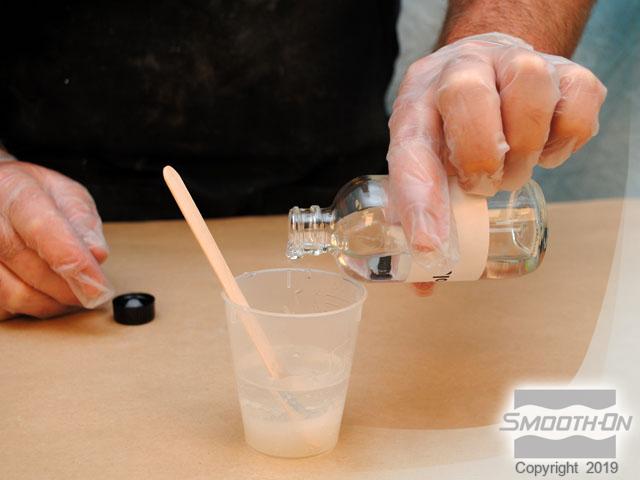
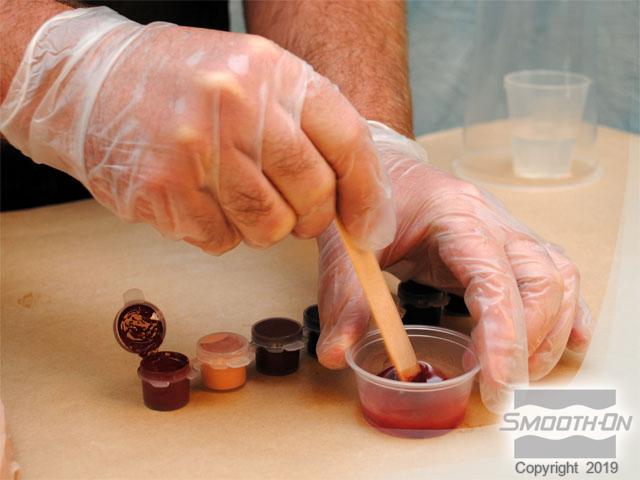
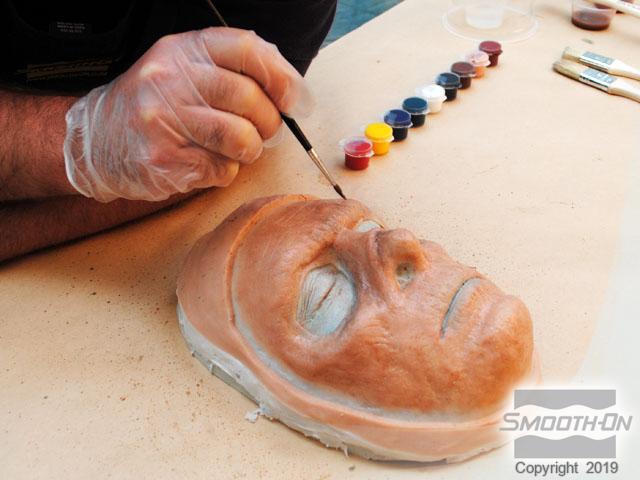
Step 6: Painting the Silicone Appliance
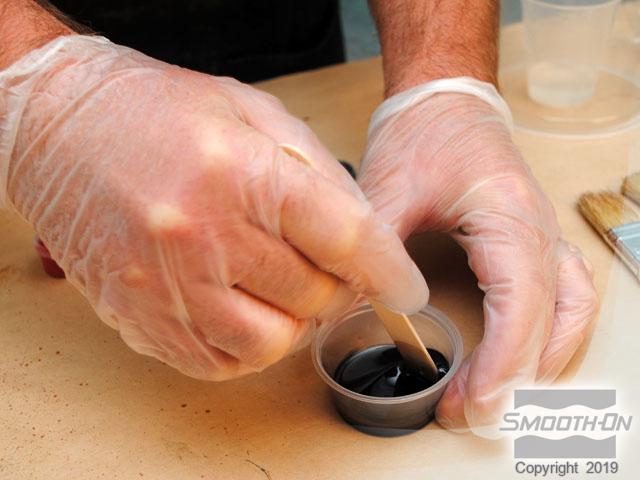
Assemble Psycho Paint®, toluene and Silc Pig® pigments. Because the mix ratio is 1A:1B by weight or volume, dispense equal amounts of Psycho Paint® Part A and Psycho Paint® Part B. Using a large mixing cup, combine the 2 Psycho Paint® components and add toluene until the Psycho Paint is of a brushable consistency. Be sure that toluene and Psycho Paint® components are thoroughly mixed.
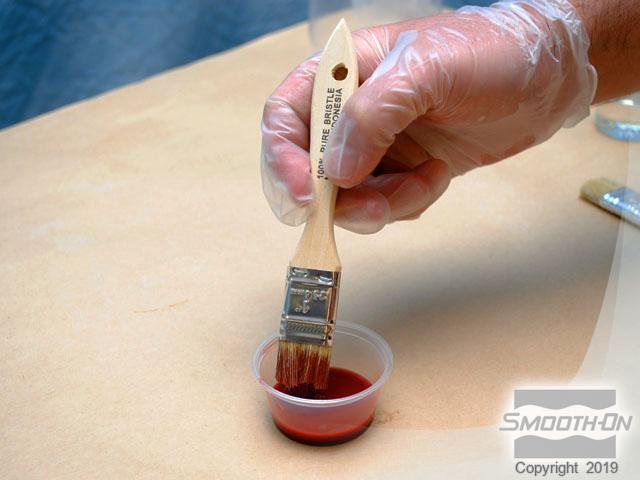
Next, add a small amount of Silc Pig® Blood pigment to a batch of clear Psycho Paint®. Cut down the bristles of a chip brush to 3/8: (1cm) and dip the brush in the pigmented Psycho Paint® mixture. 'Spatter' the paint on the surface of the appliance.
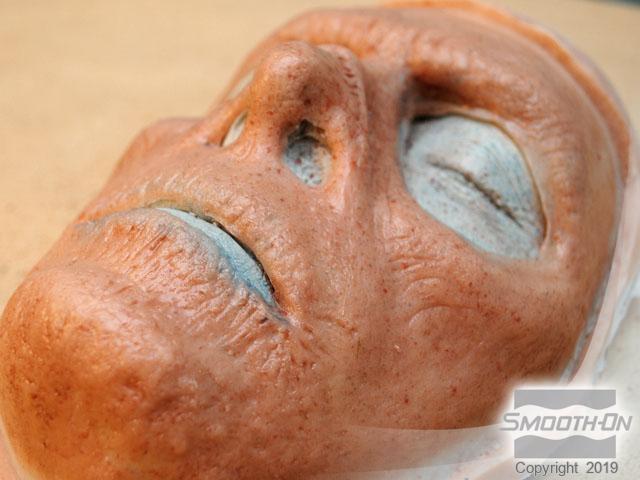
Now, add a small amount of Silc Pig® Blue and Black pigment to a batch of clear Psycho Paint®. This material is used for painting detail and shading on your appliance. Additional layers of color can be built up in this way. Allow the Psycho Paint® to cure for 4 hours.
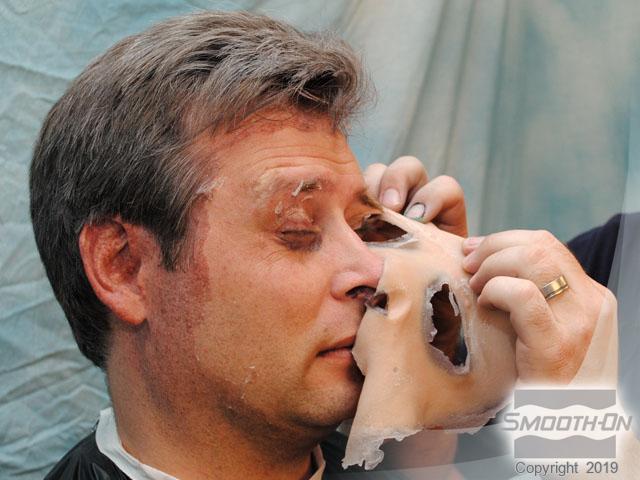
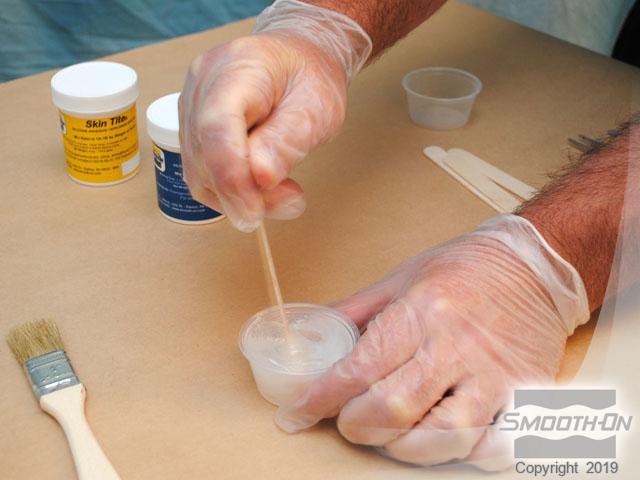
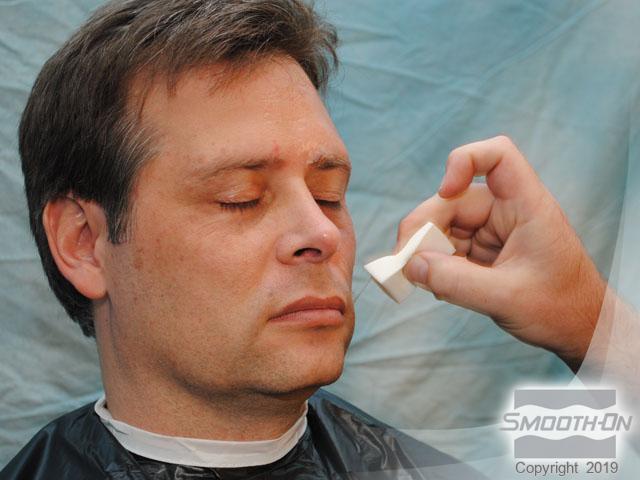
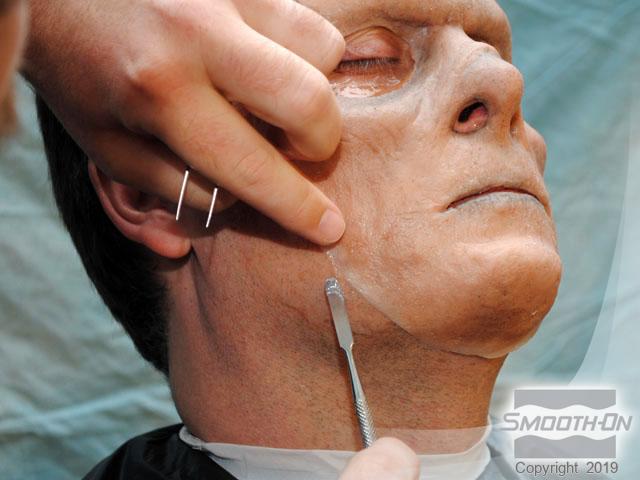
Step 7: Apply to Model
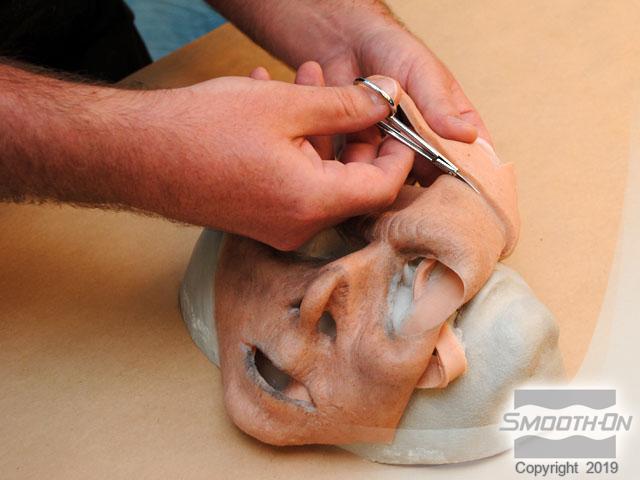
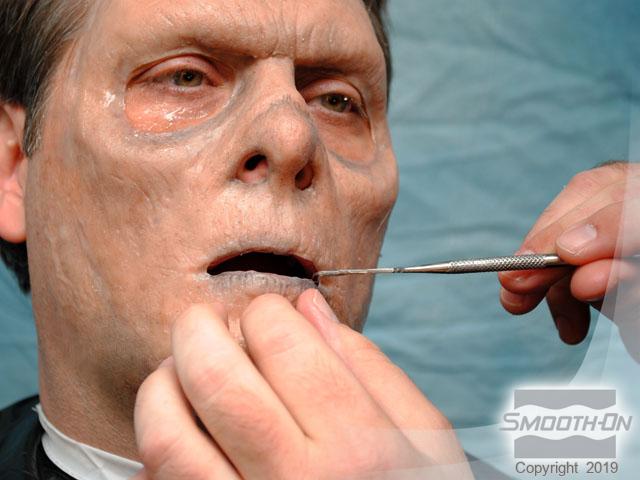
After the Psycho Paint® cures, cut away excess flashing using sharp scissors. Measure out a small amount of Skin Tite® silicone appliance adhesive following 1A:1B by volume and mix thoroughly. Apply a thin layer of this Skin Tite® mixture to the entire face. As the Skin Tite® cures, press the appliances into place. Use more Skin Tite® to adhere and blend the appliance, carefully applying around the mouth area. To further blend the piece into the surrounding skin, theatrical makeup can be used.
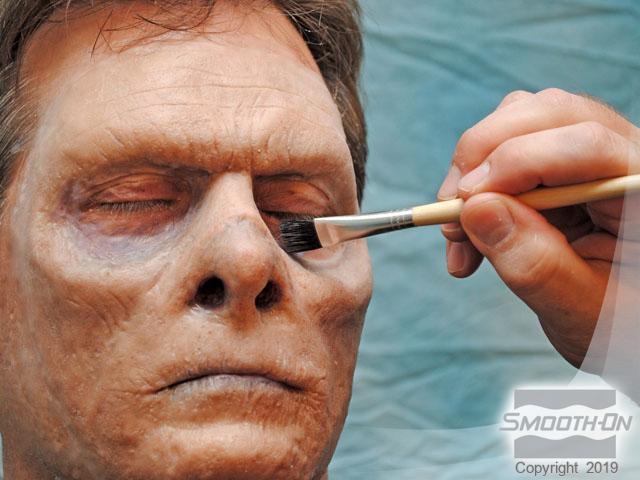
Step 8: Finished Zombie
The super soft gel filled FX-Pro® appliance flexes with every facial expression. During a photo shoot, the silicone piece will reflect light in a very natural way. The Skin Tite® adhesive also creates a very long lasting bond.


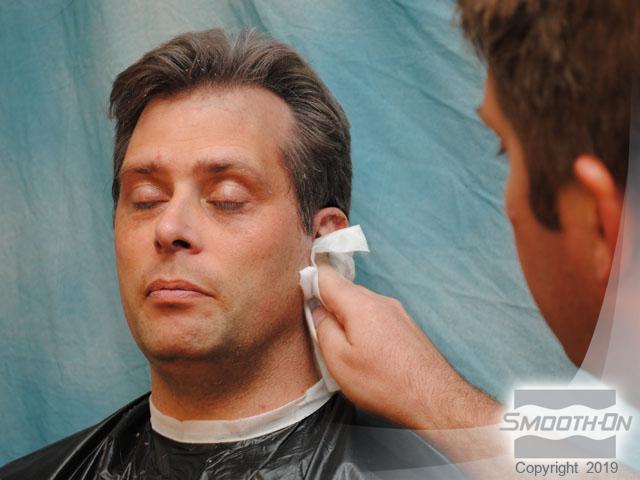
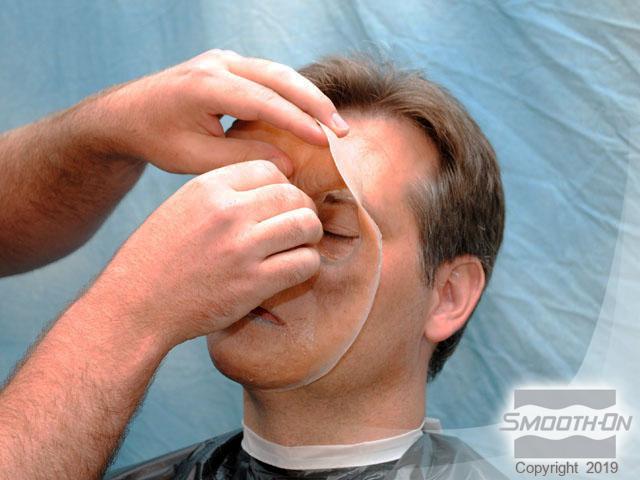
Step 9: Removing the Appliance
To remove the piece, gently pull the appliance away from the skin. Skin Tite® does not encapsulate body hair so the material can easily be pulled away from eyebrows, eyelashes, beards, etc. the remaining Skin Tite® and makeup residue can be removed using a standard makeup removal wipe.