Free Form™ AIR
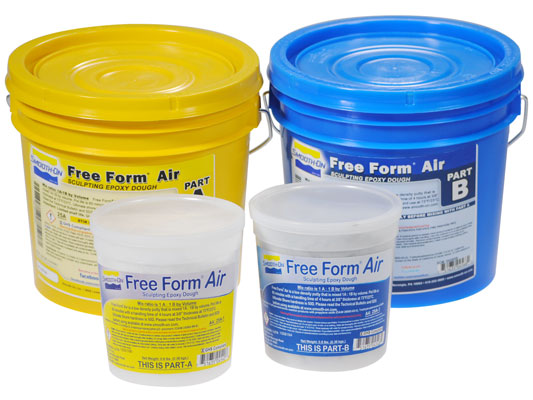 *NOTE: Product Packaging May Vary
Free Form™AIR is an extremely lightweight epoxy putty suitable for an infinite variety of industrial and art-related applications. This is a low-odor, low shrinkage putty that is unique, inexpensive and easy to use. Free Form™AIR is mixed by hand with a 1A:1B by volume or weight mix ratio. It offers a long working time and cures overnight at room temperature to a hard, rigid epoxy that is very strong. Cured Free Form™AIR is so lightweight, it will float in water. It can be sanded, shaped, and drilled. It will readily accept any paint. Free Form can also be color pigmented with UVO™ or Ignite™ colorants.
Features
After mixing, Free Form™AIR can be pressed into a mold to make a lightweight, detailed casting. It will hold vertical surfaces and can be applied to almost any surface including polystyrene foam for rough sculpting. Free Form™AIR putty can also be used to make rigid support shells or mother molds.
Epoxy Laminating: Laminate Free Form™AIR putty in between layers of EpoxAmite™ Laminating Epoxy and fiberglass cloth, carbon or other fiber for making lightweight composite parts. Eliminates the need to make multiple layers of laminating with liquid epoxy; saves time and labor. Epoxy Tooling Applications – use as a filleting material. Also good for jig and fixture construction.
Used as a lightweight adhesive, Free Form™AIR will bond to itself and a variety of surfaces including wood, stone and EpoxAcoat™ surface coat epoxy. Free Form™AIR will even cure under water.
Pot Life/Working Time: this material is mass sensitive. The more material you mix at one time, the less time you have to work with it. Working tip; If mixing a large quantity, flatten putty with a rolling pin to reduce mass concentration and extend pot life.
- Thickness; 1.5 inch (3.81 cm) – pot life is 30 minutes, handling time is 2.5 hours, full cure in 24 hours.
- Thickness; 3/8” (0.95 cm) – pot life is 60 minutes, handling time is 4 hours, full cure in 24 hours.
- Thickness; 1/8” (0.32 cm) - pot life is 120 minutes; handling time is 8 hours, full cure in 24 hours.
› Click here for more Free Form AIR™ products.
Gallery
- 899962730
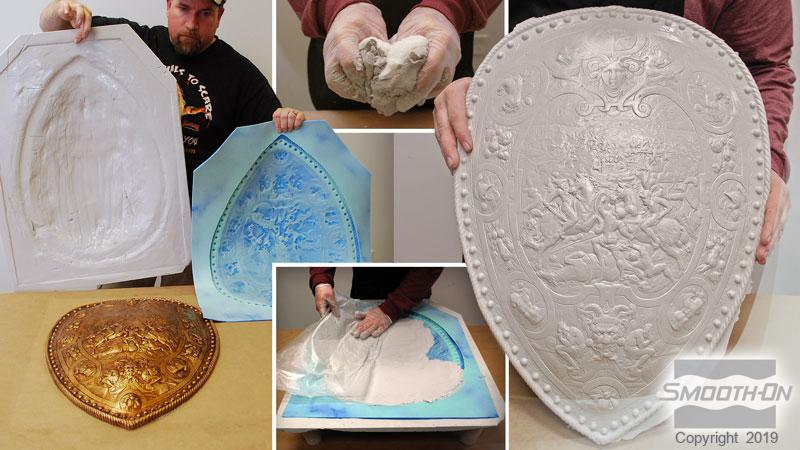 Free Form® AIR used to make both a lightweight support shell and casting of this stage shield prop.
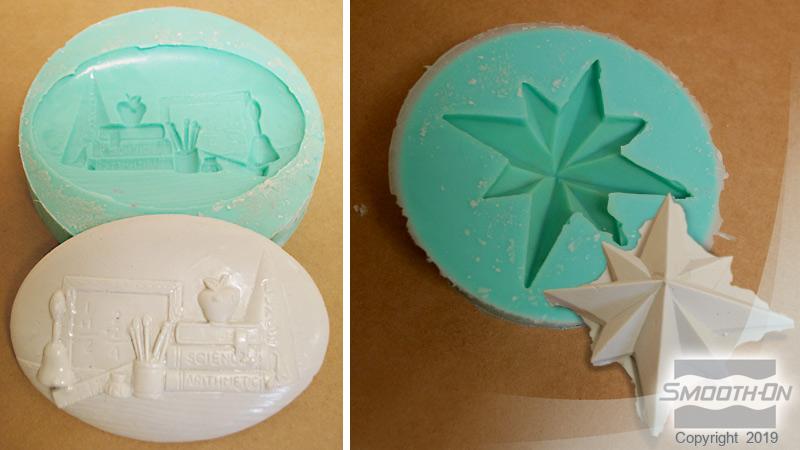 Free Form® AIR is able to capture fine detail.
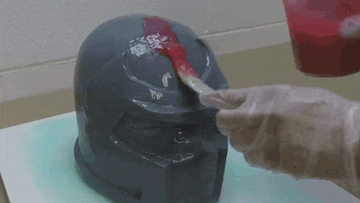
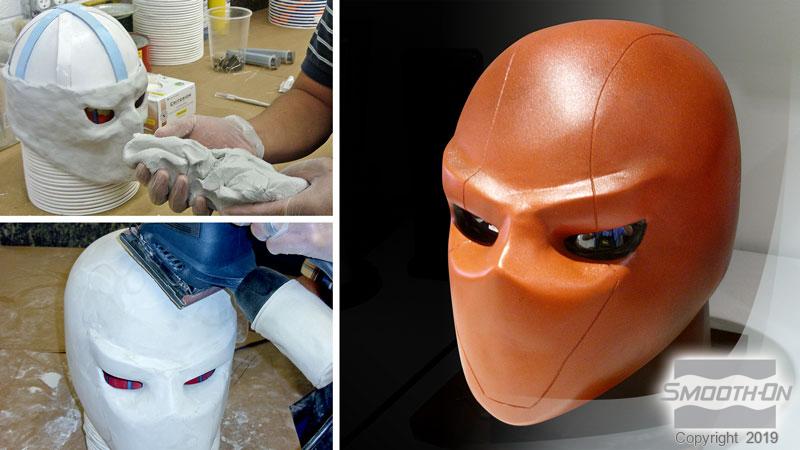 Free Form® AIR used to make a lightweight cosplay helmet.
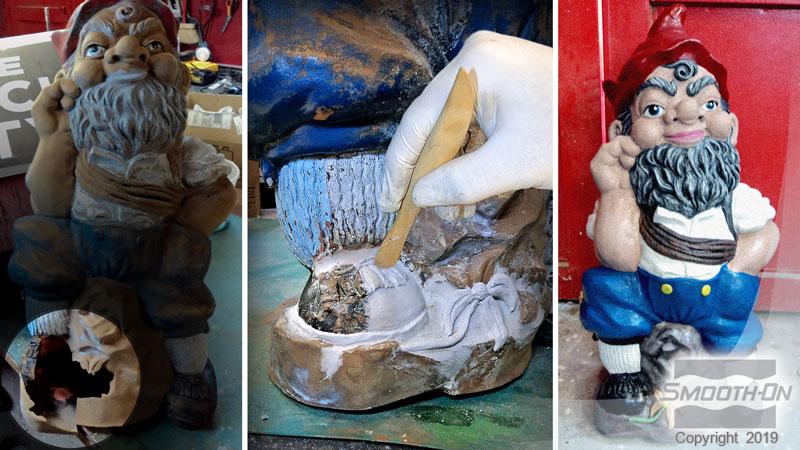 Free Form® AIR was used to repair this garden gnome.
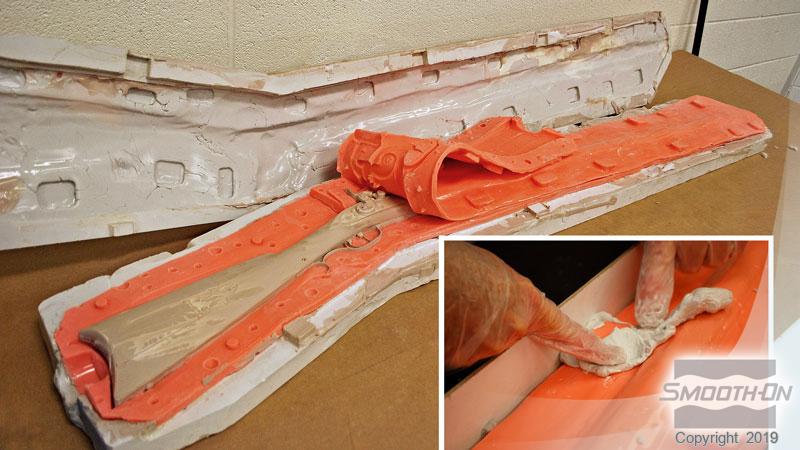 Free Form® AIR used to make a lightweight support shell for this Rebound® silicone rubber mold of a replica Kentucky rifle.
 Free Form® AIR used to make a lightweight support shell for this Rebound® silicone rubber mold of a replica EpoxAcoat® Captain America helmet.


Instructions
Safety – Use in a well-ventilated area (“room size” ventilation). Generally, if you use any epoxy system on a regular basis, wearing a NIOSH approved respirator is advised. Wear safety glasses, long sleeves and rubber gloves to minimize skin contact. Wear nitrile or vinyl gloves only.
Preparation – Materials should be stored and used at room temperature (73° F / 23° C). This product has a limited shelf life and should be used as soon as possible. Mixing should be done in a well-ventilated area. Wear safety glasses, long sleeves and rubber gloves to minimize contamination risk. If making a 2 or more piece mother mold, apply appropriate shim apparatus to rubber mold exterior.
Because no two applications are quite the same, a small test application to determine suitability for your project is recommended if performance of this material is in question.
Applying A Release Agent – For releasing epoxy from non-porous surfaces such as resin, metal, glass etc., use Sonite™ Wax to prevent adhesion.
This product is mixed by hand. You must wear gloves when mixing this material, wearing vinyl gloves reduces inhibition risk.
MIXING & MEASURING - Free Form™AIR putty comes as two parts. Dispense equal amounts (golf ball size, for example) of Part A and Part B. These products have a limited shelf life and should be used as soon as possible.
Mixing - Knead parts together aggressively to a uniform color and apply quickly to surface of tool or mold.
Using Water as a Bonding Primer – Before applying Free Form™ AIR, spray a light mist of water over all surfaces. Do not allow water to pool.
Applying – Mixed Free Form™AIR is a dough that can be applied up to 1.5” (3.81 cm) thickness. Mix only enough Free Form to be used at one time. Free Form™AIR will bond to itself.
Laminating - Free Form™AIR can be used in conjunction with EpoxAcoat™ surface coat and EpoxAmite™ laminating resin to create a strong and lightweight composite tool or mold.
Use as a Sculpting Medium - Free Form™AIR can be applied to wire mesh armatures to create rigid forms for sculpting. Wire mesh for sculpting is available at most art supply stores. Free Form™AIR can be applied to polystyrene foam to create a hard, rough-sculptable and sandable surface. When applying to polystyrene foam, maximum thickness is 3/4” (1.90 cm).
Smoothing Surface – Epoxy surface can be smoothed with water or isopropyl alcohol.
Painting – Cured Free Form™ AIR can be painted and / or primed and then painted with acrylic enamel paints. Let paint fully dry before putting part into service.
Cure Time - Refer to specified Cure Times in the Product Overview section at room temperature depending on mass. Cured material will be hard and unable to penetrate with a finger nail. Cured epoxy can now be dry sanded. If machining or sanding, wear NIOSH approved mask to prevent inhalation of particles. Pot Life and Cure Time values are dependent on mass and mold configuration, as epoxies are mass-sensitive.
Heat Resistance – Fully cured putty with a minimum thickness of ½” (1.27 cm) will resist temperatures up to 140°F/60°C.
Removing Uncured Free Form™AIR Epoxy Putty - Remove as much uncured material from the surface as possible. Clean any residue with soap and water. Optional - Use E-POX-EE KLEENER™ available from Smooth-On.
Related Categories: Epoxy Putties
Related Series: Free Form™ AIR Series – Lightweight Epoxy Putty
How-To Articles
How To Make a Silicone Glove Mold for a Resin Cosplay Helmet
Jon N. shows us how he made a glove mold for his cosplay helmet
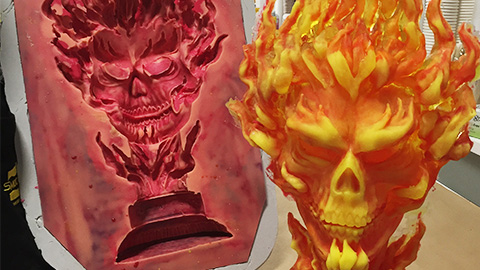
How To Mold and Cast a Resin Sculpture - Ghost Rider
Learn how to mold and cast a backlit bust of the infamous Marvel character, Ghost Rider.
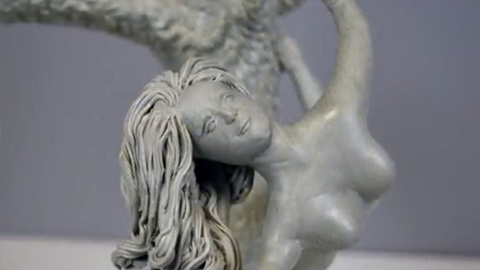
How To Sculpt with Epoxy Putty - Free Form™ AIR & SCULPT
Sculpting with Epoxy Putty - Free Form AIR & SCULPT Demo

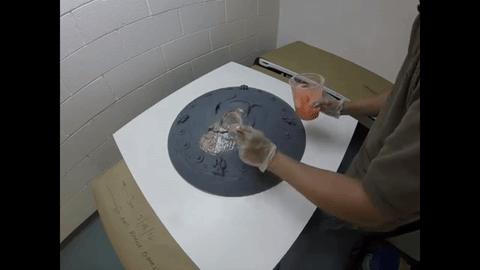
How To Create a Mold and Casting of a Prop Shield
A plaster replica of an ancient Roman shield is used to make light weight and strong reproductions for display.

High Tech Materials Create a Horrific Zombie
Zombies are more popular than ever in TV shows, movies, Zombie-walks, Zombie Parties and more.
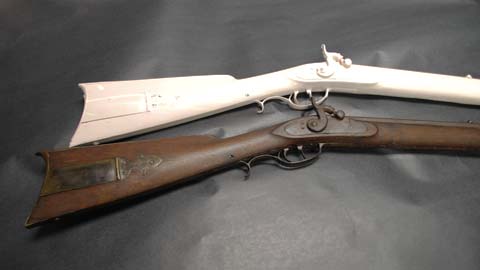
How To Make a Brush On Mold of an Antique Rifle
This tutorial shows how to make a two piece silicone mold of a historic firearm
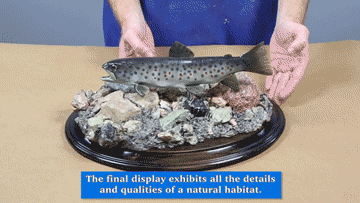
How To Make a Taxidermy Base Using Free Form™ Air Epoxy Putty
How to create a taxidermy habitat base using Mold Star® 16 silicone and Free Form® Air
How To Mold a Prop Shield For Cosplay
Jon N. shows us how he creates a mold for his Thundercats shield.
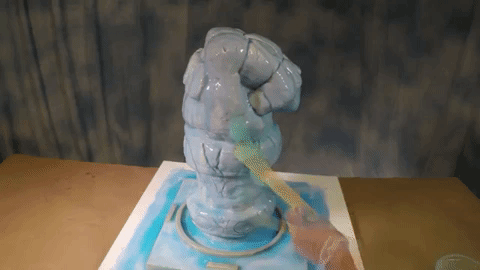
Cosplay Tutorial: How to Make a Silicone Brush Mold for a Hellboy Fist
Smooth-On fan Jon N. shows how he makes a mold for a large "Hellboy" inspired fist for cosplay.

Cosplay Tutorial: How To Sculpt a Hellboy Fist Model for Moldmaking
Smooth-On fan Jon N. models a large "Hellboy" inspired fist for cosplay
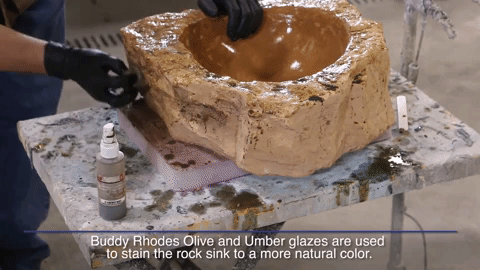
How to Make a Mold of a Rock for a Concrete Sink
Learn how to make a mold of a small boulder using Rebound 25 brush on silicone rubber.