How To Create a Mold and Casting of a Prop Shield

Overview
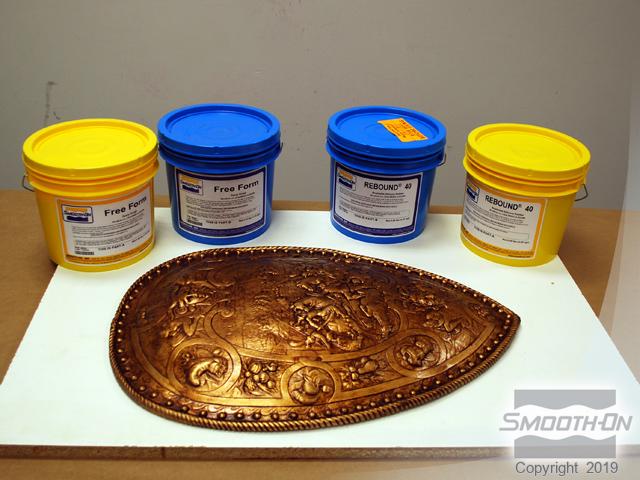
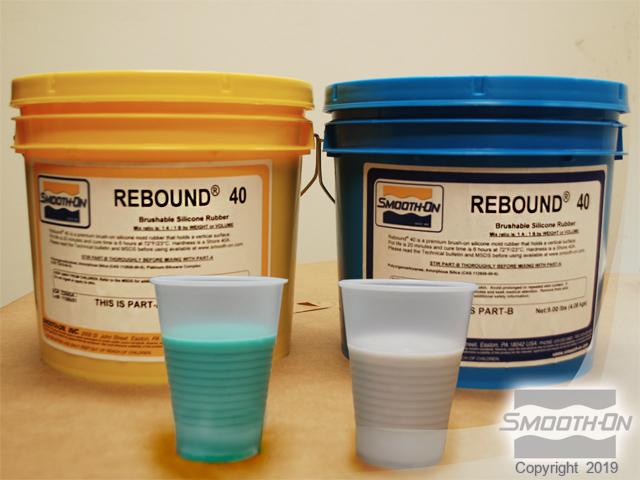
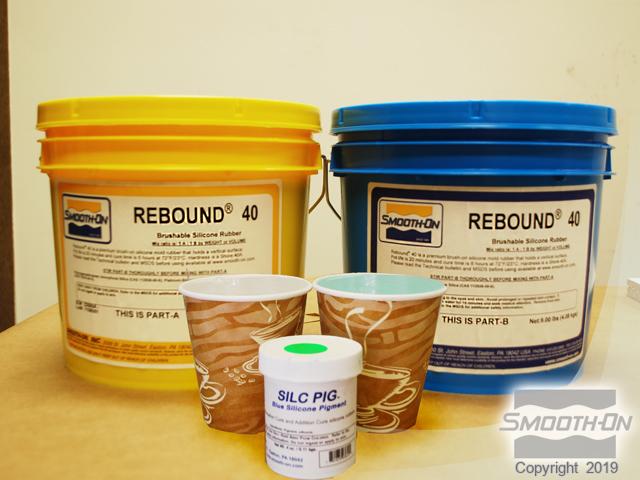
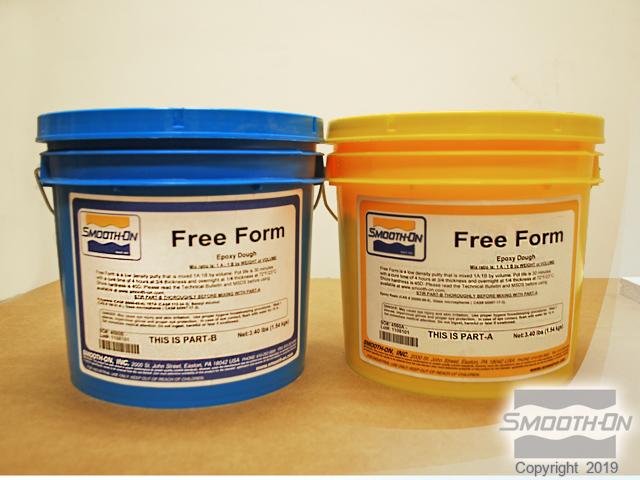
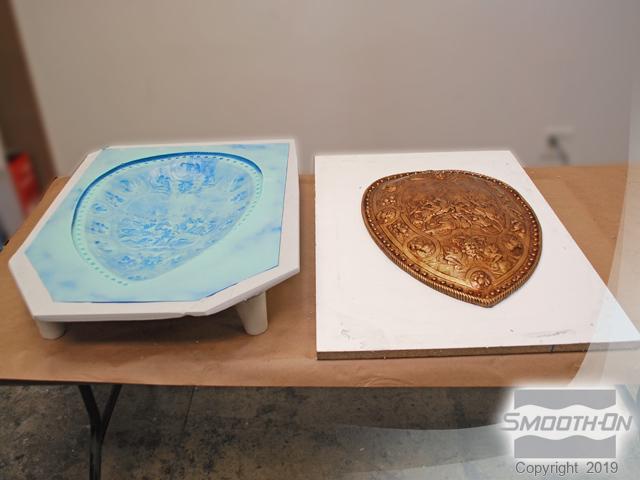
A decorative plaster replica of an ancient Roman shield is used as a master to make light weight and strong reproductions for display. It was quickly agreed upon that the best strategy for reproduction would be a brush on mold to save on material cost and weight due to the size of the original.Rebound™ 40 was selected as the rubber of choice because of it's ease of use and durability in a production setting.
Free Form™ Air was chosen both for the mother mold and the casting due to it's low cost, ease of use and superior strength. Couple this with it's light weight properties and it makes for a great general purpose product. The end result is a lightweight durable mold that is easy to handle and use as well as super lightweight castings that are durable and resistant to abuse. A perfect combination!
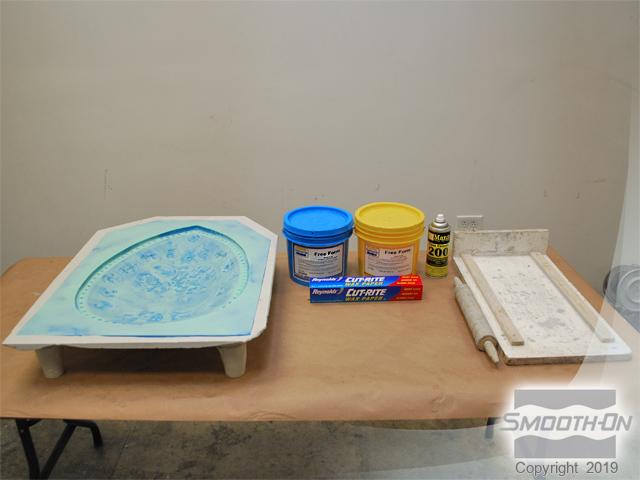
Materials Used in this Tutorial
- Free Form™ Air
- Rebound™ 40
- Silc-Pig™
- Sonite™ Wax
- Universal™ Mold Release
- Ease Release™ 200
- Hot Glue
- Wax Paper
- Wooden Stick
- Rolling Pin
- Level
- Mixing Containers
- Mixing Sticks
- Brushes
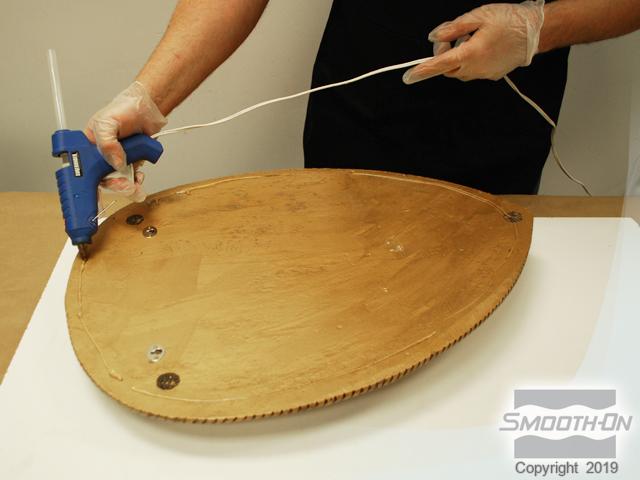
Step 1: Gathering Materials / Preparing for Mold Process
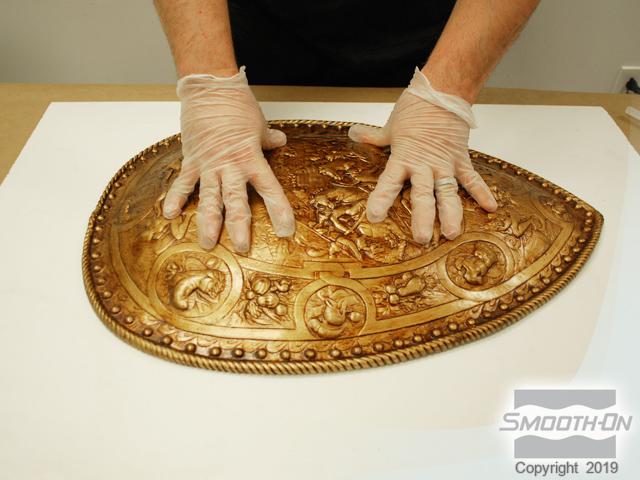
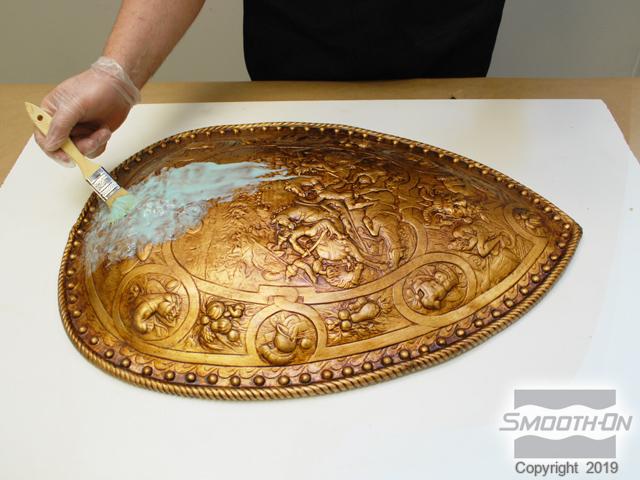
In this example, a decorative Roman Shield is used as a model for duplication.
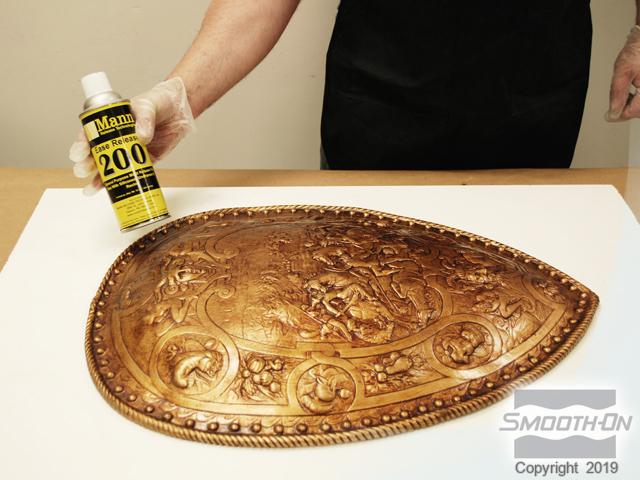
First, hot glue is applied to the back of the shield to adhere it to the board. Then the shield is pressed down on board to firmly secure it for the mold making process. A light mist of Ease Release 200 is sprayed on all surfaces for easy release of the Rebound 40 later on when the mold is finished.

Step 2: Creating a Brushable Mold Layer 1
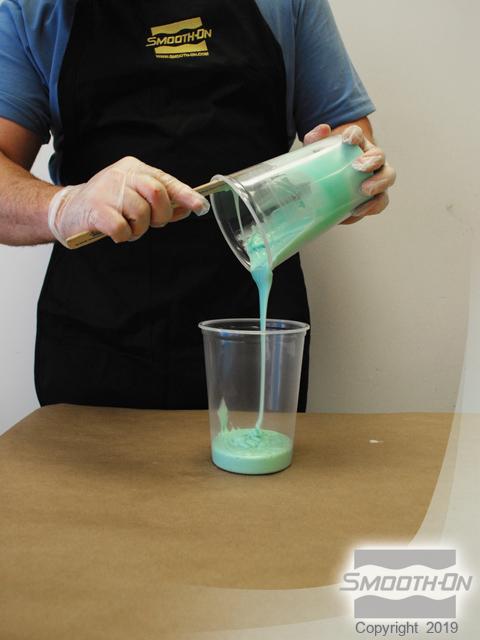
Rebound™ 40 is measured out 1:1 by volume for first layer. The individual components of the rubber are combined in a clean container for mixing. The rubber is double mixed in another container to ensure a proper consistency.
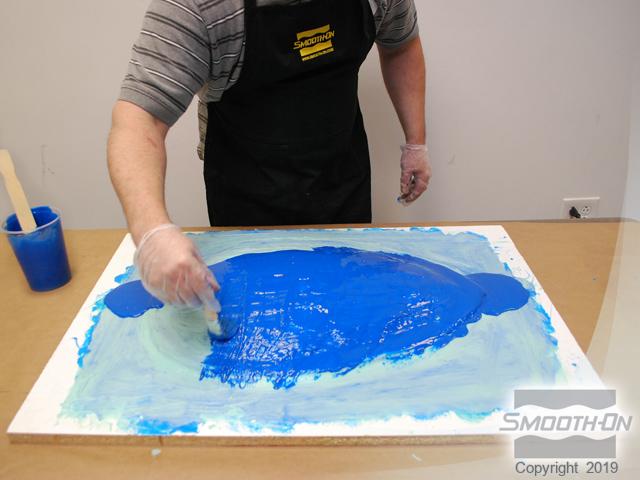
The first layer of Rebound™ 40 is brushed onto the surface of the shield. Until all the surfaces, including the board, are covered in a thin layer of rubber.

Step 3: Creating a Brushable Mold Layer 2
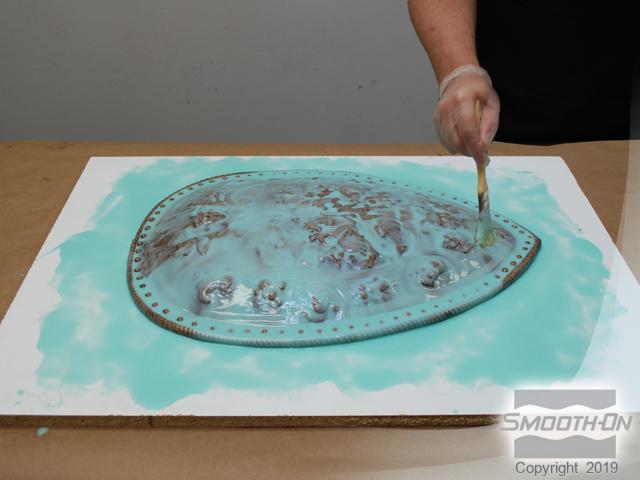
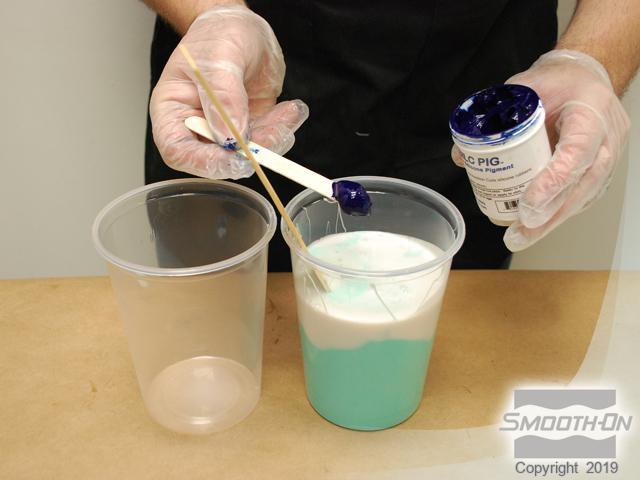
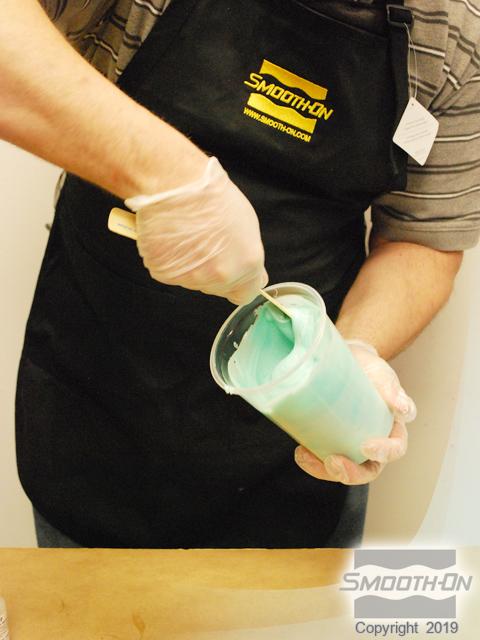
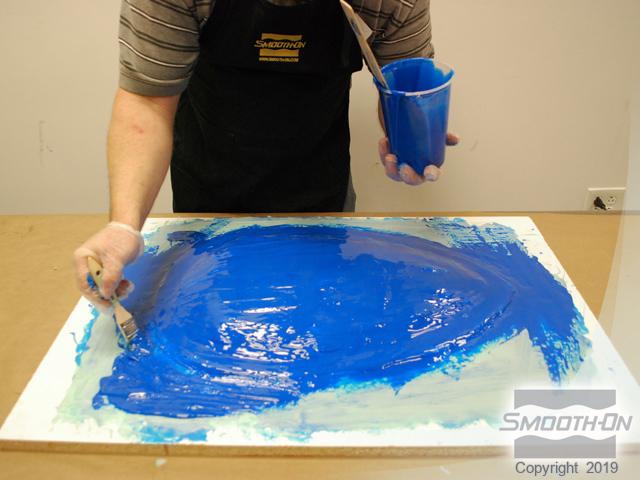
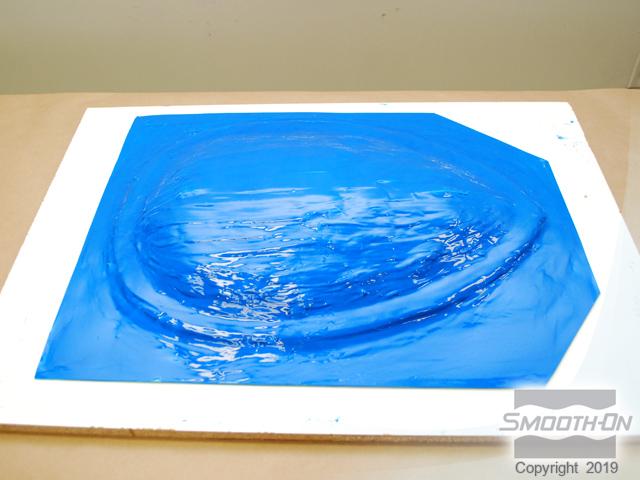
Silc Pig™ Blue is used for the second layer to distinguish it from the first layer, this will make it easier to see areas that need to be covered. A small amount of the Silc Pig™ is dispensed into the Rebound™ 40 and mixed in. A double mix into a new clean container is mimicked from the first layer.
The Silc Pig™ is thoroughly mixed in and the second layer is brushed over top the first layer.
Step 4: Creating a Thickened Mold Layer 3
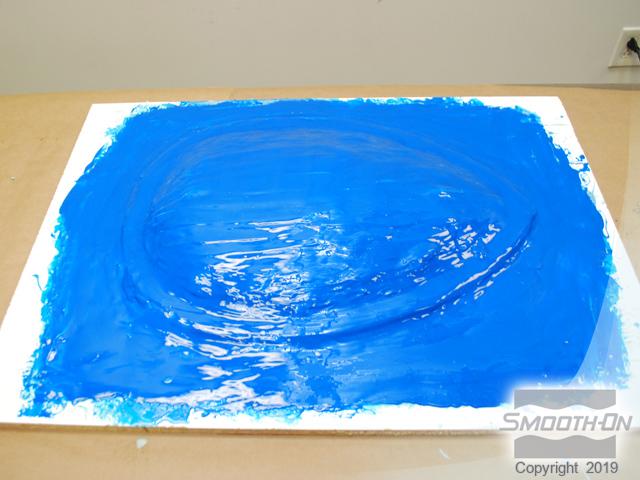
Thi-Vex™ is used in the third layer to thicken the rubber prior to brushing. Thi-Vex™ produces a very thick product for filling in undercuts and potential weak areas.
The thickened rubber is brushed in where the shield meets the board in order to make a tough strong edge.


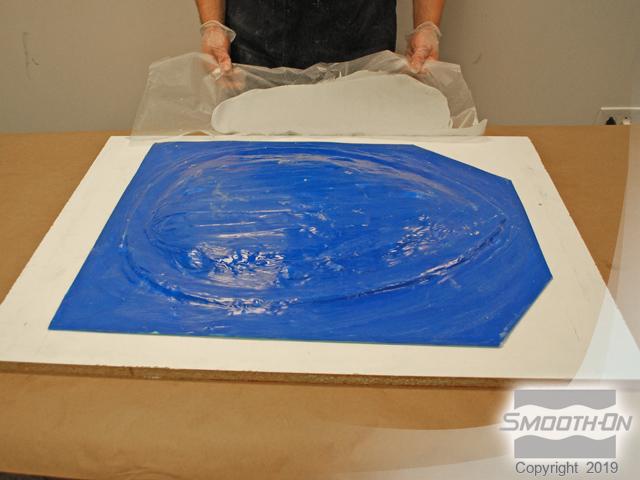
Step 5: Creating an Unthickened Layer 4
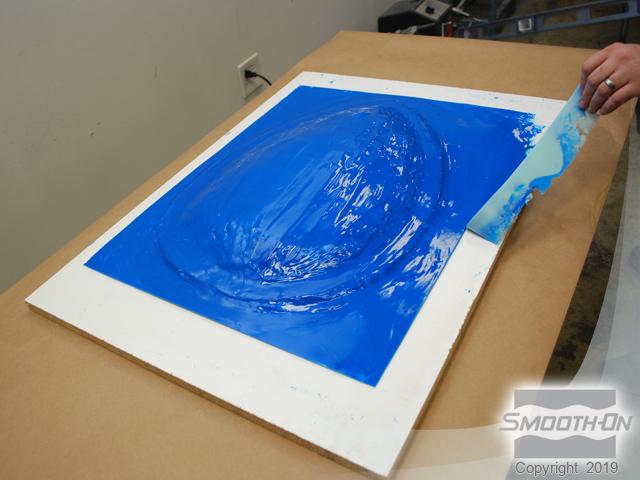
A last, colored and unthickened layer of Rebound™ 40 is applied to the shield mold to even out all surfaces. The rebound™ 40 mold is allowed to fully cure for 6 hours.
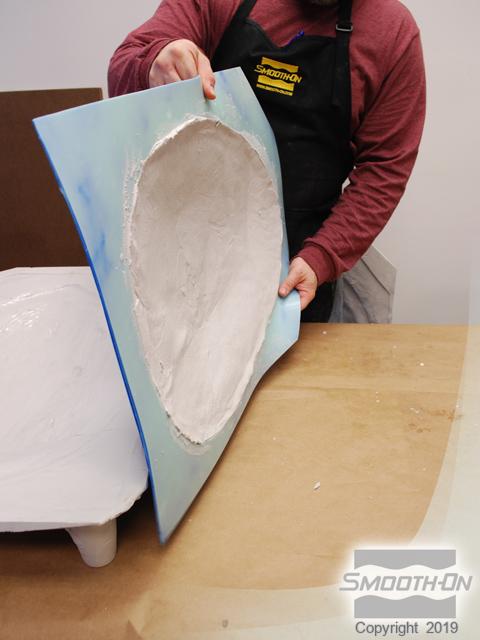
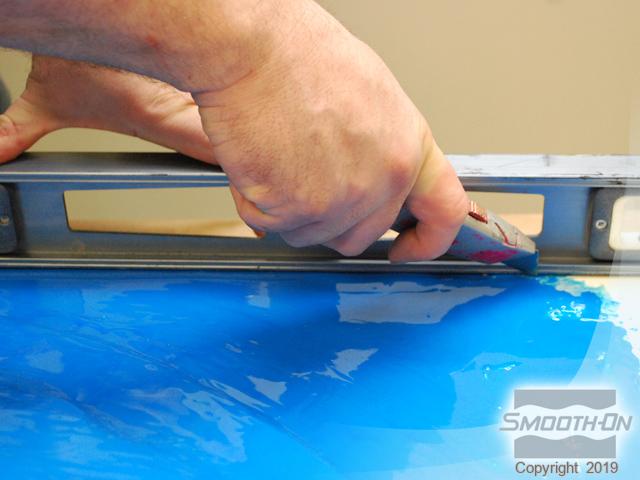
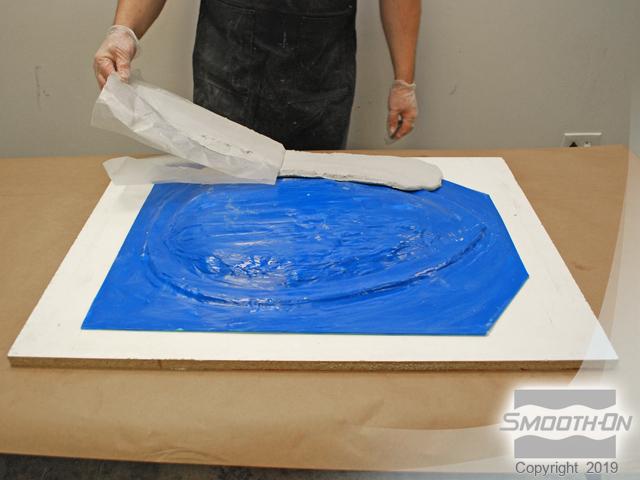
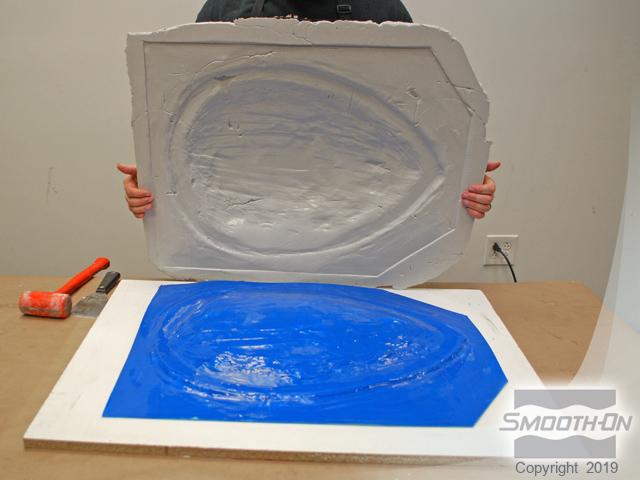
Once cured, a straight edge and utility knife are used to clean up the edges of the rubber. Rubber flashing peels away from the board easily. The finished Rebound™ 40 mold is ready for the support shell.
Step 6: Creating a Support Shell Using Free Form™ Air
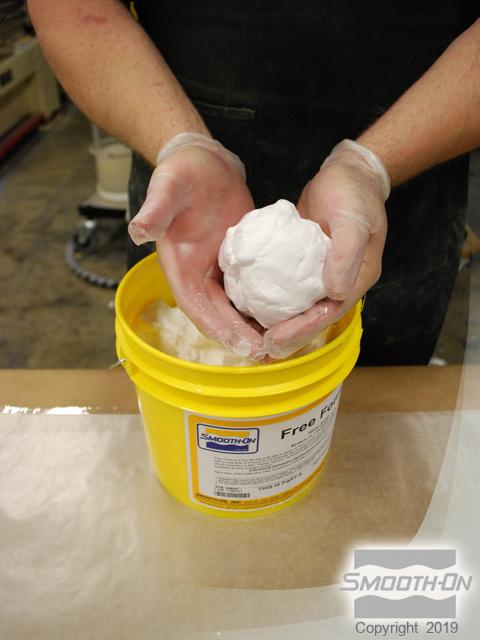
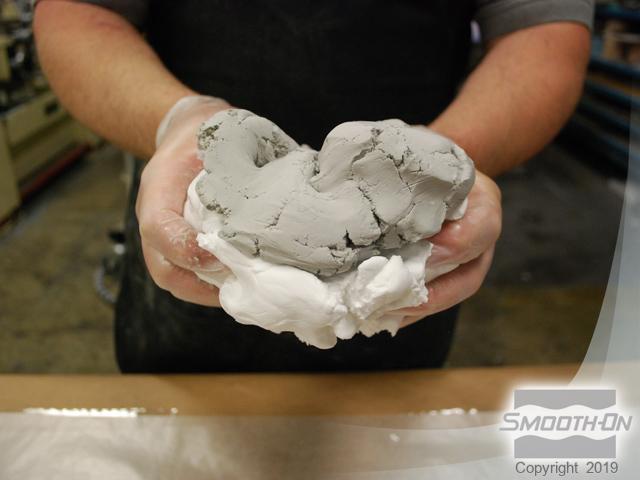
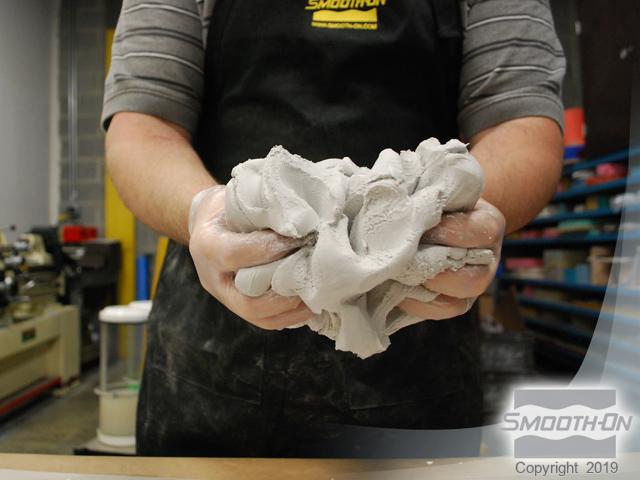
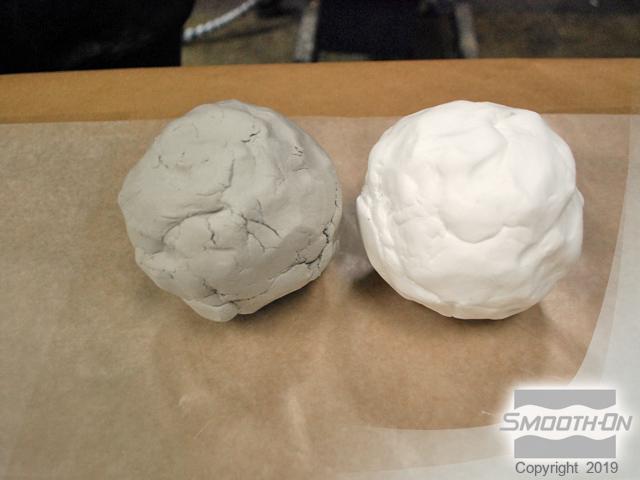
Free Form™ Air Molding putty is chosen as a lightweight and strong mother mold material. Free Form™ Air is a lightweight putty that is easily dispensed by hand.
Two equal sized portions of Free Form™ Air are dispensed for easy 1:1 mixing of the product. Free Form™ Air is hand mixed together. Mixing is complete when a uniform color has been achieved.
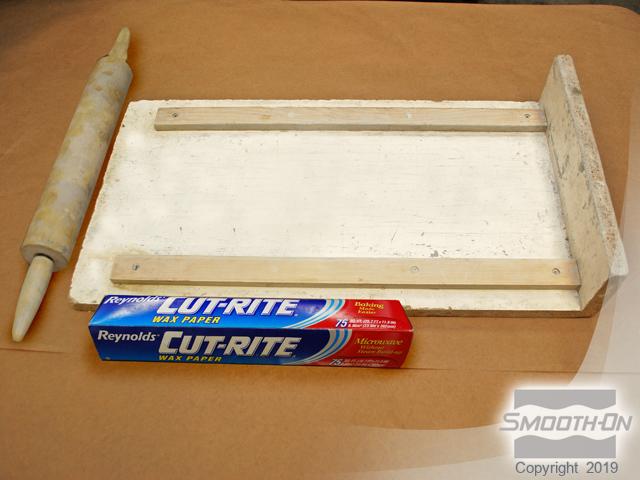
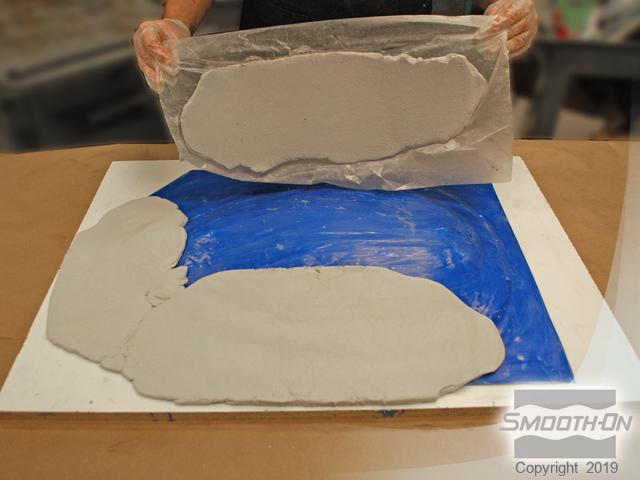
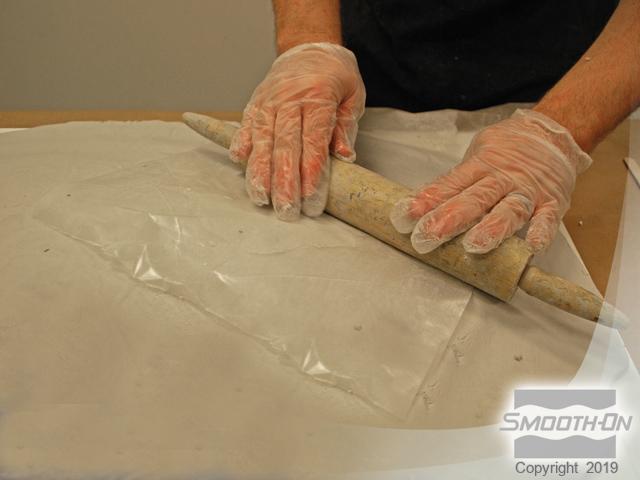
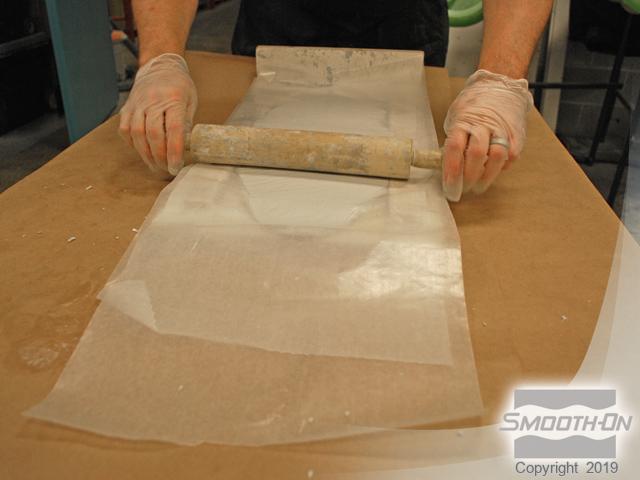
A rolling pin, board, and wax paper will be used to roll out the putty into an even thickness. A sheet of wax paper is placed over the board and the Free Form™ Air is pressed into the wax paper.
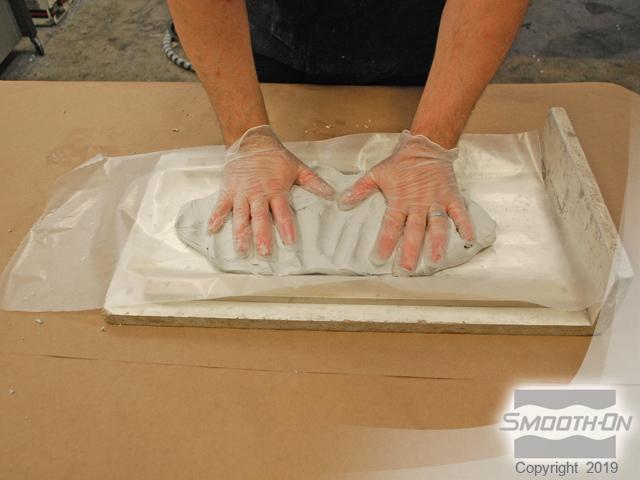
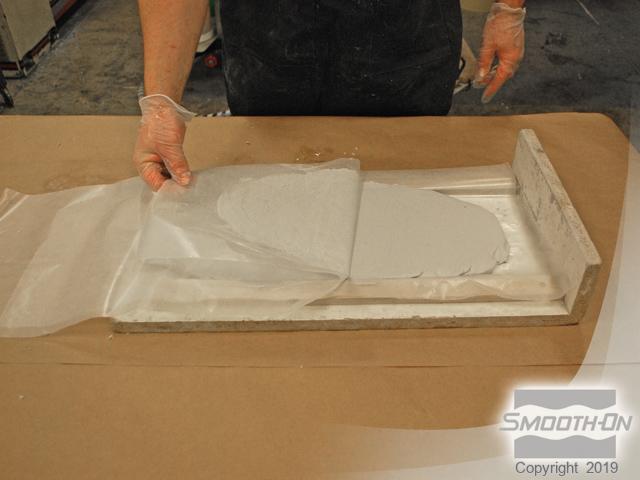
A second layer of wax paper is placed over top the Free Form™ Air and then a rolling pin smooths out the putty to the thickness of the guides on the board. The top layer of wax paper is removed to reveal a smoothed out layer of Free Form™ Air that is now the desired thickness (3/8'') for the support shell.
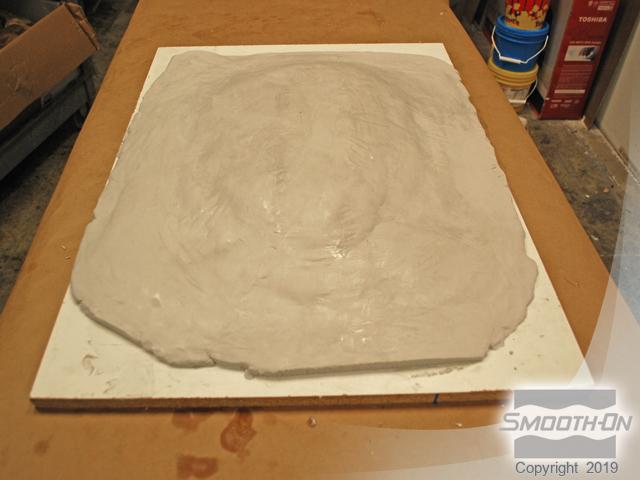
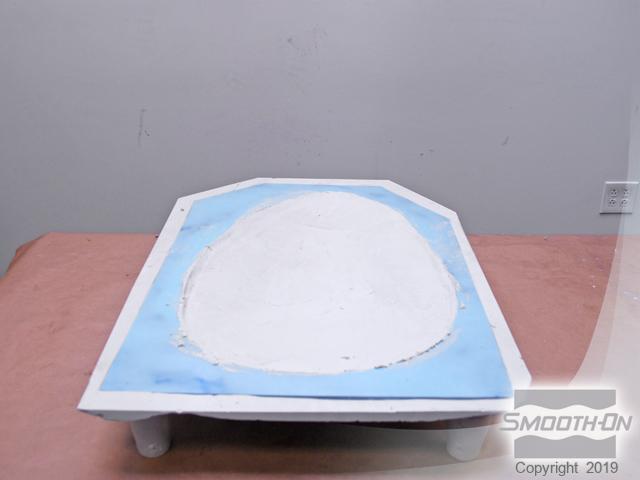
Free Form™ Air, while still on wax paper is positioned over the mold, ready to be pressed into place. The Free Form™ Air, is placed in place and the wax paper is peeled back, leaving the Free Form™ Air on the mold. This method is repeated over the entire model, covering all surfaces.
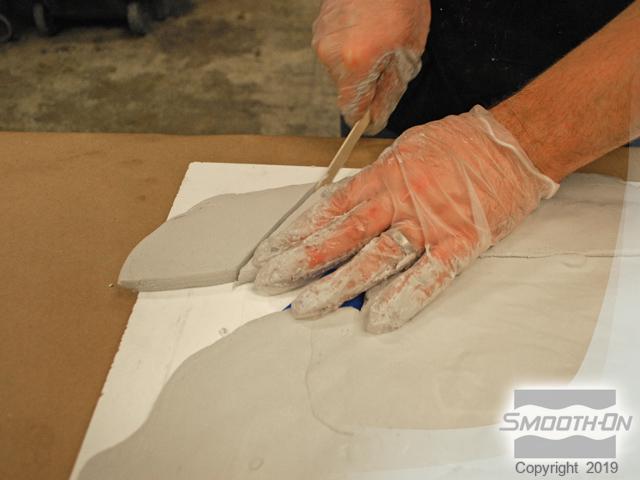
Excess Free Form™ Air can be trimmed with a wooden stick while it is still uncured thus eliminating any waste and making for little post-clean up work. Wax paper can be applied to the entire mold and the putty can again be rolled thus eliminating seams and making a nice uniform mother mold. The completed mold is seam-free and ready for the next step.
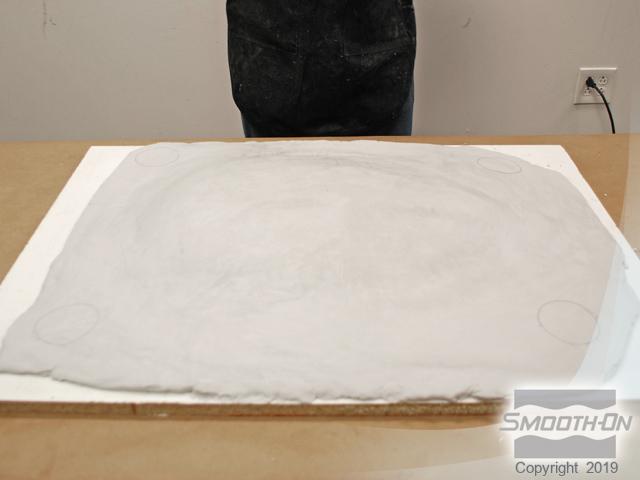
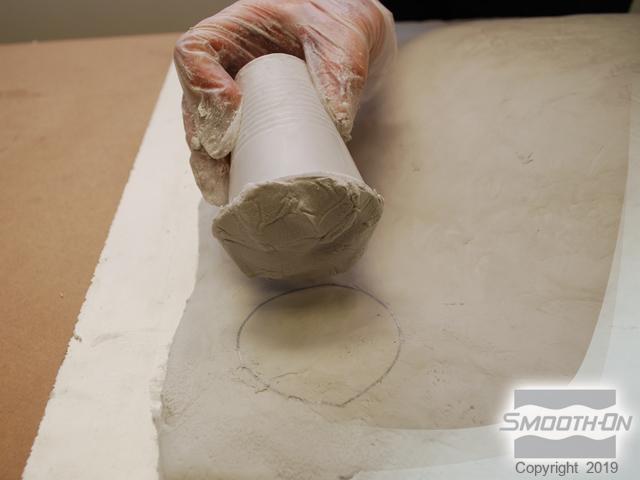
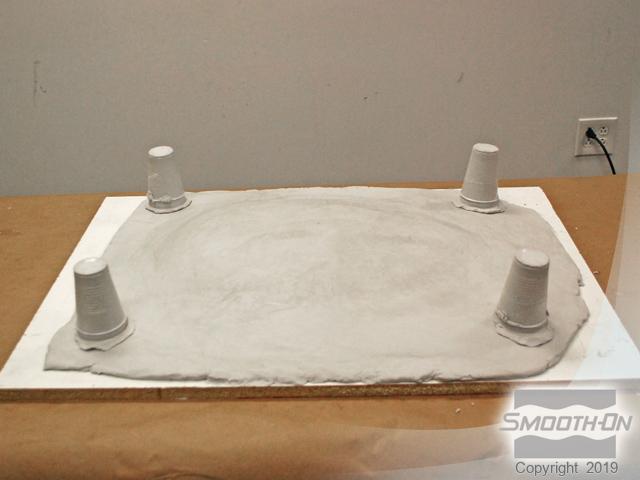
Plastic cups are positioned onto the putty in order to judge leg placement for the mold support. The impressions left from the cups marks are where the legs will be placed on the mold.


Step 7: Creating Supports Using Free Form™ Air
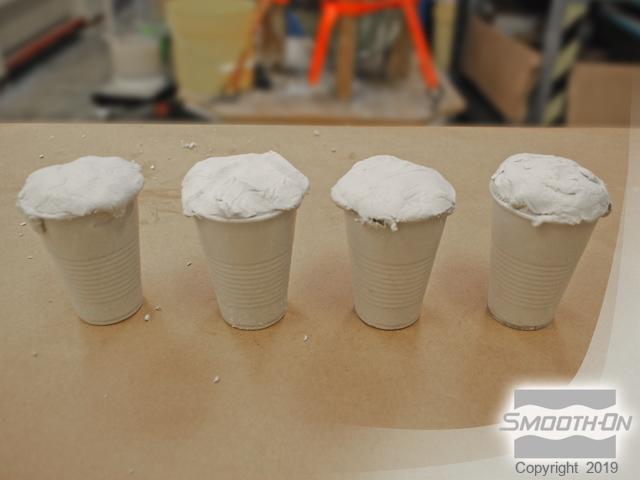
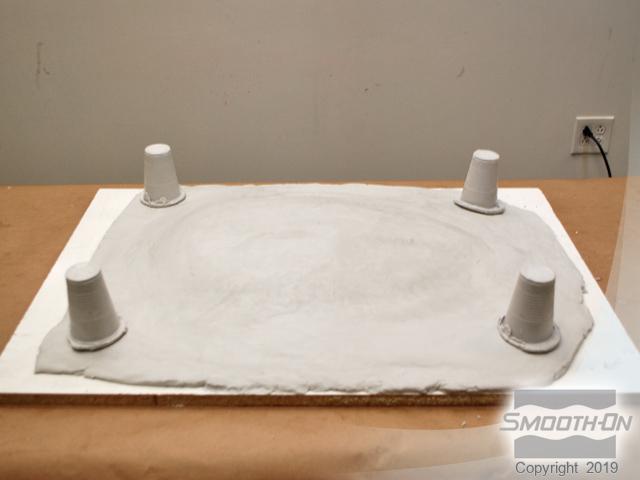
More putty is mixed and each cup is filled with the mixed putty. The cups are slightly overfilled to allow for ease of leveling out the final base. Cups are placed back onto the mold where the impressions were made. All four cups are now in the proper position.
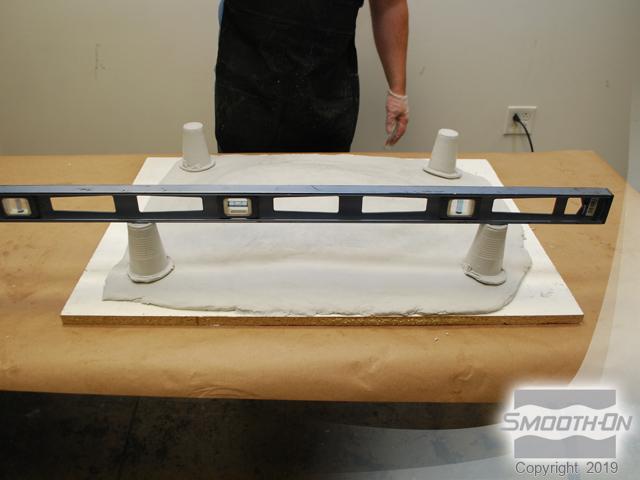
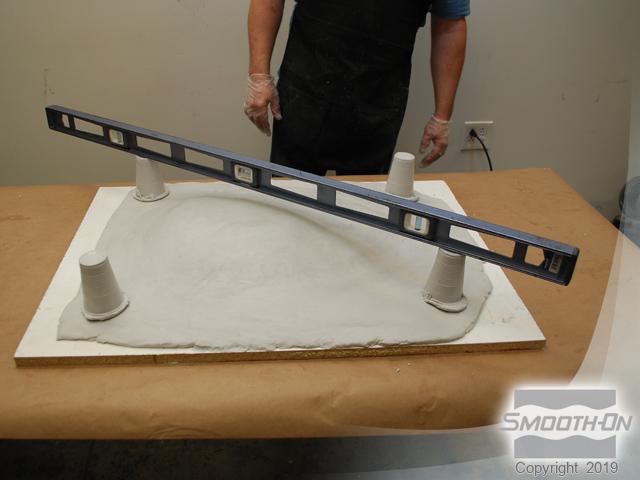
A level is used to make sure that the mold will sit solid once it is cured. All cups aligned perfectly thanks to the extra putty placed in each cup, which allowed for adjustment.
Free Form™ Air is allowed to fully cure overnight.

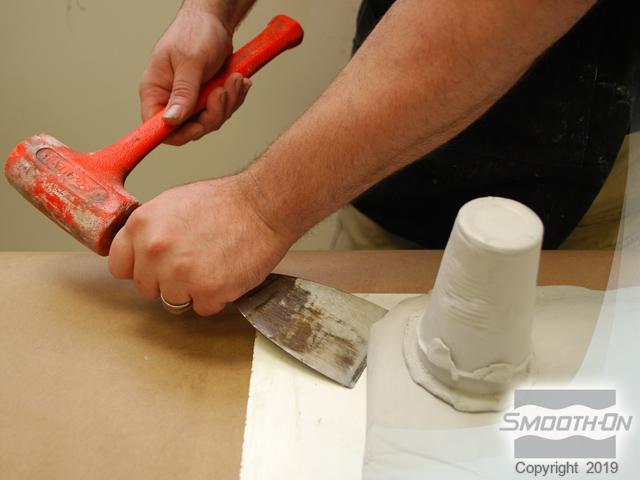
Step 8: Demold
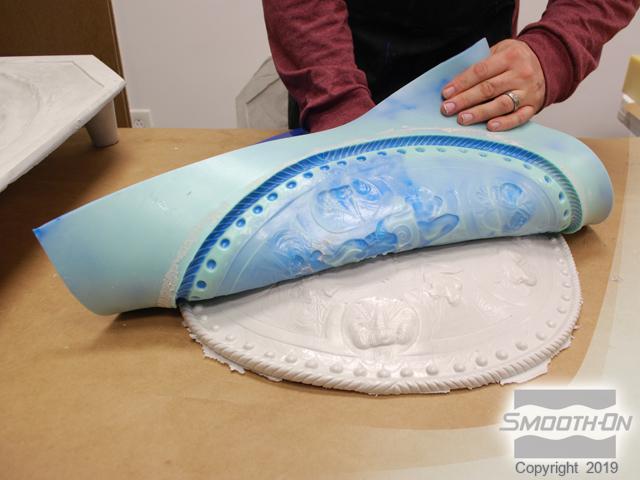
In the morning, the mother mold is pried from the base board. The Free Form™ Air shell is removed easily from the Rebound™ 40 mold. The Rebound™ 40 is peeled away from the master.
The Free Form™ Air mother mold is sanded smooth and the Rebound™ 40 fit back in, producing a perfect mold that captures all the detail of the original. The mold is now ready for casting Free Form™ Air into it.
Step 9: Casting with Free Form™ Air
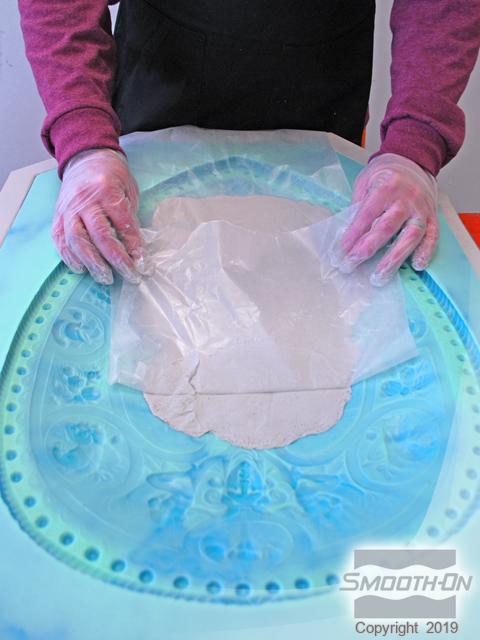
Two coats of Ease Release 200™ are applied to the molding surface. Wax paper is laid over top the rolling pin board in preparation of the Free Form™ Air.
Free Form™ Air is dispensed in equal amounts for the first layer of the casting. Once again, Free From™ Air is mixed to a consistent color, placed on the board with a layer of wax paper placed over top and rolled out to a even thickness. The top layer of wax paper is pulled off revealing an evenly rolled out layer of Free Form™ ready to be applied to the molding surface
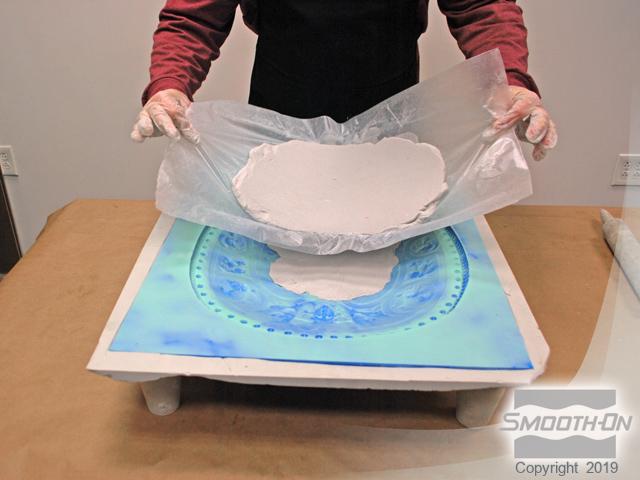
The first layer of Free Form™ Air is positioned and placed into the molding surface. The Free Form Air is then pressed into all the detail on the surface of the mold. The wax paper is removed from the Free Form™ Air.
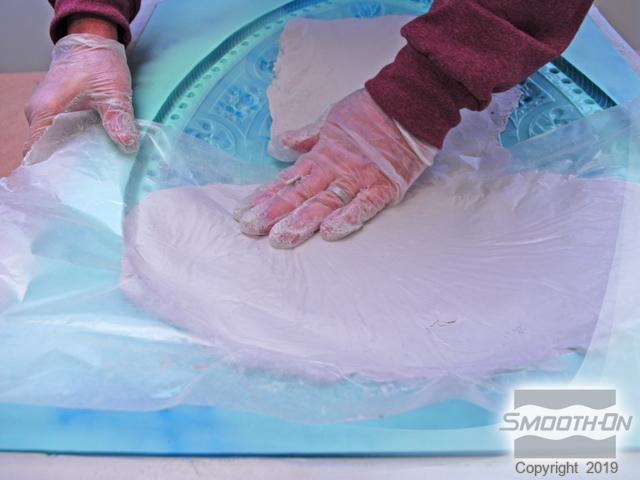
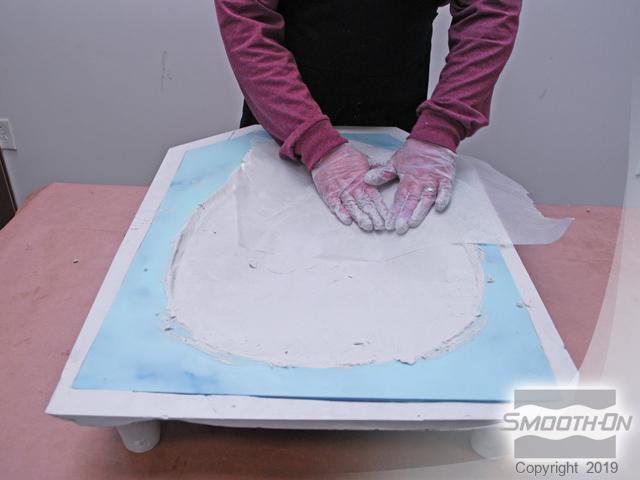
Additional pieces of Free Form™ Air are applied like the first piece. Each piece is carefully applied to the mold surface slightly overlapping a neighboring piece. Care is given to making sure seams are tightly pressed in, when applying additional pieces adjacent to each other. All sections of the molding surface is covered with Free Form™ Air and all seams properly blended together.
The casting is allowed to fully cure overnight.


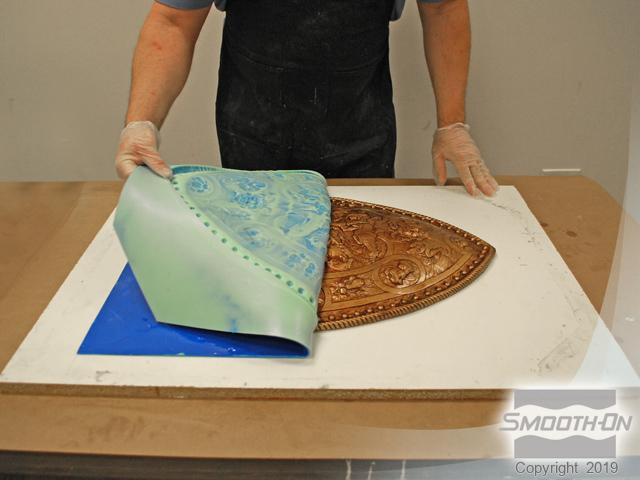
Step 10: Demold/ Finishing Casting
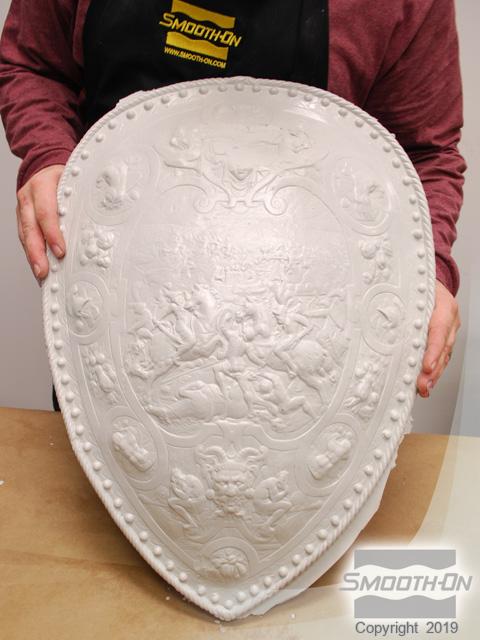
The next day, the Rebound™ 40 mold with the cured casting is removed from the mother mold. The Rebound™ 40 is easily peeled back off of the casting. The finished casting reflects perfect detail, is light weight and strong!
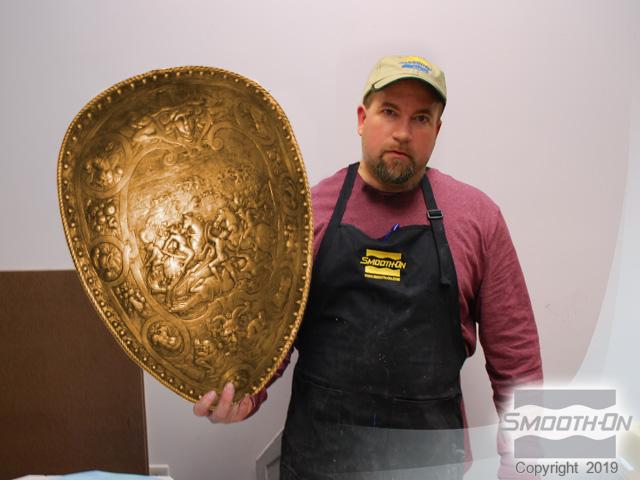
Post Finishing - Free Form™ Air is easily painted with acrylic paints.