EpoxAmite™ WHITE 102
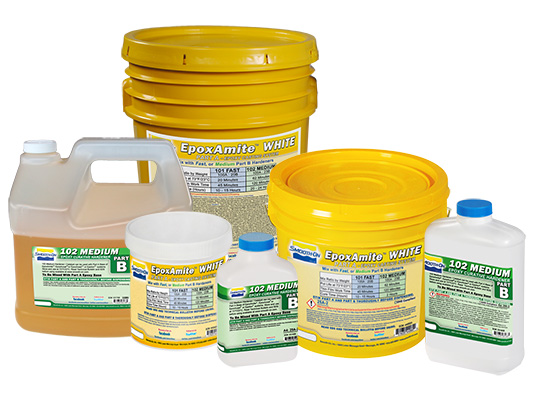
EpoxAmite™ White Epoxy Laminating System is an easy-to-use liquid epoxy system formulated for a wide variety of fabrication applications. EpoxAmite™ White Laminating System is odorless and cures at room temperature. Cured epoxy displays exceptional physical and performance properties. It can be sanded, shaped, machined, drilled, tapped and painted.
EpoxAmite™ White Laminating System can be used with reinforcements such as S-Glass, E-Glass, Kevlar and Carbon fibers for lay-up& applications or composite parts. EpoxAmite™ White Resin can also be mixed with fillers such as fumed silica for gel coat applications. Urefil™ 3, Urefil™ 7 and other fillers can be added for fairing, filleting or bonding applications.
Features
Applications:
- Wet Lay-Up Lamination
- General Bonding & Repair
- Gel Coating
- Barrier Coating
- Thin-Section Casting
- Water Proofing
- Patching & Small Laminates
Advantages Include:
- Easy-to-Use
- Excellent Moisture Resistance
- Low Viscosity
- Non-blush Formula
- Easy-to-Mix & Apply
- Exceptional Physical & Performance Properties
› Click here for more EpoxAmite™ resin products.
Instructions
Preparation – Avoid breathing fumes - use in a well ventilated area at minimum. NIOSH approved respirator is recommended. Wear safety glasses, long sleeves and rubber gloves to minimize skin contact. This material has a high exotherm (generates heat). Do not mix components in glass or foam containers.
Materials should be stored and used in a room temperature environment (73°F/23°C). Elevated temperatures will reduce Pot Life. EpoxAmite™ White Resin and 101 or 102 Hardener must be properly measured and thoroughly mixed to achieve full, high-strength, solid-cure properties.
Applying A Release Agent – For releasing epoxy from non-porous surfaces such as resin, metal, glass etc., use Ease Release™ 200 or 205 (available from Smooth-On) to prevent adhesion.
Measuring / Dispensing – Accurate ratio measurement by weight is required for the material to cure properly and develop full physical properties. Refer to specified Mix Ratios in Handling Properties for proper measurements. Dispense Parts A and B proper proportions into clean plastic, metal or wax-free paper containers.
Adding Color - EpoxAmite™ White Epoxy Laminating System can be colored with UVO™ or Ignite™ colorants (from Smooth-On). Pre-mix tint with Part A thoroughly and then add Part B.
Mixing – Be sure mixing utensils are clean and free of any potential contaminants such as dirt, dust or grease. Mix Parts A and B thoroughly for at least 3 minutes with a square edged mixing stick. Be aggressive and scrape sides and bottom of mixing container several times. Use the square edge of mixing stick to bring material off of the sides of container and blend. If using a drill mixer, follow with hand mixing as directed above to ensure thorough mixing. NOTE: If mixture is to be used for coating, pour into a roller pan to extend Pot Life.
Adding Fillers - A variety of dry fillers can be added. Pre-mix dry filler with Part A before adding Part B.
Important - Mixed EpoxAmite™ White Resin with EpoxAmite™ 101 or 102 Hardener is exothermic, meaning it generates heat. A concentrated mass of mixed epoxy in a confined area such as a mixing container can generate enough heat to melt a plastic cup, burn skin or ignite combustible materials if left to stand for its full Pot Life. Do not use foam or glass mixing containers or pour sections thicker than 1/8” (0.32 cm). If a batch of mixed epoxy begins to exotherm, move it to an open air environment.
Applying – Mixed EpoxAmite™ White is initially a low viscosity liquid that can be poured up to 1/8” (0.32 cm) thickness.
Laminating - cut the bristles of a chip brush 30% for better control. After epoxy is mixed, you must work quickly to apply multiple layers. Brush an initial gel coat of epoxy over surface. Apply reinforcement fabric evenly into gel coat. Using brush, gently use stippling motion to work fabric into epoxy. Ensure fabric ply is saturated. Plastic polyethylene spreaders may also be used.
Alternate additional thin layers of epoxy and fabric using above application method. Add additional epoxy as needed to wet out subsequent layers. Repeat as necessary until desired thickness is attained. After final layer of fabric is applied, use lamination roller to evenly distribute epoxy and reduce air bubbles. Be mindful of your Thin Film Working Time.
Cure Time - Refer to specified Cure Times in Handling Properties at room temperature depending on mass. Cured material will be hard and unable to penetrate with a finger nail. Cured epoxy can now be dry sanded. If machining or sanding, wear NIOSH approved mask to prevent inhalation of particles.
Heat Curing - This product will cure at room temperature and does not require heat. Cure time can be reduced by applying mild heat. The higher the curing temperature is, the higher the resulting Heat Deflection Temperature. With a higher temperature cure, a service temperature of 165°F / 74°C can be attained. Allow epoxy to cure for 30 minutes and then cure for 2 hours at 176°F / 80°C, followed by 1 hour at 212°F / 100°C. Allow casting to cool to room temperature before handling.
Painting – Cured EpoxAmite™ White Laminating System can be painted and / or primed and then painted with acrylic enamel paints. Let paint fully dry before putting part into service.
Removing Epoxy – Uncured / Non-curing epoxy - Scrape as much material as possible from the surface using a scraper. Clean the residue with E-POX-EE KLEENER™ available from Smooth-On, lacquer thinner, acetone or alcohol. Follow safety warnings pertaining to solvents and provide adequate ventilation.
Because no two applications are quite the same, a small test application to determine suitability for your project is recommended if performance of this material is in question.