How To Make a Custom Concrete Bench
Overview
Benchmark Stone's long-time reputation for quality in the concrete casting industry is widely known. Owner Keith Rohn's impeccable eye for detail and strict quality control standards are reflected in every casting. Mr. Rohn uses VytaFlex® mold rubbers because his castings come out of the molds with a smooth surface finish that he can't get from other mold rubbers that he has tried.
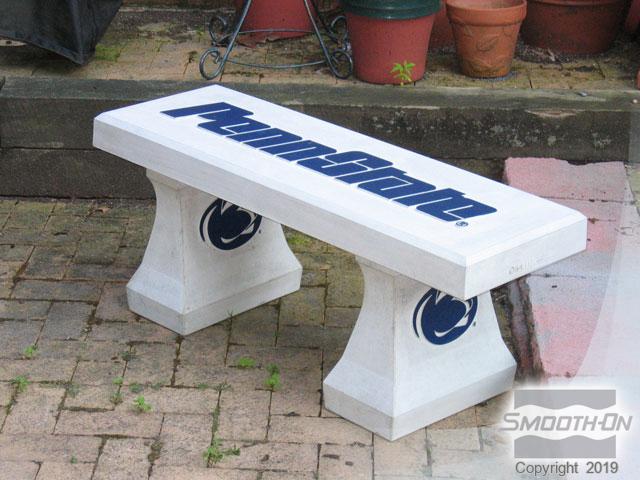
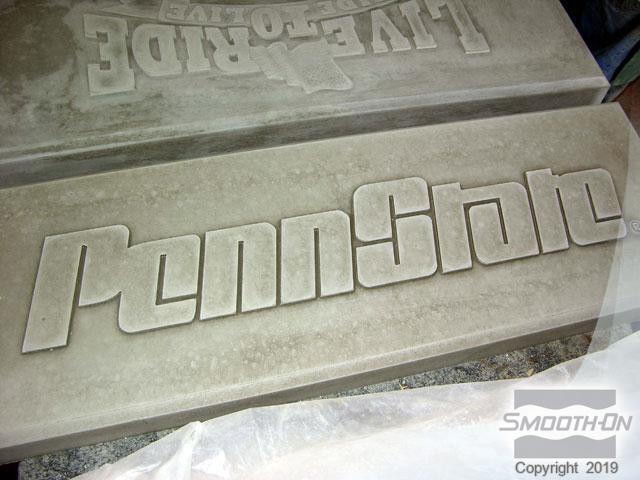
Benchmark's recent job for Penn State University involved making a custom concrete bench. Mr. Rohn once again turned to VytaFlex® for the mold rubber.
Materials Used in this Tutorial
- Mixing Sticks and Containers
- VytaFlex® 60
- SuperSeal®
- Universal® Mold Release
- Concrete
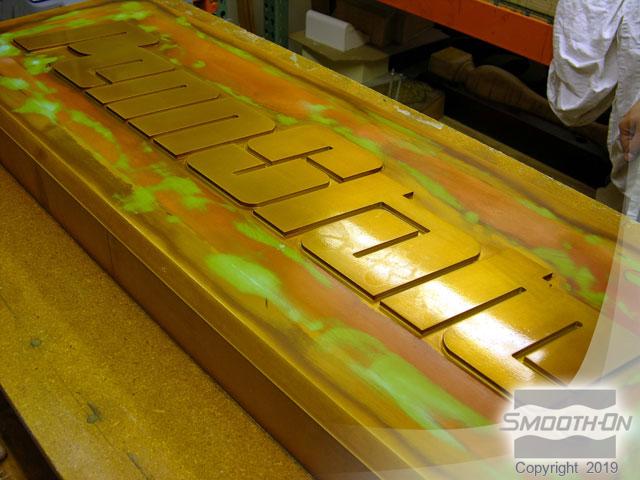
Step 1: Preparing Original Model
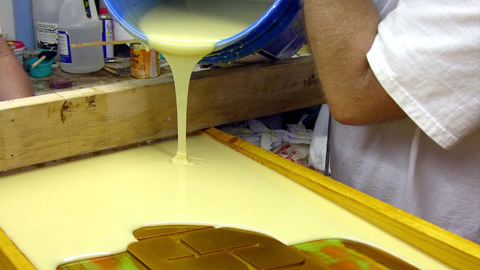
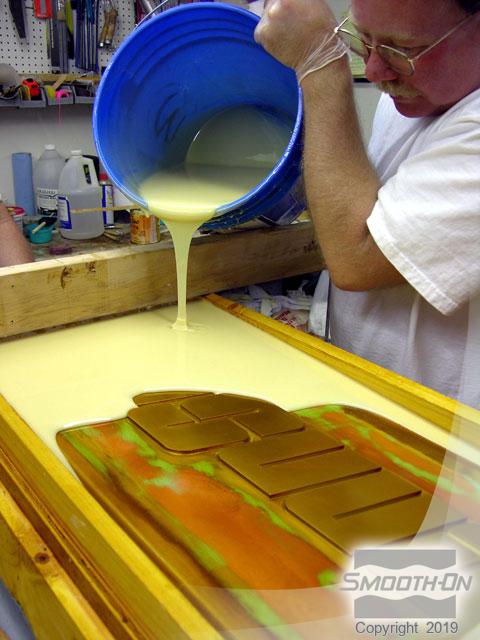
The original wood model is sealed with SuperSeal® sealing agent and Universal® Mold Release is applied to all surfaces that will come in contact with the mold rubber. VytaFlex® 60 is measured (1A:1B by volume), mixed, and poured over the model and allowed to cure overnight. The VytaFlex® 60 mold rubber cures to a durable rubber that will provide years of service.
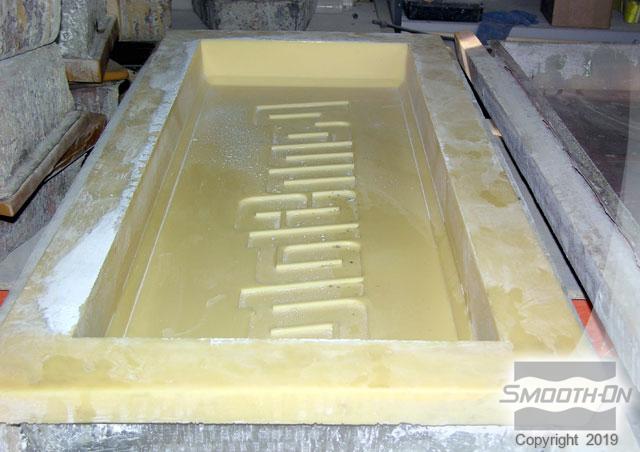
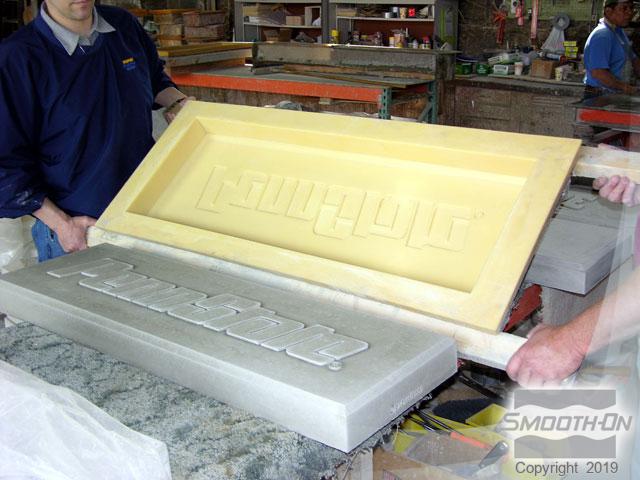
Step 2: Casting Concrete Bench Top
The concrete is mixed and poured into the Vytaflex rubber mold and allowed to cure for 24 hours. Once cured it is slowly demolded and the concrete bench is ready to be polished and painted.
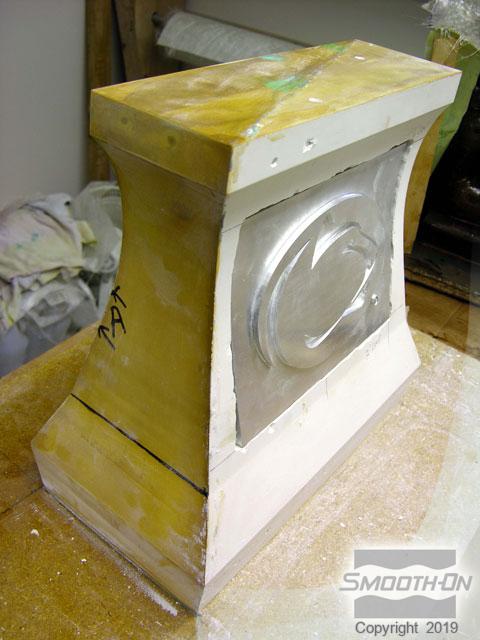
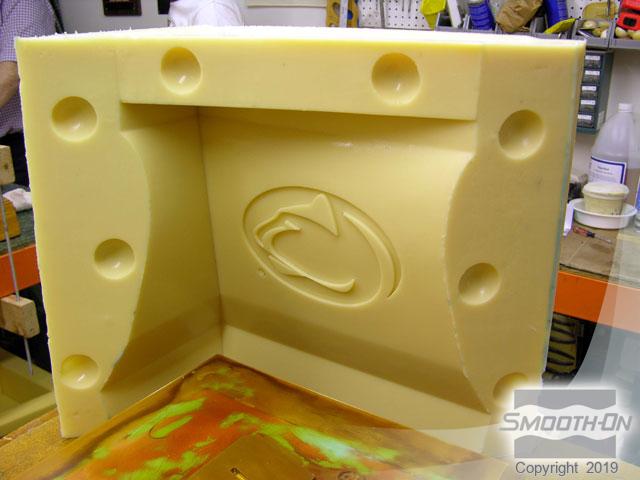
Step 3: Molding The Legs Of The Concrete Bench
Next, the original bench base is sealed with SuperSeal® sealing agent and Universal® Mold Release is applied to all surfaces. A 2-part VytaFlex® 60 mold is made from the base model. Concrete is then mixed and poured into the mold and allowed to cure for 24 hours.