Making A One Piece Cut Block Mold

Overview
A one piece cut block mold is a popular mold making method that has some definite advantages. This time saving technique yields an accurate production mold which also minimizes seam lines. Reduction of seam lines cuts down post finishing of castings and has less impact on detail. Smooth-On silicone rubber compounds cut very evenly and smoothly and are thereby an excellent choice for making a mold of this type. The following shows how to make a one piece cut block mold using silicone rubber and demonstrates how it can be used for casting plastic or a variety of other materials.
Materials Used in this Tutorial
- SuperSeal
- Silicone Rubber
- Melamine Board
- Hot Melt Glue Gun
- Ease Release 200
Step 1: Preparation
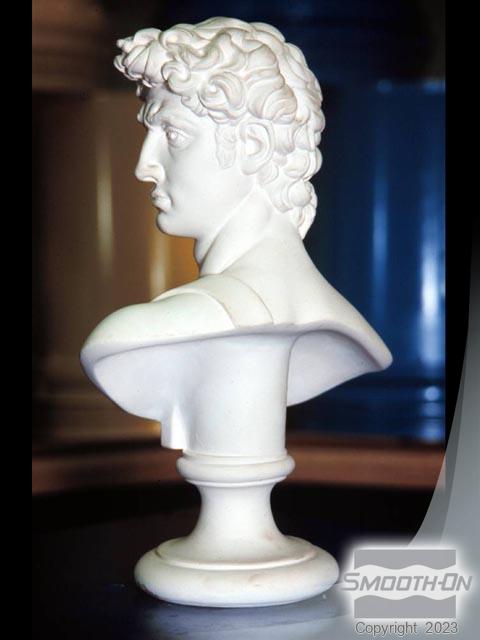
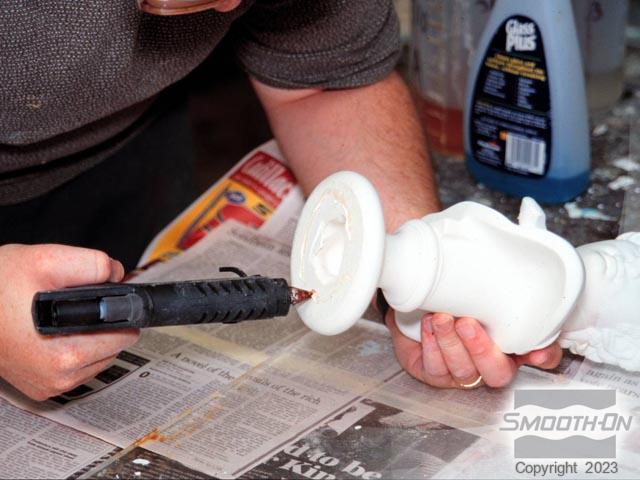
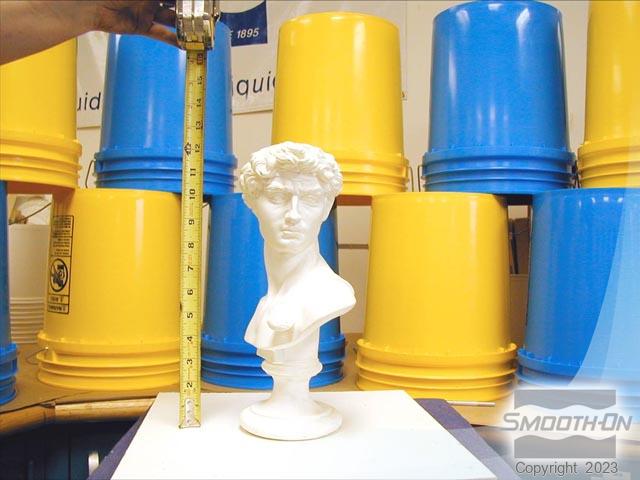
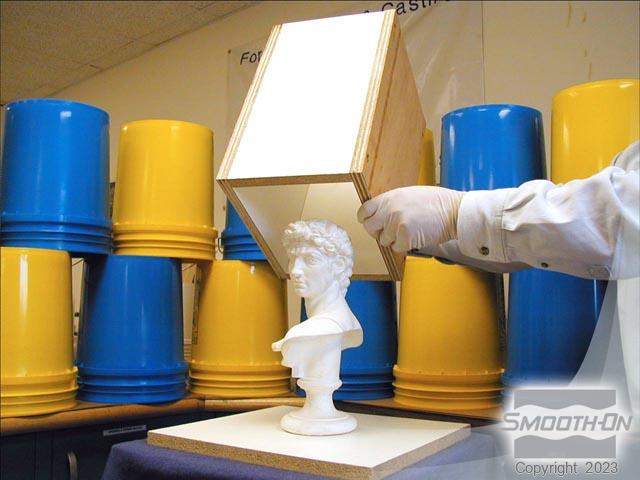
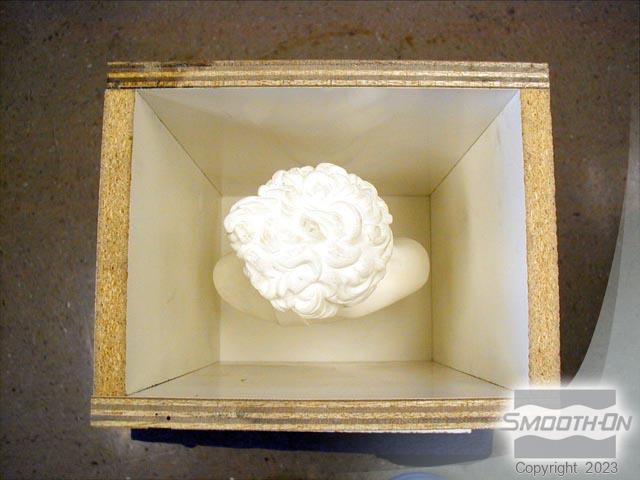
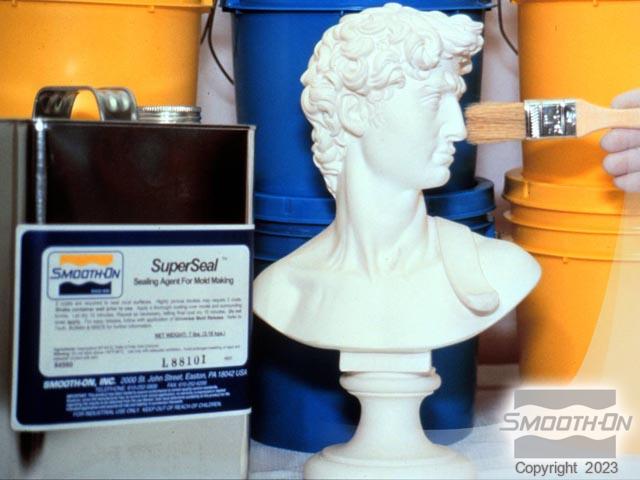
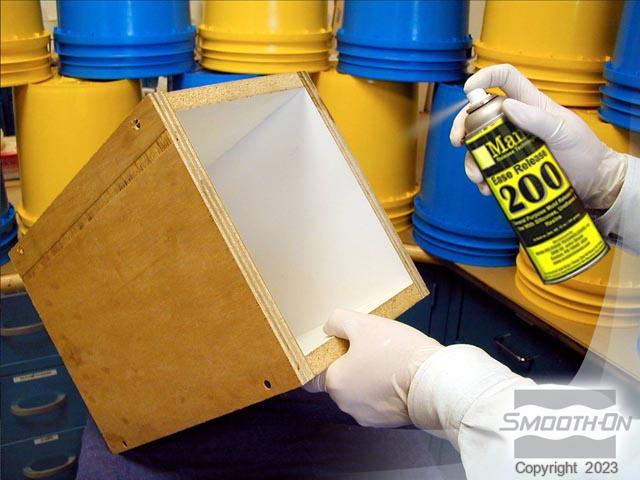
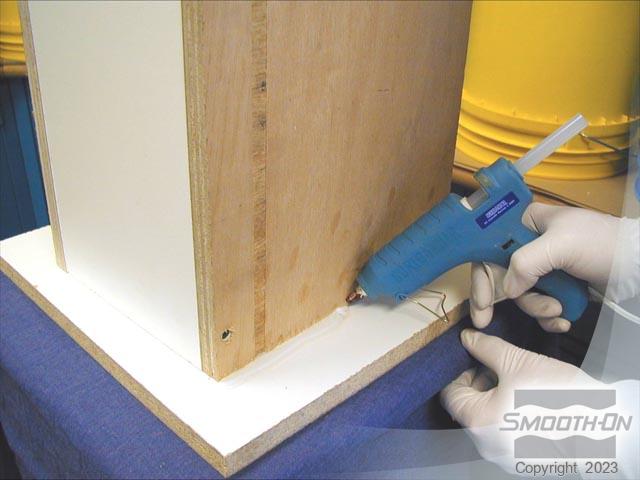
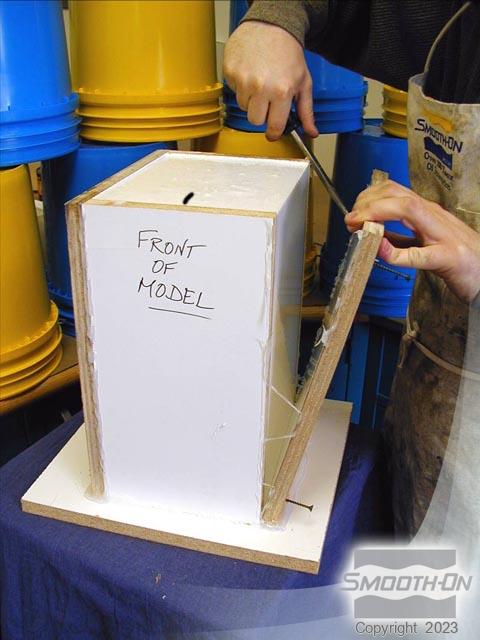
The original piece is made of plaster and has deep undercuts which will require a strong and flexible mold rubber such as a platinum silicone. The original is glued to a piece of melamine board using hot glue to prevent the model from floating in the liquid rubber. This will also prevent the rubber flowing under the model. We chose melamine board because it is waterproof and non-porous. Because the original is porous plaster, the surface of the original will need to be sealed to prevent the liquid rubber from soaking into and locking into the fine pores. We chose to use SuperSeal as the sealing agent. After sealing, a mold box is built around the model using more melamine board, allowing at least a half inch of space between the model and the inside of the mold box. The insides of the mold box walls are given a spray of Ease Release 200 release agent and allowed to dry, and then the mold box is screwed to the base around the model. All of the seams and corners of the mold box are sealed from the outside with hot glue. Care must be taken with this step to ensure that the mold box is fully watertight to prevent leaks during the pour. The front (face) of the model is indicated on the outside of the mold box using a marker.
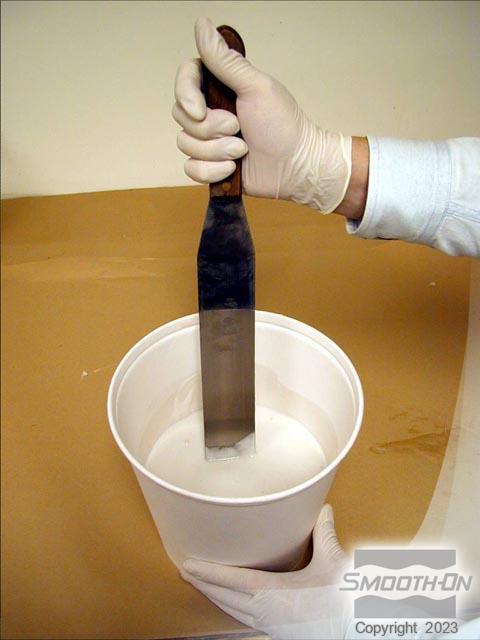
Step 2: Dispensing and Mixing the Rubber
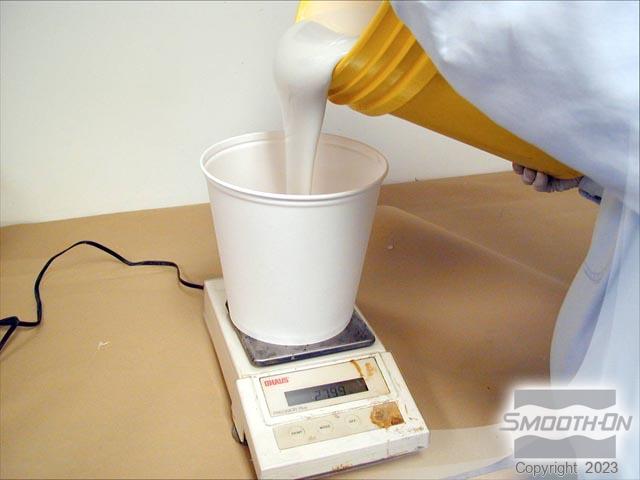
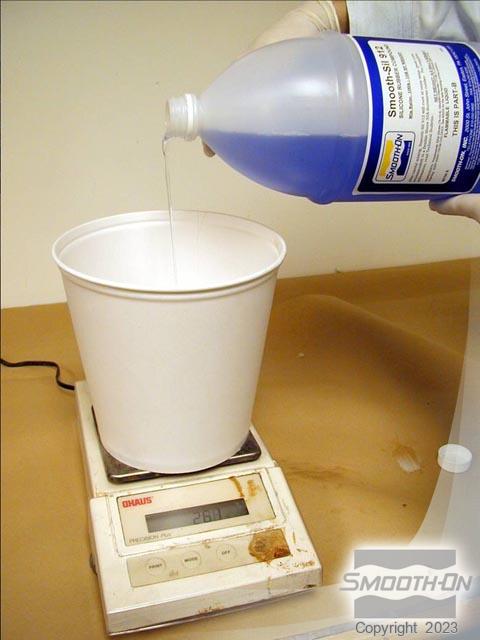
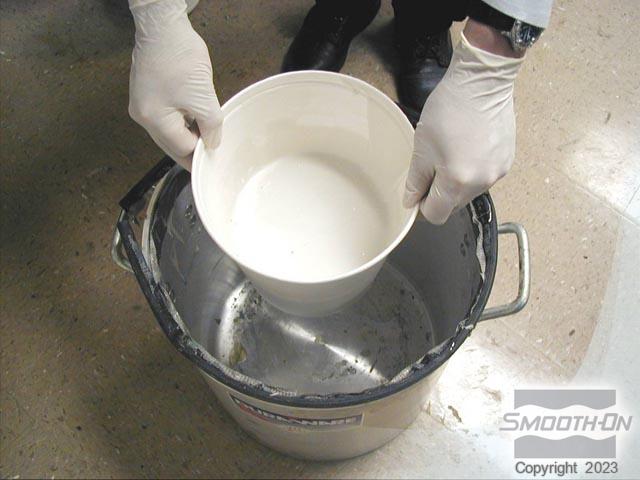
Because the silicone we chose is not a 1:1 material, parts A and B are carefully dispensed and weighed using an accurate gram scale. The material is mixed thoroughly, scraping the bottom and sides of the container, then poured into another clean container and mixed again, scraping the bottom and sides. This technique is called a double mix and pour, and it guarantees proper mixing of the material.
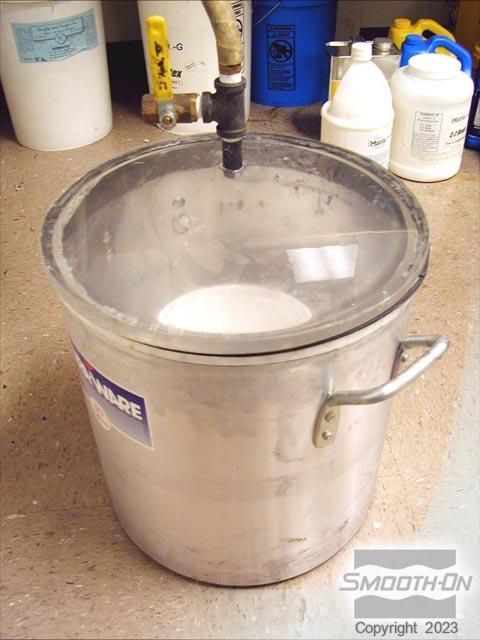
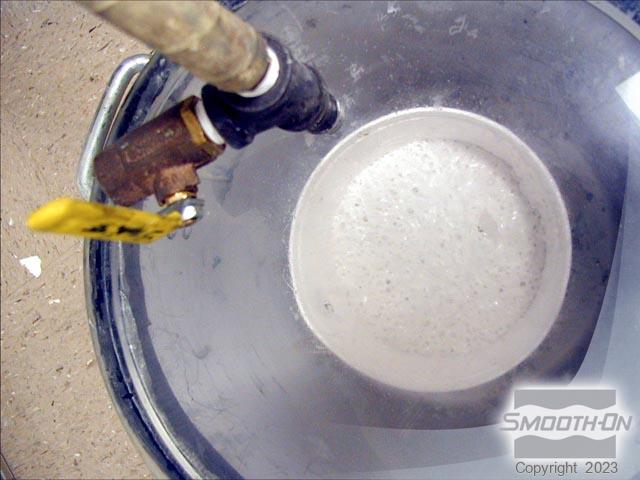
Step 3: Vacuum De-Gassing
We chose to vacuum de-gas the material before pouring to eliminate any bubbles in the final mold. The mixed material is placed into the vacuum chamber after assuring that there is enough space above the liquid in the container for the material to rise and fall as any air bubbles burst. The chamber is attached to a vacuum pump and the chamber is drawn down to 29 inches of mercury. The material is allowed to foam and rise up. After the material falls again and the bubbles are largely gone, the vacuum pressure is released, and the material removed from the chamber. It is now ready to pour.
Step 4: Pouring the Rubber
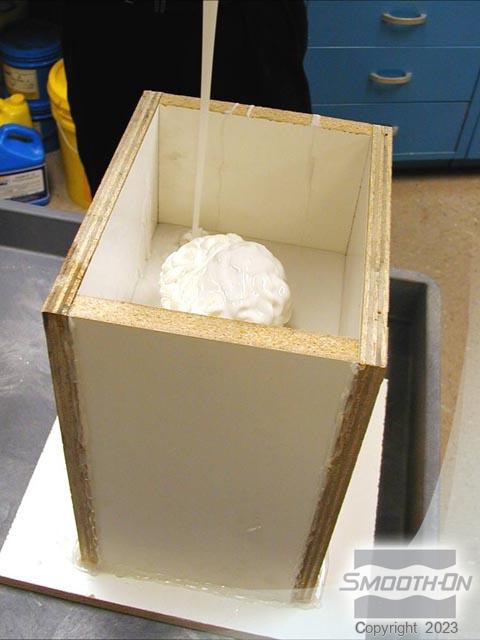
The rubber is poured from a height in a thin stream into the lowest spot in the mold box. The high pour and thin stream will break any bubbles that remain after the vacuum chamber. The material is allowed to rise and surround the model at its own pace, gently displacing all air in the process. The rubber is poured to at least a half inch above the top of the model and allowed to cure overnight.

Step 5: Demolding
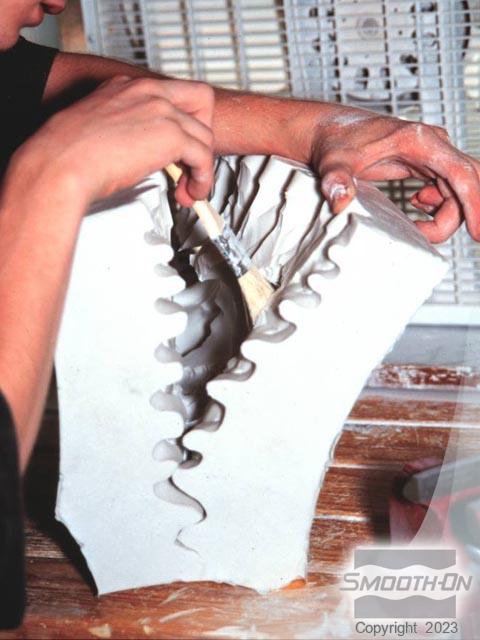
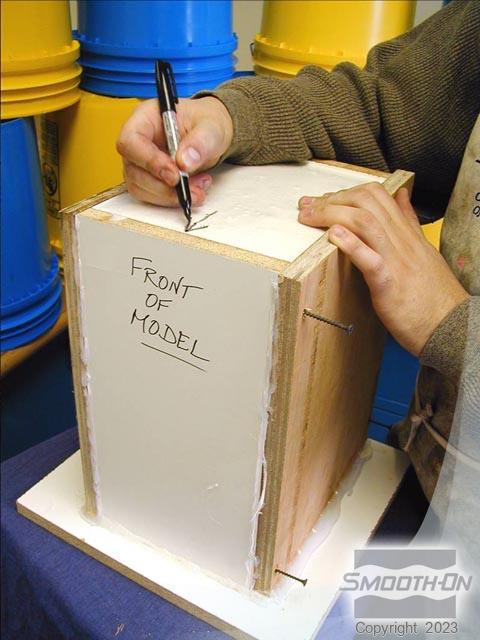
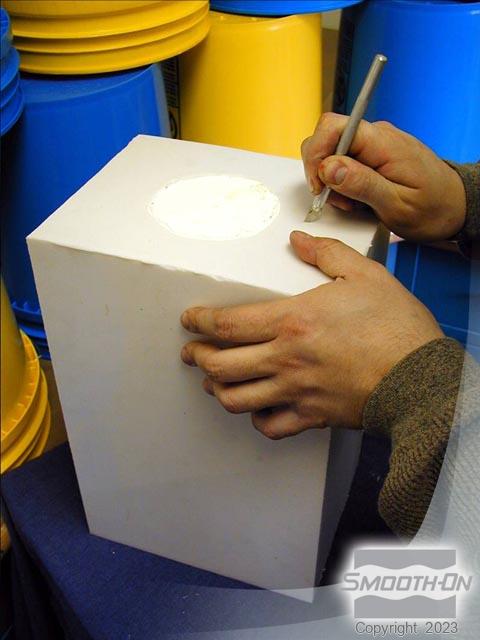
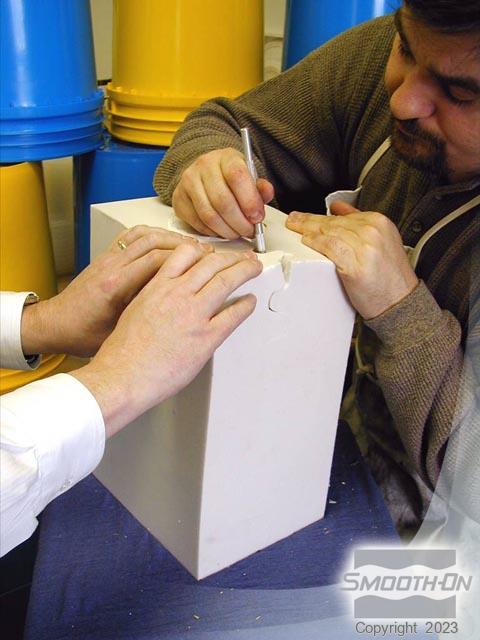
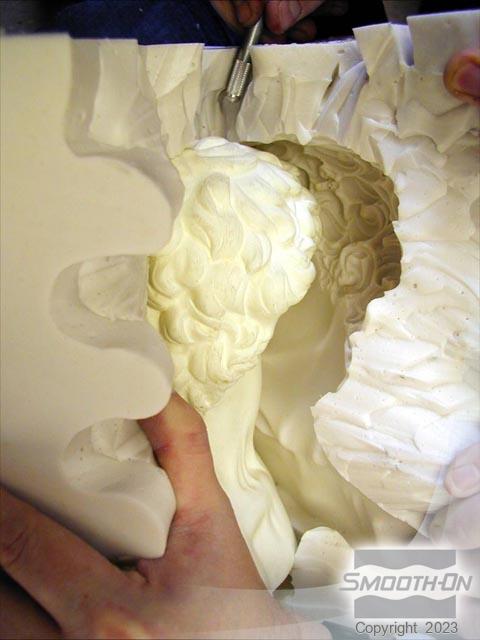
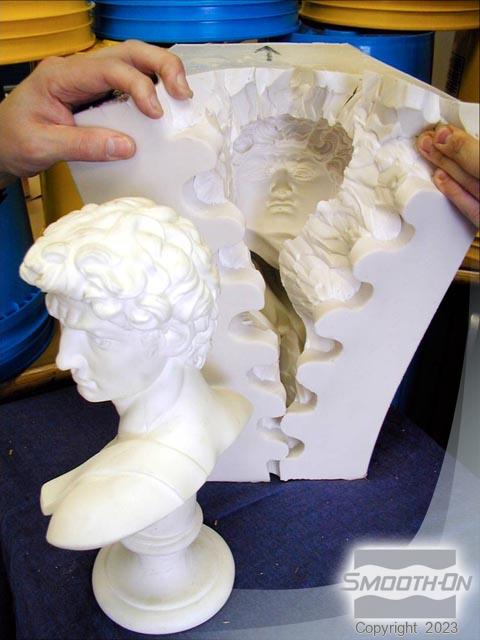
We do not want a seam on the face of our model. After the rubber cures another mark is made on the rubber itself indicating the front of the model, so that the seam in the rubber is not done on this side. The mold box is unscrewed, and isopropyl alcohol is used to soften and remove the hot glue sealing the box. The sides and base of the box are removed. The mold is turned upside down and, using a razor knife, a cut is made down one side of the model starting at the base of the model. Two people can make this task easier, with one person pulling the seam apart and the other doing the cutting. The cut is made in a zig-zag pattern, so as not to leave a straight seam. This will both hide the seam better when casting and allow the seam to be closed completely, the two sides of the cut locking together like the pieces of a jigsaw puzzle. The cut is extended until the original can be extracted from the mold.

Step 6: Casting
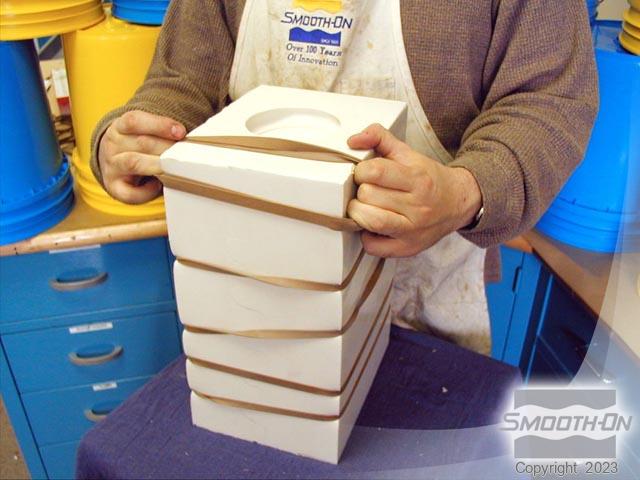
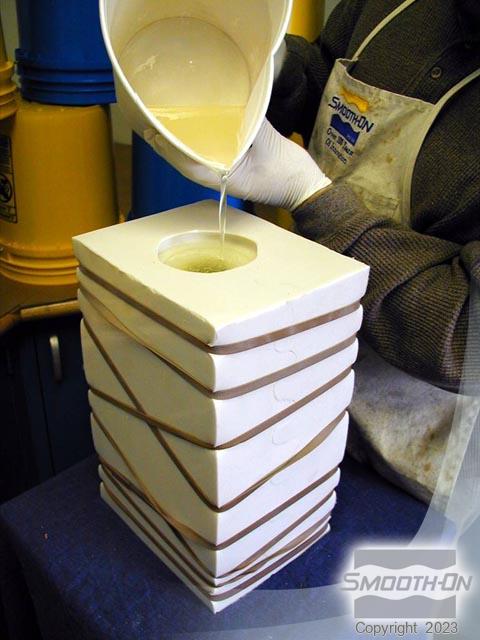
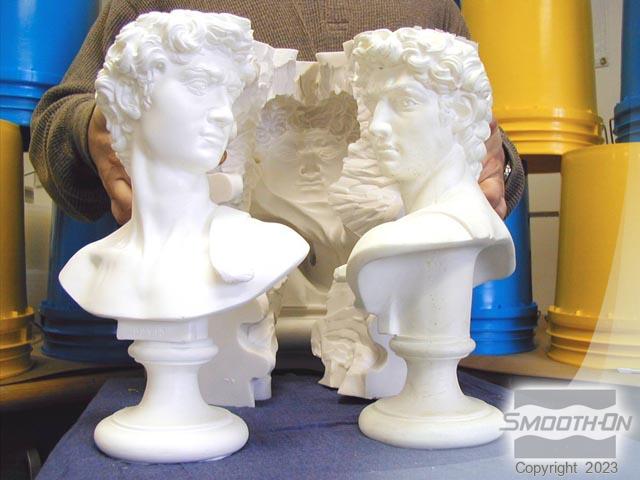
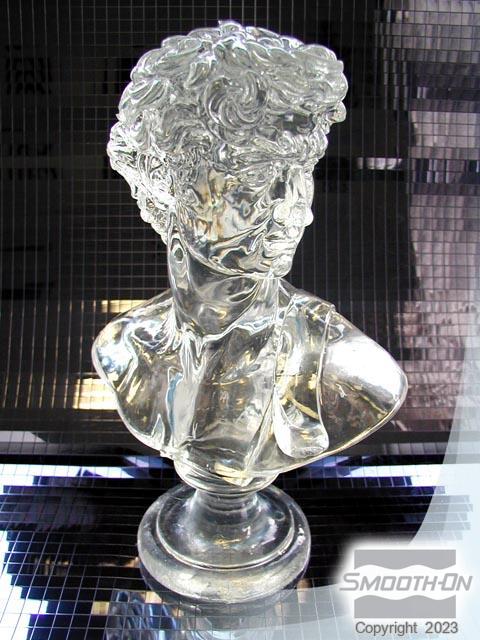
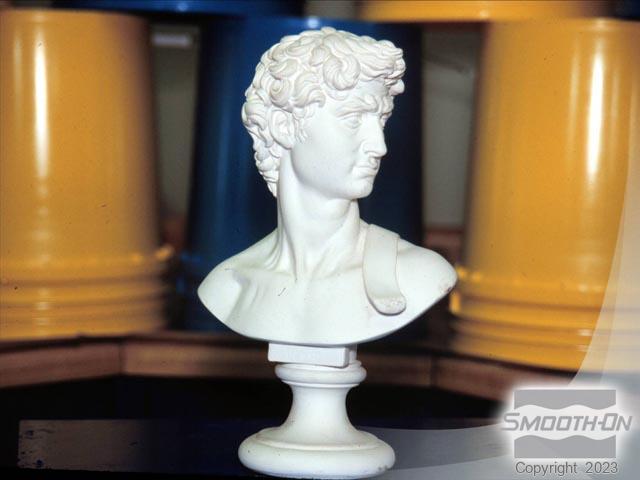
The seam in the rubber mold is carefully aligned and pressed together and is held with large rubber bands. (You could also reassemble the mold box around the rubber to accomplish this.) Smooth-Cast 300 is carefully dispensed and mixed and the mold is filled and allowed to cure. After curing the rubber bands are removed and the casting is extracted from the mold. We chose to do another casting using Crystal Clear resin, with the added step of placing the entire mold into a pressure chamber after pouring. The chamber is pressurized to 60 PSI to eliminate bubbles in the casting resin. After the cure time has elapsed, the chamber pressure is released, and the mold removed. The perfectly clear casting is then extracted from the mold.