How To Make a Star Trek Klingon Disruptor with Mold Max™ Silicone and Smooth‑Cast™

Overview
Running from 1987 to 1994, "Star Trek: The Next Generation" remains the most popular syndicated Sci-fi show in television history. Smooth-On rubbers, plastics, foams, etc. were delivered to the set of 'Star Trek - TNG' almost on a daily basis and were used to create a variety of special effects including making molds and castings of show staples such as space ships, themed environment elements, and props. One of the more popular props created by effects artisans was the 'Klingon Disruptor' pistol used in both the TV show and Star Trek movies. Following the end of the series, these props remain at the top of collector's lists.
Reproductions of TV and movie props are in high demand on the collector's market. This tutorial outlines making a mold of a replica Klingon Disruptor pistol from the Star Trek television series.
There are a couple of challenges in this moldmaking application. The barrel of the gun has a 'pass through' where the rubber can flow through and fully encapsulate the end of the gun. A card stock shim will be used to eliminate this 'pass through'. Also, the shape of the gun would lead to a large amount of wasted rubber if a standard mold box were used. A 'spacer board' will help reduce the amount of wasted rubber in the mold box.
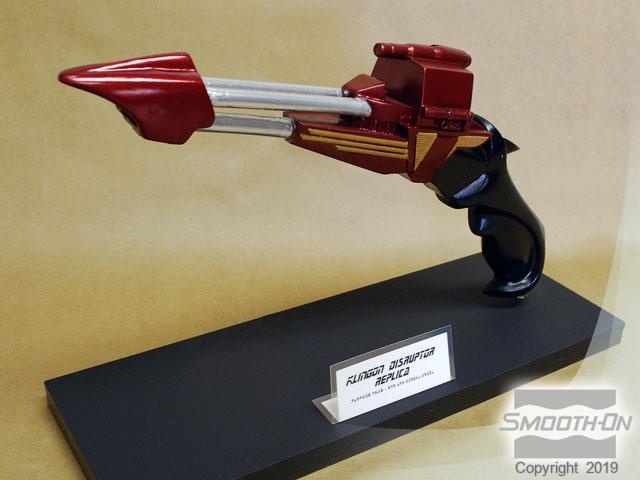
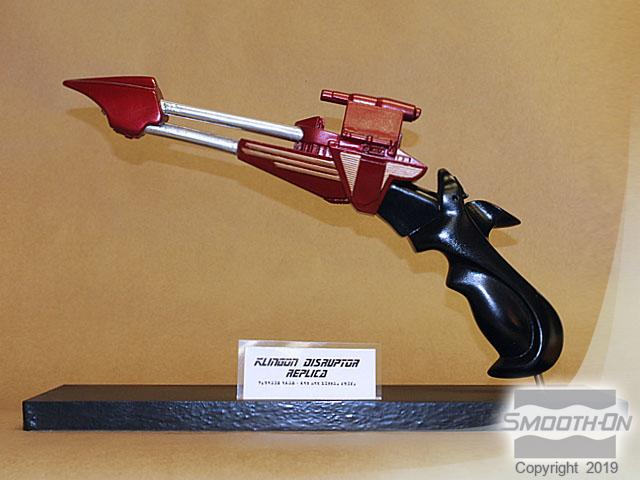
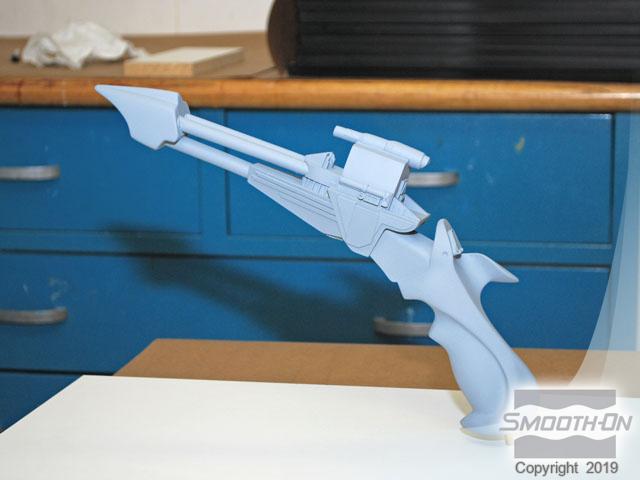
Once the final casting is sanded, primed, and painted, it becomes an exact duplicate of a screen-used prop weapon.
Materials Used in this Tutorial
- Drill
- Melamine Board
- Super Instant
- Saw
- Drill Bit
- Brass Stock
- Hammer
- Scissors
- Card Stock
- Permanent Marker
- Tape Measure
- Screws
- Ruler
- Oil-Based Sulfur Free Clay
- Mold Max 15T
- Vacuum Chamber
- Vacuum Pump
- Drill Mixer
- Knife
- Smooth-Cast 320
- Paint
- Gloves
- Mixing Sticks
- Mixing Containers
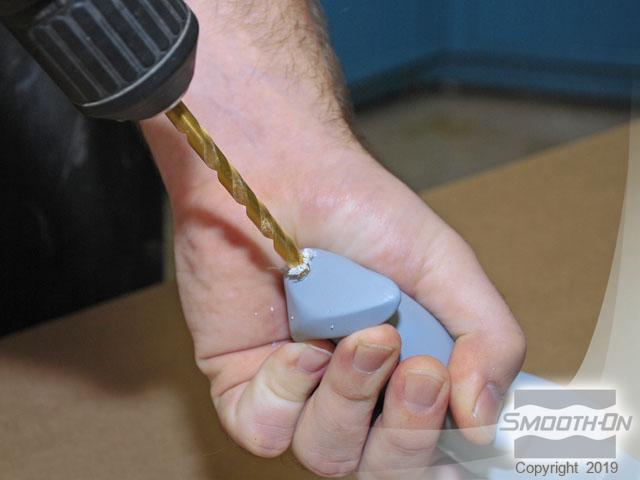
Step 1: Preparing Your Model
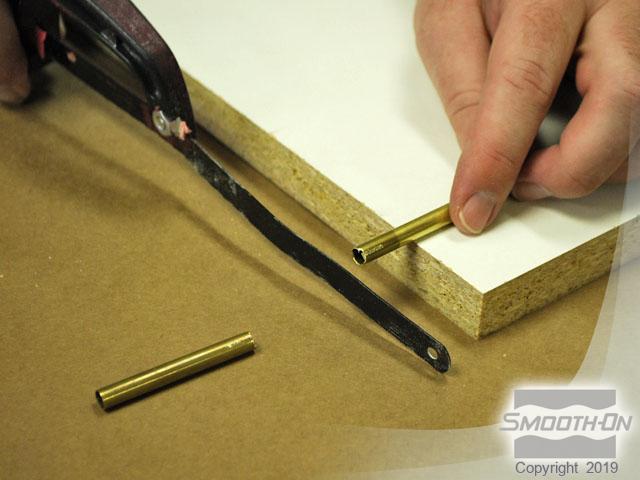
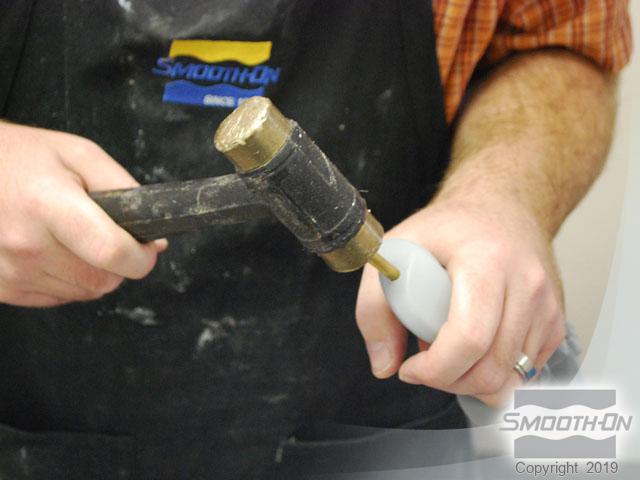
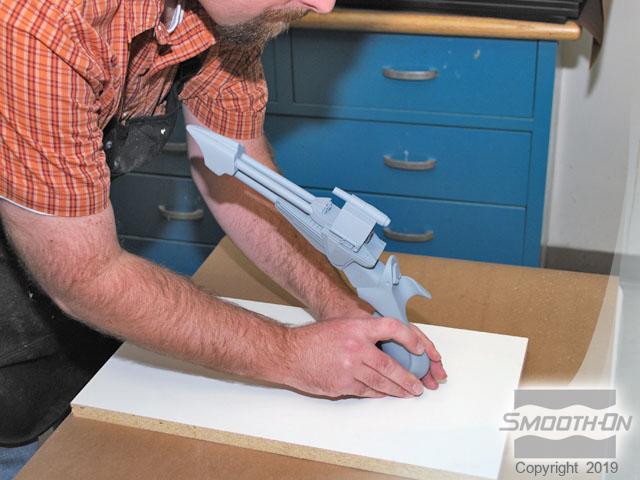
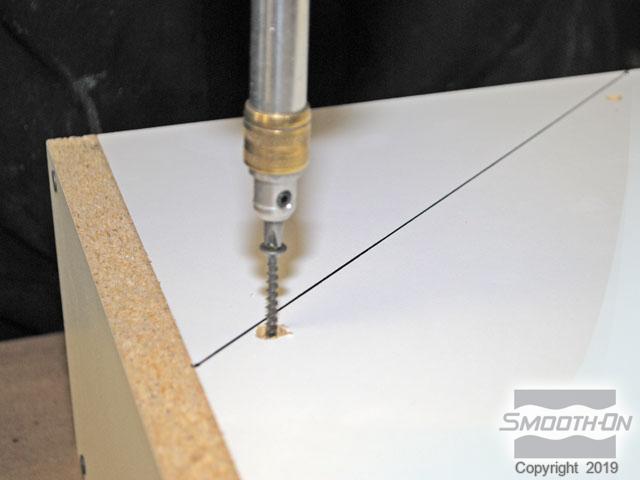
The original carved piece should be primed and sanded. Drill a hole in the handle to mount the piece. Then, drill a matching hole in the base board. Cut a piece of brass stock to length and insert it into the hole in the handle of the gun and then into the hole in the base board. After the Super Instant epoxy is mixed, apply it to the brass stock and base board. the gun is now ready to be mounted for molding.


Step 2: Covering Up Holes In Model
Measure a piece of card stock to the length of the 'pass through' in barrel section of the gun. After the card stock is cut, fold the card into a 'V' shape. Insert the card into the barrel. This will work as a 'shim' to keep the rubber from flowing through the open section of the barrel. Mix the Super Instant epoxy and carefully apply it to areas where the card 'shim' touches the barrel parts.


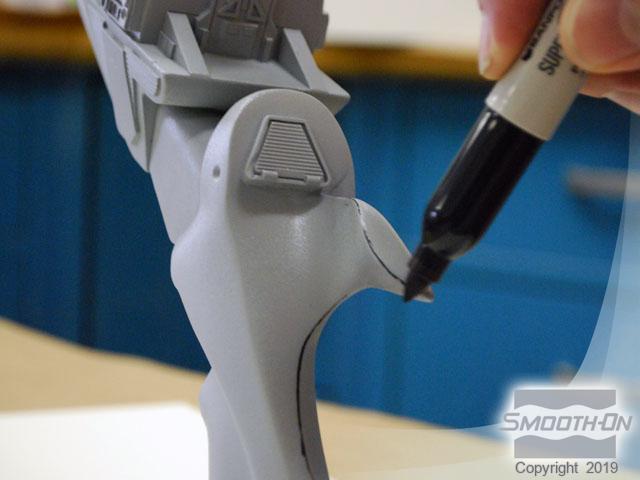
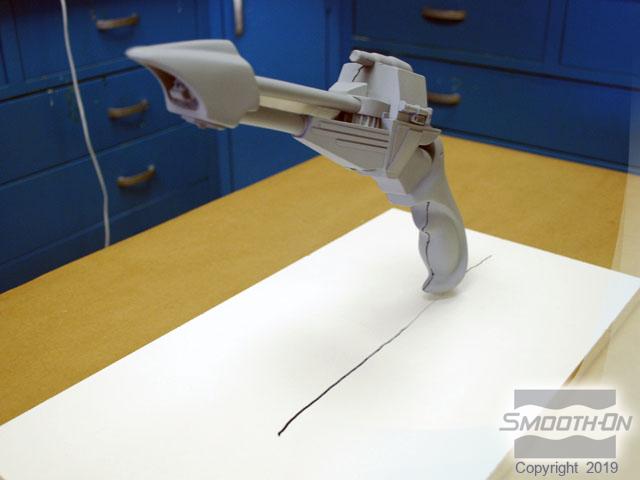
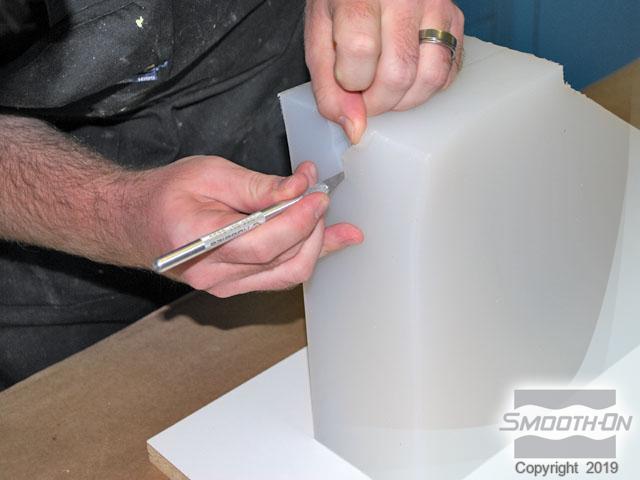
Step 3: Finding Cut Seams and Constructing Mold Box
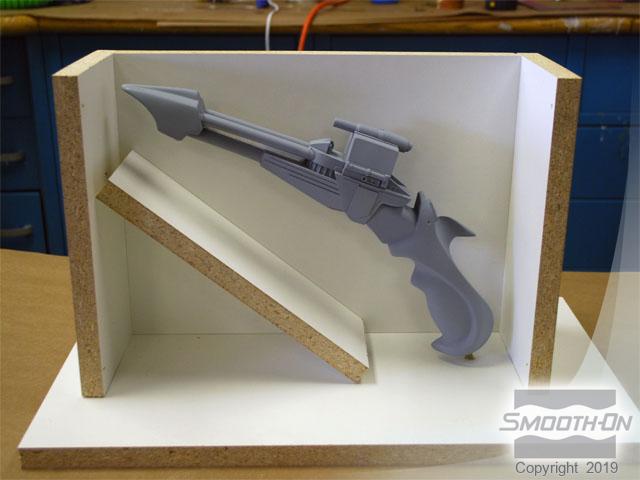
Draw a line, splitting the piece into two sections. This line (shown here highlighted in green) will be a cutting guide when demolding the piece.
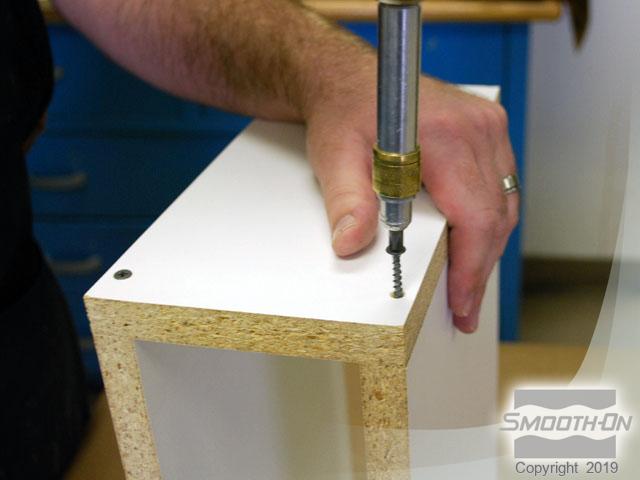
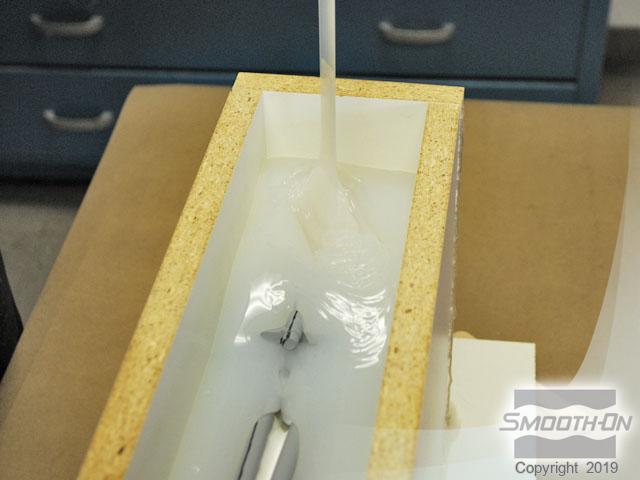
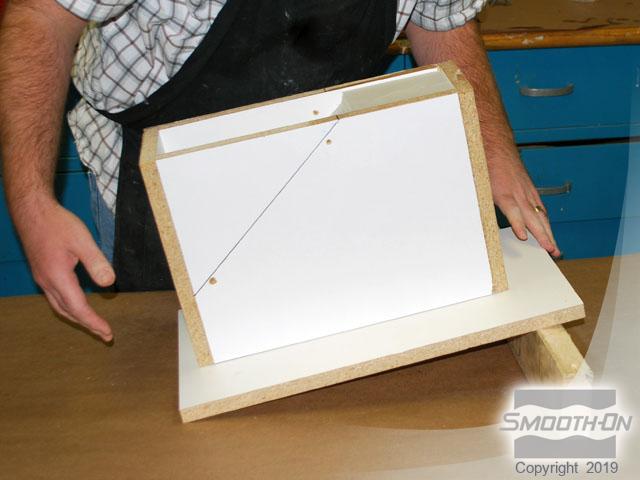
Construct a box to contain the mold rubber and original model. Next, cut a 'spacer board' to size; this board is used to take up space, reducing the amount of wasted rubber. A height and length measurement needs to be taken to determine the location of the 'spacer board' in the mold box.
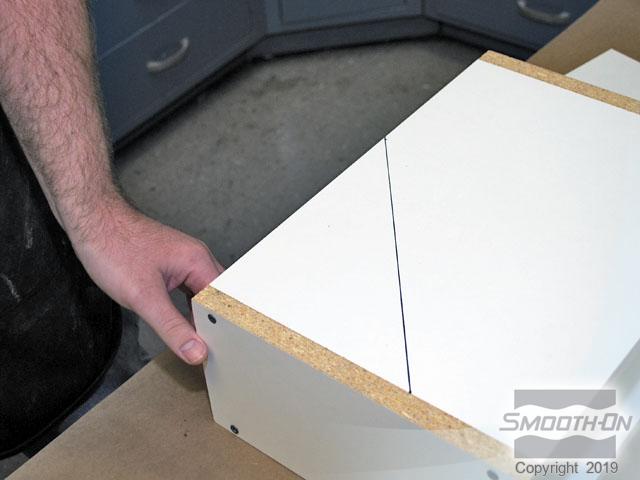
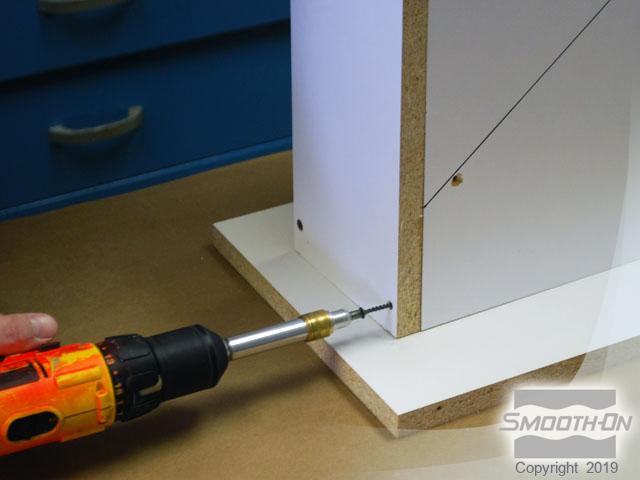
Now, draw a line to indicate the location of the 'spacer board'. This line will reflect the location of screws for the 'spacer board'. The measurements should then be transferred to the edges of the mold box. The 'spacer board' can then be inserted into the mold box.
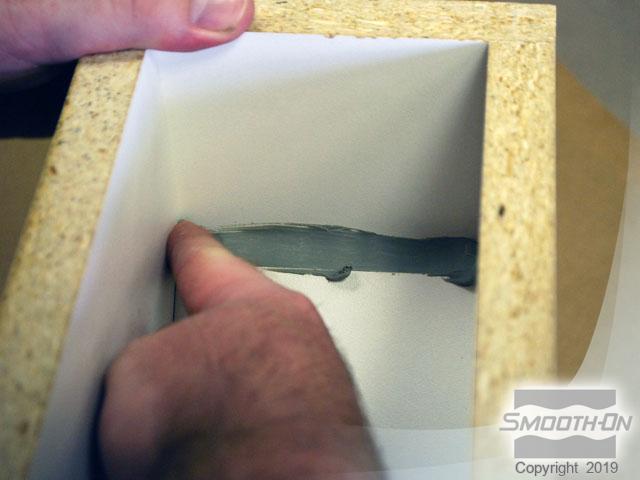
Screws should be used to attach the 'spacer board'. The cutaway view shows how the 'spacer board' takes up space in the mold box. A non-sulfur, oil-based clay can be used to seal the interior and bottom seams of the 'spacer board'.
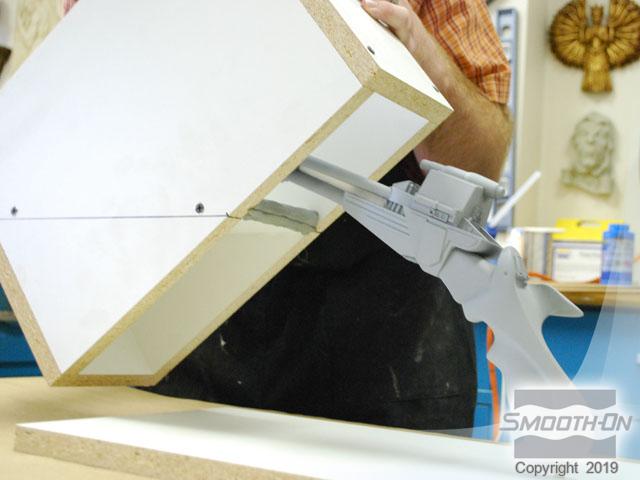
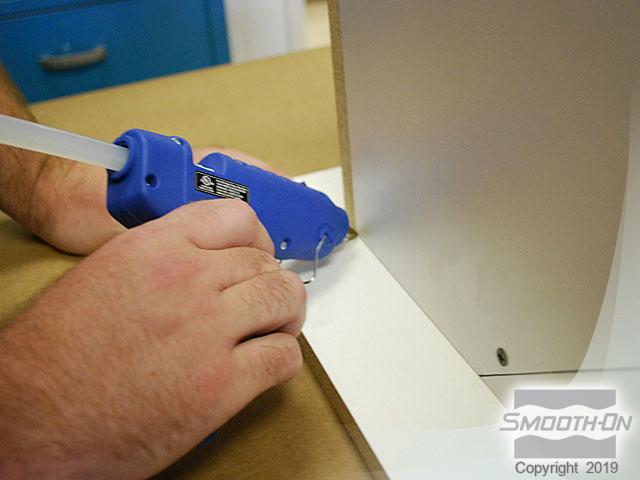
Place the box over the model and use hot glue to seal the external seams.

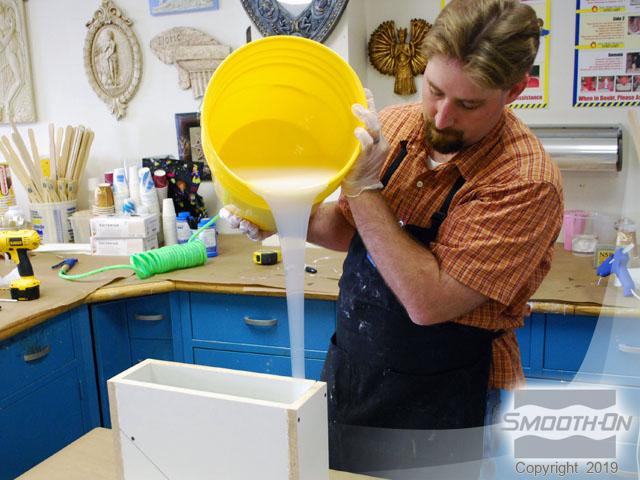
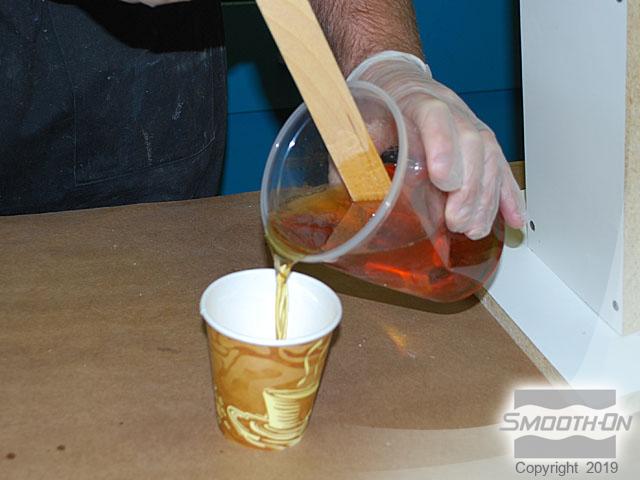
Step 4: Dispensing and Pouring Mold Max 15T
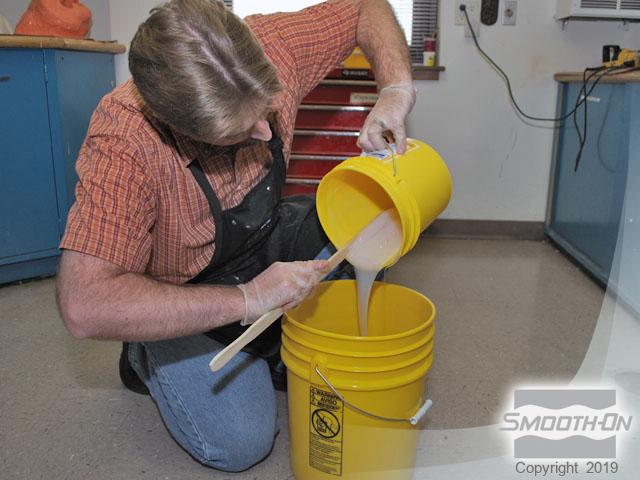
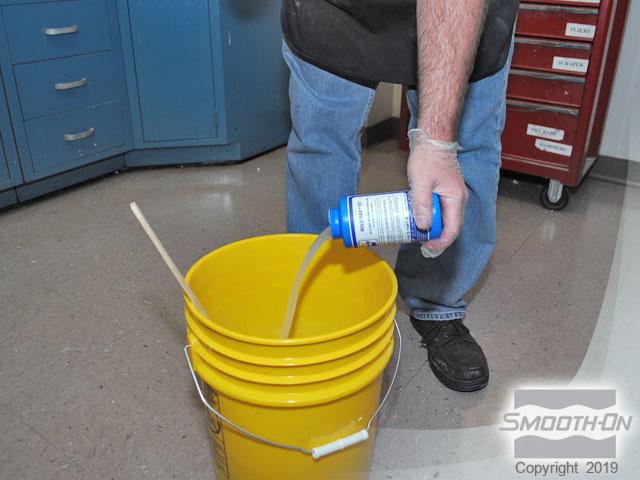
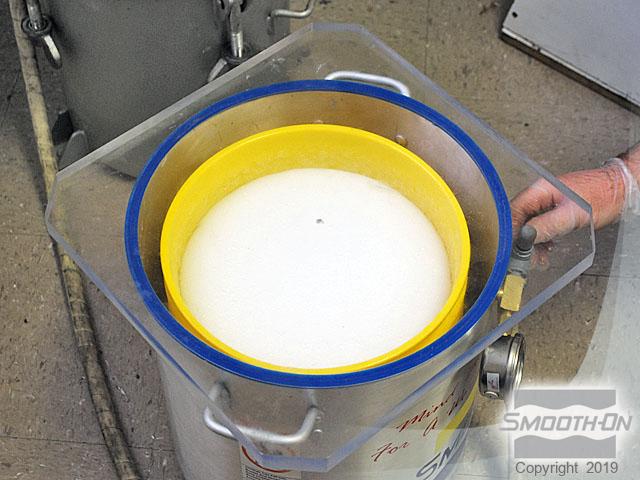
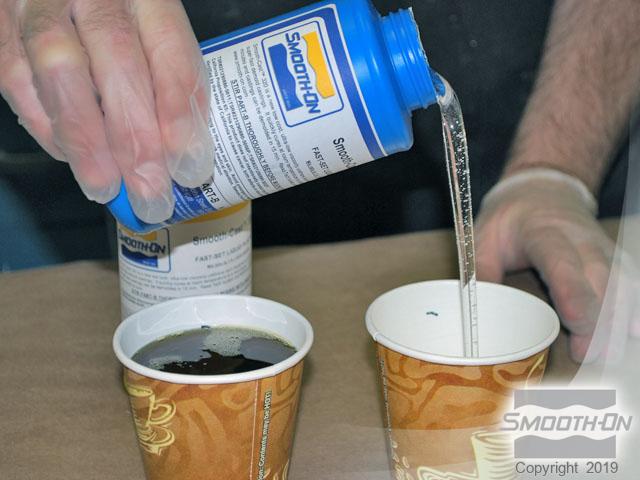
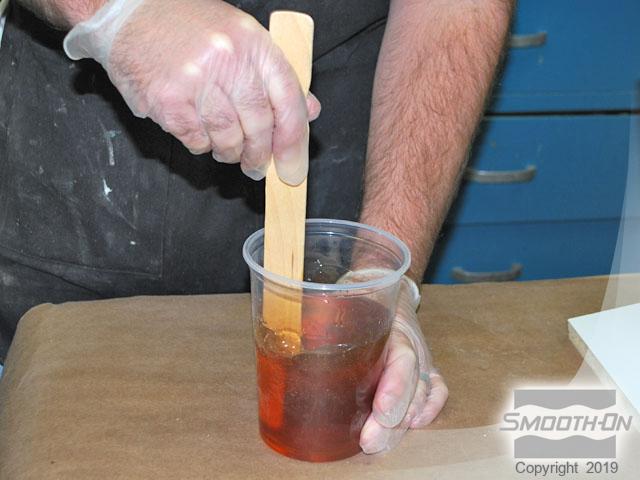
Dispense Mold Max 15T part A and B into a mixing bucket. The Mold Max 15T silicone should be mixed with a squirrell mixer on an electric drill. After the material is mixed it needs to be vacuumed to remove excess air. Once this is complete, pour the Mold Max 15T into the mold box in a thin stream. The Mold Max 15T will flow up and over the gun and then it should be left to cure overnight (16 hours) at room temperature (73F/23C).


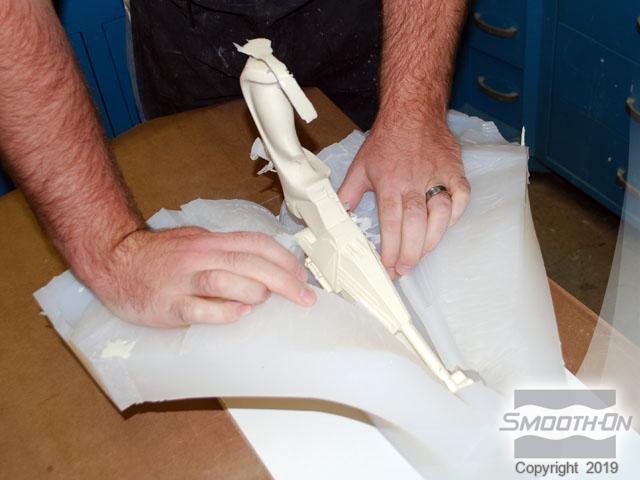
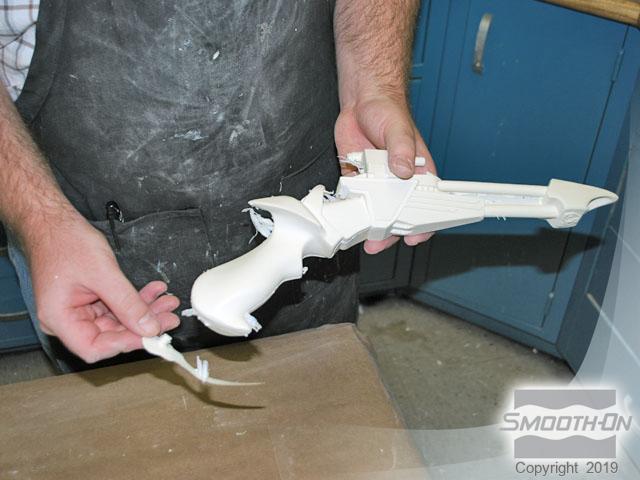
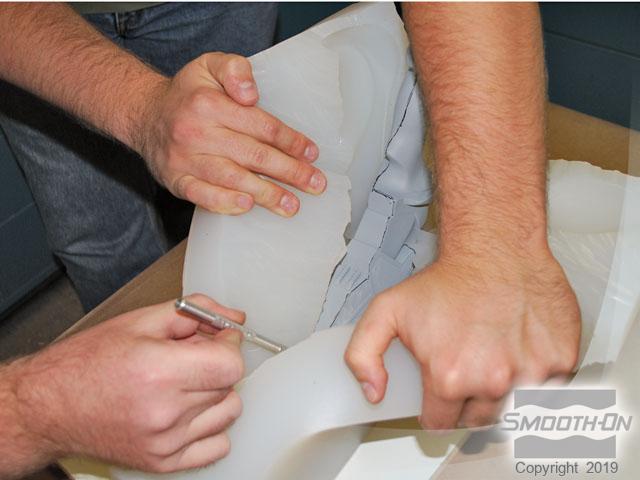
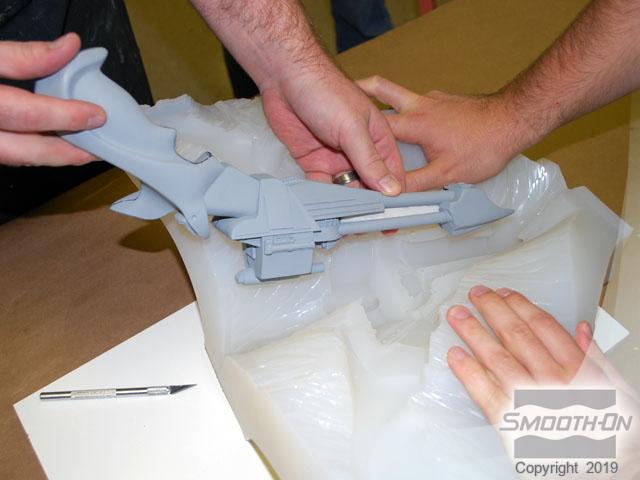
Step 5: Demolding
After the material is fully cured, the box can be disassembled. The sides of the mold box should be removed and retained. Carefully cut open the silicone using a sharp knife. An assistant should help hold the mold open while the cutting continues. Then, the original can carefully be removed from the mold.
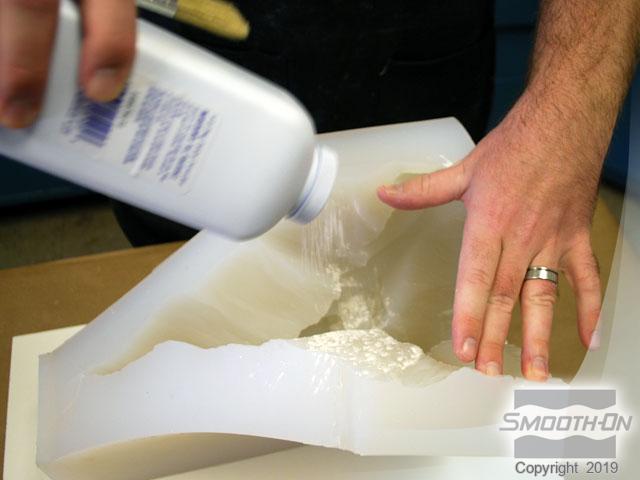
Step 6: Preparing Mold For Casting
Gently powder the mold using standard talc to reduce surface bubbles. The mold box can now be reassembled around the rubber mold and placed at an angle to aid in air bubble reduction.
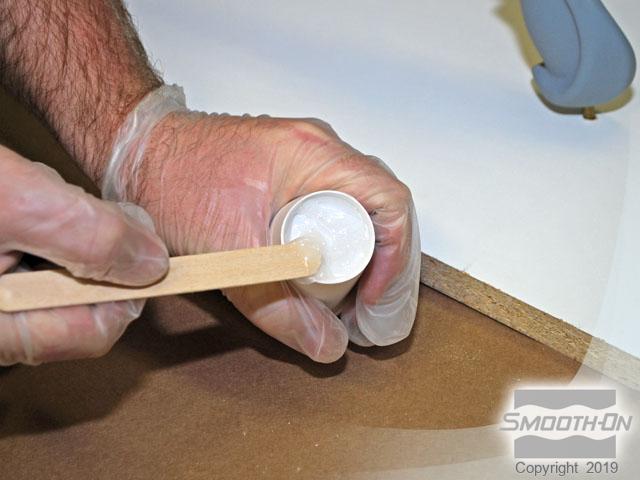
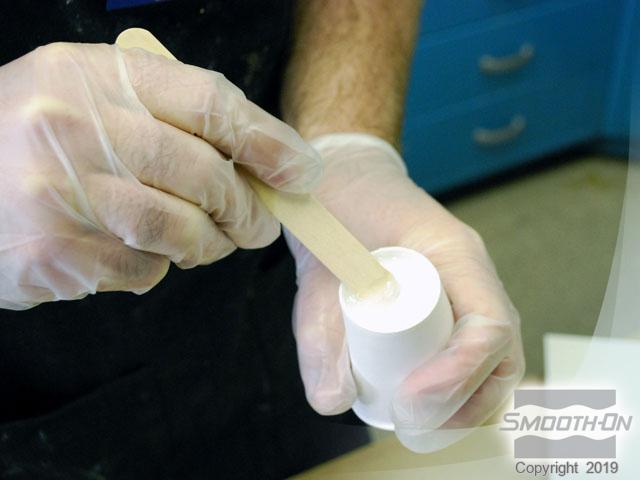
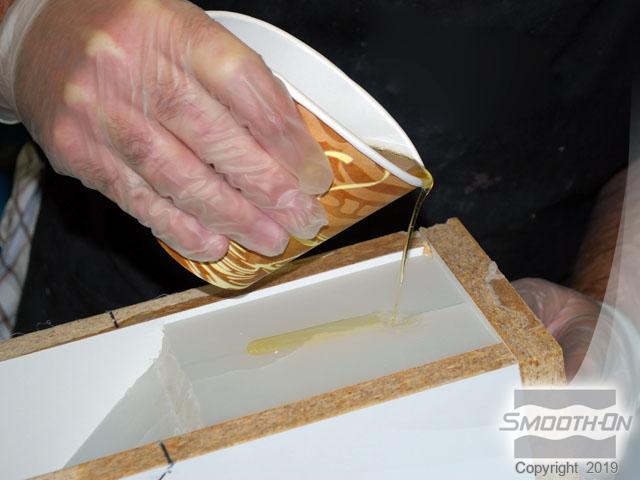
Step 7: Dispensing and Casting Smooth-Cast 320
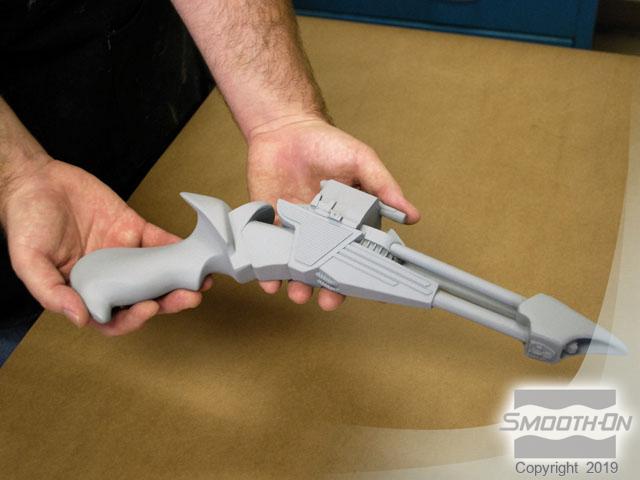
Measure Smooth-Cast 320 1A:1B by volume, mix thoroughly and transfer to a smaller cup. The resin is a very low viscosity and will easily pour into the mold.
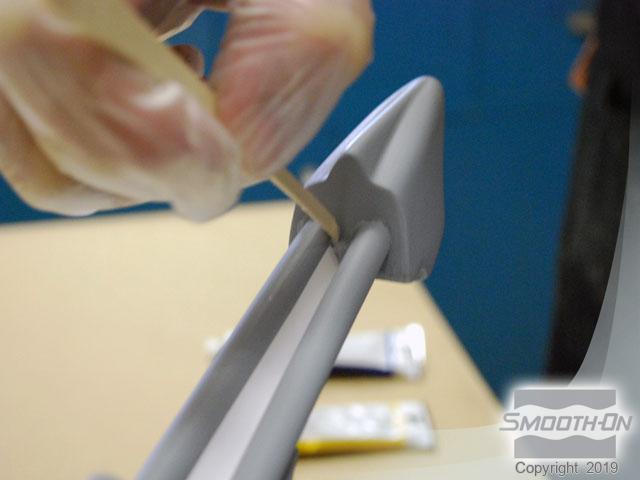
Step 8: Demold And Finishing
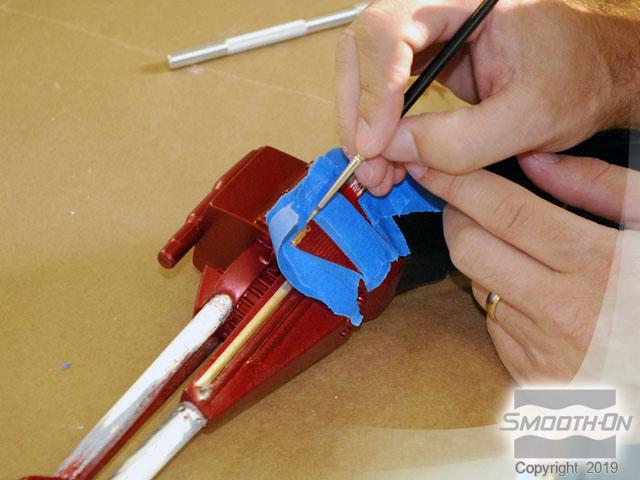
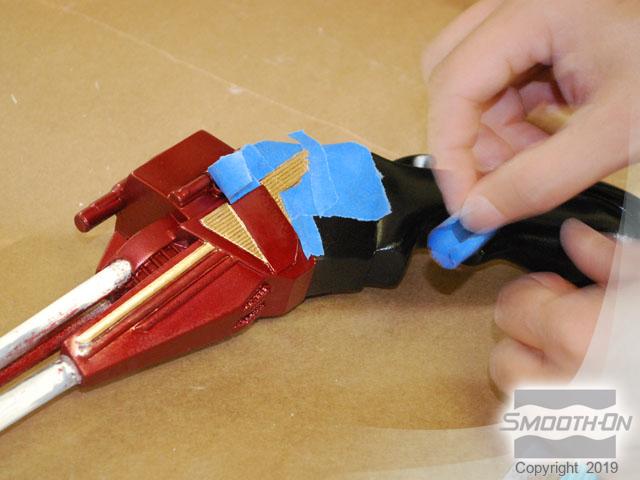
Remove the Smooth Cast 320 resin duplicate from the mold. Then, remove the 'flashing' around the edges of the casting. The casting is now ready to be primed and painted. Masking tape can be used to paint detailed areas of the casting.
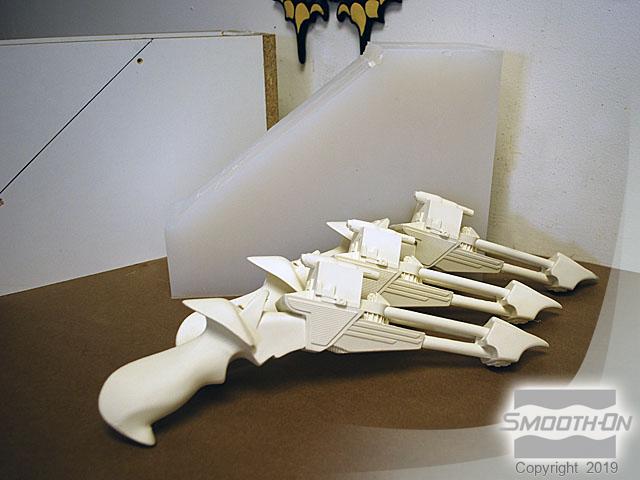
The strong silicone rubber mold can be used to cast multiple duplicates.