Mold Max™ 30
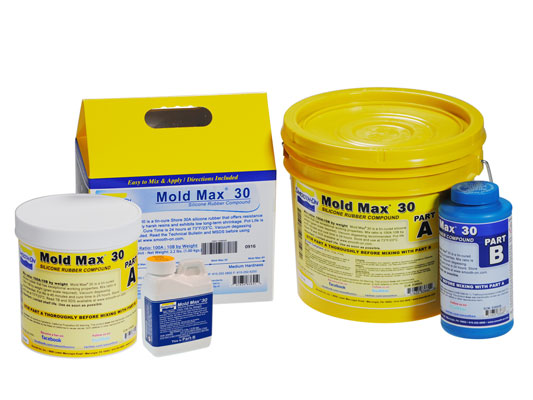
Mold Max™ Silicones are tin-cured silicone rubber compounds that have exceptional working properties and library life. Mold Max™ Silicones feature Smooth-On’s exclusive “Libra™” catalyst for long library life. Mold Max™ silicones can be pigmented with Silc Pig™ silicone colorants. Pot life for the pourable silicones is 45 minutes and they cure in 24 hours at room temperature.
Vacuum degassing mixed material using a vacuum pump and chamber to remove entrapped air is recommended.
Features
- Mold Max™ Silicones will reproduce the finest detail and are suitable for a variety of industrial and art related applications including making molds for reproducing prototypes, furniture, sculpture and architectural elements.
- Mold Max™ 30 can be thickened with THI-VEX™ additive for brush-on applications.
- Mold Max™ Silicones can be used to cast a variety of materials including wax, gypsum, low melt alloys/metals and urethane, epoxy or polyester resins (without using a release agent).
› Click here for more Mold Max™ silicone products.
Gallery
- 837674458
- -3IBuyfFGw0
- 37Q_MekkxCI
- AAP5pAB-4jM
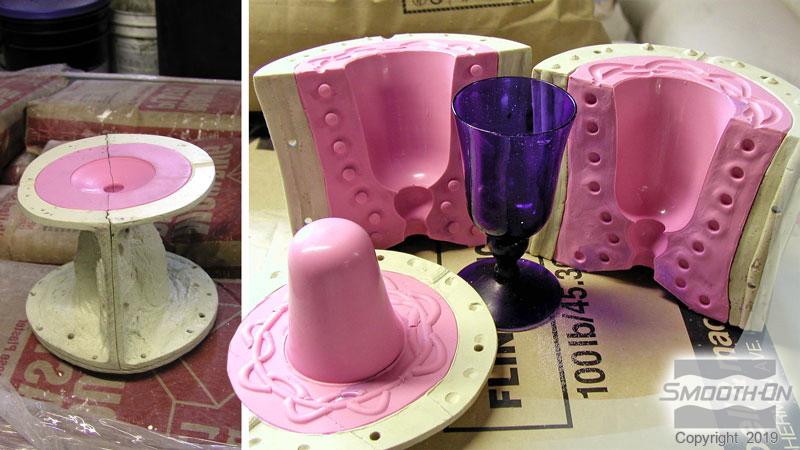 SMASH!® plastic glass cast into a three piece Mold Max® 30 mold.
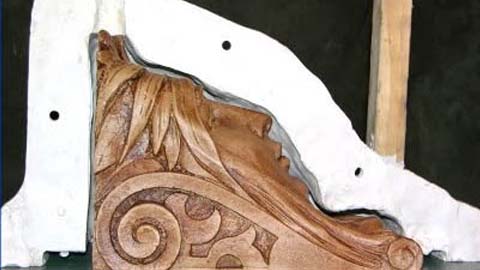
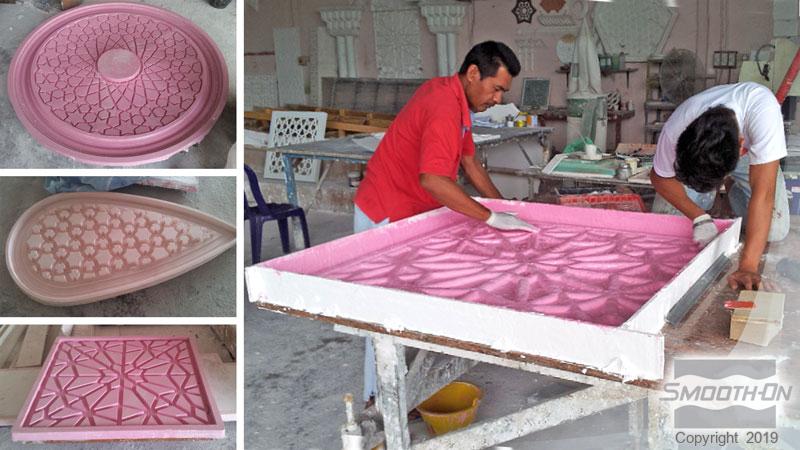 Mold Max® 30 molds used to cast architectural elements.
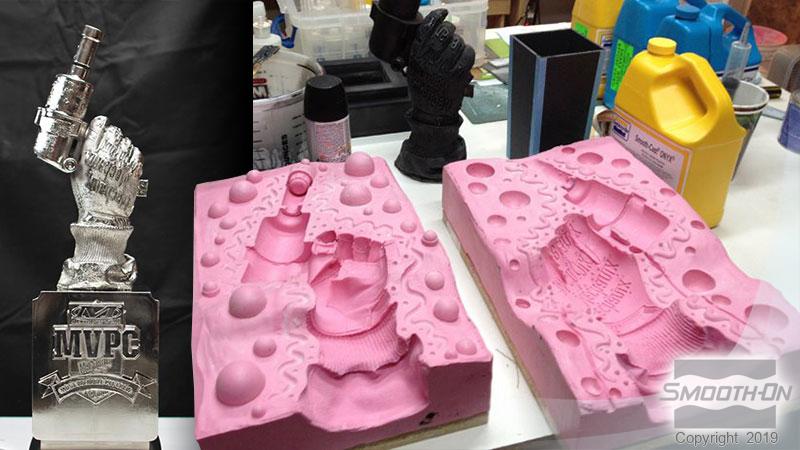 Frank Ippolito was charged with making this Mechanixwear Award from a two piece Mold Max® 30 mold.
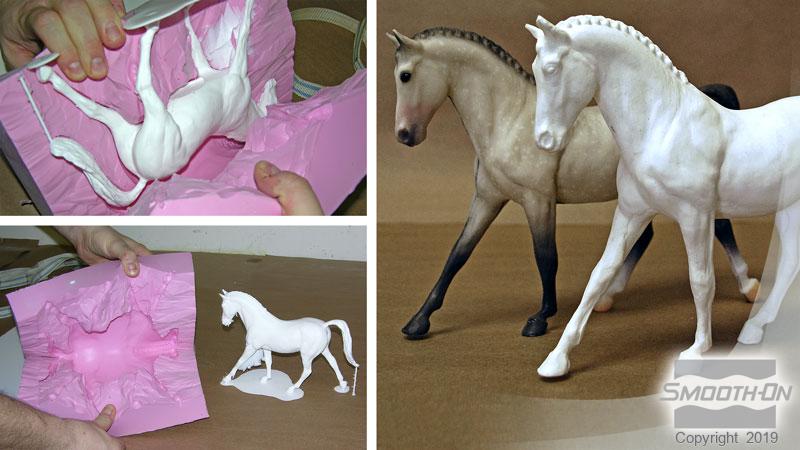 Mold Max® 30 split mold.
 Mold Max® 30 used to make production gang molds, training devices and stage props.


Instructions
Important - you must weigh Part A & B components using a gram scale to be successful with Mold Max™ silicones.
Safety – Use in a properly ventilated area (“room size” ventilation). Wear safety glasses, long sleeves and rubber gloves to minimize contamination risk. Wear vinyl gloves only. Latex gloves will inhibit the cure of the rubber.
Store and use material at room temperature (73°F/23°C). Storing material at warmer temperatures will also reduce the usable shelf life of unused material. These products have a limited shelf life and should be used as soon as possible.
Applying a Sealer / Release Agent - Mold Max™ rubber may be inhibited by sulfur based clays resulting in tackiness at the pattern interface or a total lack of cure throughout the mold. If compatibility between the rubber and the surface is a concern, a small-scale test is recommended. Apply a small amount of rubber onto a non-critical area of the pattern. Inhibition has occurred if the rubber is gummy or uncured after the recommended cure time has passed. To prevent inhibition, a “barrier coat” of clear acrylic lacquer sprayed directly onto the pattern is usually effective. Allow to thoroughly dry. Although not usually necessary, a release agent will make demolding easier when casting into or over most surfaces. Ease Release™ 200 is a proven release agent for making molds with silicone rubber and for releasing new silicone from cured silicone. Mann Ease Release™ products are available from Smooth-On or your Smooth-On distributor.
MEASURING & MIXING - Before you begin, pre-mix Part B thoroughly to re-disperse pigments that may have settled. Using a gram scale, dispense required amounts of parts A and B into a mixing container and mix for 3 minutes. Scrape the sides and bottom of the container several times. After mixing parts A and B, vacuum degassing is recommended to eliminate any entrapped air in liquid rubber. Your vacuum pump must pull a minimum of 29 inches of mercury (or 1 Bar / 100 KPa). Leave enough room in container for material expansion. Vacuum material until it rises, breaks and falls. Vacuum for 1 minute after material falls.
Pouring / Curing / Post Curing - For best results, pour your mixture in a single spot at the lowest point of the containment field. Let the rubber seek its level up and over the model. A uniform flow will help minimize entrapped air. The liquid rubber should level off at least 1/2” (1.3 cm) over the highest point of the model surface. Allow the mold to cure for 24 hours at room temperature (73°F/23°C) before demolding. Post curing the mold an additional 4 hours at 150°F (65°C) will eliminate any residual moisture and alcohol that is a byproduct of the condensation reaction that can inhibit the cure of some urethane resins and rubbers. Allow mold to cool to room temperature before using. Do not cure rubber where temperature is less than 65°F/18°C.
Thickening Mold Max™ Silicones For Brush-on Application - THIVEX™ is made especially for thickening Smooth-On’s Mold Max™ 30 silicone for vertical surface application (making brush-on molds). Different viscosities can be attained by varying the amount of THI-VEX™. Apply a thin coat of rubber. Wait for rubber to become “tacky” before applying next coat. Final mold thickness should be at least 3/8” (1 cm). Allow rubber to cure overnight before applying support shell. See the THI-VEX™ technical bulletin (available from Smooth-On or your Smooth-On distributor) for full details.
Accelerating Mold Max™ Silicones - FastCat™ 30 silicone rubber accelerator will accelerate the cure time of Mold Max™ 30 silicone rubber. Use in place of (or in combination with) Mold Max™ regular Part B catalyst, FastCat™ 30 for Mold Max™ 30 will reduce the demold time from 24 hours to as little as 30 minutes. See the technical bulletin for FastCat™ 30 for exact mix ratios and cure times. Using these accelerators will result in a shorter library life of the mold.
Thinning Mold Max™ Silicones - Silicone Thinner™ is a non-reactive silicone fluid that will lower the mixed viscosity of tin cure (condensation) or platinum cure (addition) silicone rubber products. Silicone Thinner™ offers the following advantages: [1] A lower mixed viscosity (A+B) means that the rubber will de-air faster when vacuuming; [2] Mixed rubber (A+B) will flow better over intricate model detail; [3] Silicone Thinner™ will lower the ultimate shore hardness (durometer) of cured silicone rubber; [4] Pot life (working time) is increased in proportion to the amount of Silicone Thinner™ used. A disadvantage is that ultimate tear and tensile are reduced in proportion to the amount of Silicone Thinner™ added, however knotty tear properties of the Mold Max™ Series rubbers are unaffected. It is not recommended to exceed 10% by weight of total system (A+B). See the Silicone Thinner™ technical bulletin (available from SmoothOn or your Smooth-On distributor) for full details.
Mold Performance & Storage - The physical life of the mold depends on how you use it (materials cast, frequency, etc.). Casting abrasive materials such as concrete can quickly erode mold detail, while casting non-abrasive materials (wax) will not affect mold detail. Before storing, the mold should be cleaned with a soap solution and wiped fully dry. Two part (or more) molds should be assembled. Molds should be stored on a level surface in a cool, dry environment.
Related Categories: Silicone Rubber - Tin Cure
Related Series: Mold Max™ Series – Tin Cure Silicone Mold Rubber
How-To Articles

How To Mold and Cast Foam Props - Via Tested.com
Via Tested - How to make simple silicone molds to cast and paint foam replicas of props like shop tools
How To Create a Matrix Mold or Cavity Pour Mold Using Mold Max™ 30
Creating A Cavity Pour Mold Using Mold Max® 30
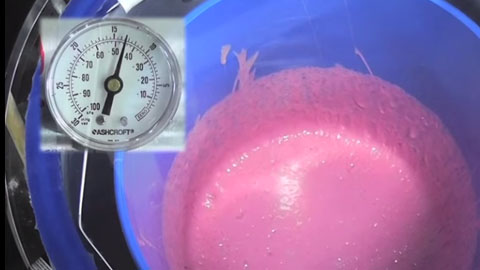
How To Vacuum Degas Silicone - Mold Max™ 30
How to vacuum silicone to eliminate entrapped air and remove bubbles from your finished mold or casting.

How To Make a Block Mold of a Four Legged Animal
This howto shows where to properly place air vents and also where to make your extraction cut line.
How To Make a Silicone Block Mold of an Irregularly Shaped Model
Learn how to save material and money by making your silicone mold conform to the shape of your model.

How To Make a 2 Piece Silicone Mold to Cast a Police Baton Prop
This step-by-step tutorial shows the process of making a two-piece block mold from a police baton using Mold Max® 30 silicone rubber. It also shows how to cast a reproduction using TASK 13 semi-rigid resin.

How To Make Antler Reproductions Using Reverse Molding
In this how-to, Tony Breedlove uses a cavity pour technique that yields perfect antler castings every time.

How To Make a Breakaway Glass Window Pane
This tutorial takes you step-by-step through the process of making a large window pane suitable for using as a breakaway glass prop for stage or movie special effects.