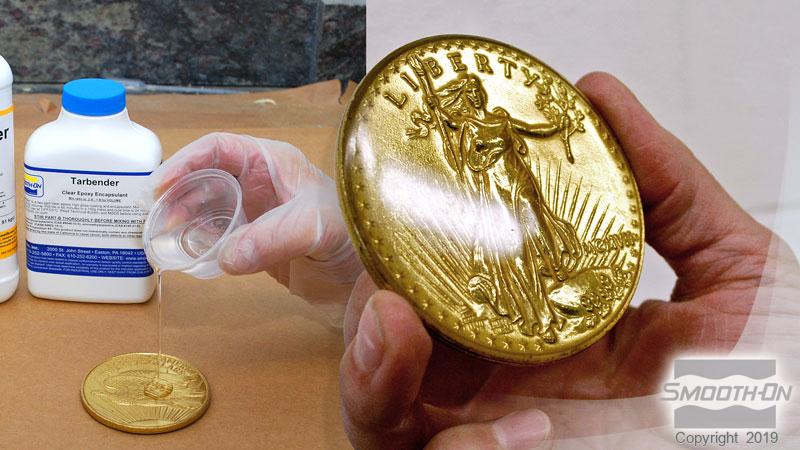
Tarbender™
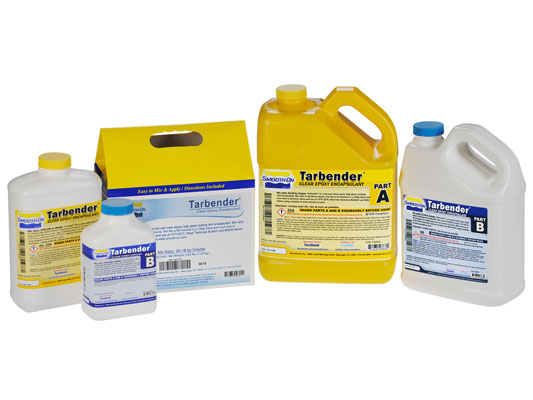
Tarbender™ is a clear liquid epoxy that can be poured or brushed over a variety of surfaces to provide a strong, high gloss coating. Parts A and B mix together and flow easily. Tarbender™ epoxy cures at room temperature and offers high impact resistance. It can be applied over wood, plaster, concrete, foam, fabrics, paper, etc. can be used to encapsulate 2-D or 3-D objects. Tarbender™ is certified “aquarium safe” and used by aquariums to create hyperrealistic coral and other aquarium displays. It is also used by zoos around the world as a coating for themed elements and displays.

Instructions
Product and Work Area Preparation – Tarbender™ containers should be stored and used at room temperature (73° F/23° C). Wear long sleeve garments, disposable gloves and safety glasses. Mixing containers should have straight sides and a flat bottom. Mixing sticks should be flat and stiff with defined edges for scraping the sides and bottom of your mixing container. Have all materials and tools on site before you begin.
Mixing containers should be made of plastic, metal or wax coated paper. Due to very high temperature potential (exotherm) of Tarbender™, do not use glass or foam containers.
Ventilation – Use only in a well ventilated area and avoid breathing fumes. Wearing a NIOSH approved respirator is recommended.
Mixing – Mix using a flat edge mixing stick for 2 minutes. Scrape the sides and bottom of the mixing container with the edge several times. Pour contents into a new, clean mixing container and mix again for 2 minutes. If using a drill mixer, use a variable speed mixer set to low rpm and mix for 2 minutes. Creating a vortex will introduce air. Follow with hand mixing for 2 minutes. A large mass concentration of epoxy will reduce pot life and may become too hot to handle. If concentrated mass of epoxy begins to get very hot, move outside to open air. To extend working time, reduce mass by pouring mixture into a flat baking pan and pour onto bar top from there.
Pre-Mixing – Stir or shake Part A and Part B thoroughly before dispensing.
Measuring – Accurately measure 2A:1B by volume into a plastic, metal or wax-free mixing container.
Pouring Tarbender™ To Coat Flat Surfaces
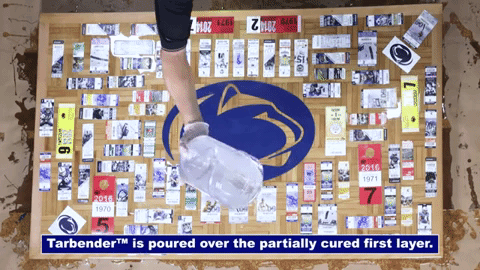
Usage Overview – Most bar tops, tabletops and other flat surfaces require 2 – 3 layers of Tarbender™ with a 4-hour cure time in between layers. You can apply as many ¼” (6.4mm) layers as needed.
Estimating Coverage – How Much Will You Need? you can correlate the square inch (cm) area of your surface with the yield of mixed Tarbender™.
| Amount | Poured at 1/16”(1.6mm) | Poured at 1/8” (3.2mm) | Poured at 1/4” (6.4mm) |
|---|---|---|---|
| 1 oz. / 28.3 grams | 25.4 in² / 164 cm² | 12.7 in² / 82 cm² | 6.4 in² / 41 cm² |
| Trial Unit (2.83 lbs. /1.28 kg) | 8 ft² / 0.74 m² | 4 ft² / 0.37 m² | 2 ft² / 0.19 m² |
| Gallon Unit (11.2 lbs. /5.08 kg) | 32 ft² / 2.97 m² | 16 ft² / 1.48 m² | 8 ft² / 0.74 m² |
| 5 Gallon Unit (56.5 lbs. / 25.62 kg) | 160 ft² / 15 m² | 80 ft² / 7.5 m² | 40 ft² / 3.75 m² |
Surface Preparation – Surface to be coated with liquid epoxy should be level in all directions. Surface must be free of dust, oils or other contaminants. Tarbender™ should not be used on surfaces coated with oil-based stain, as it will delaminate. Water based stains are compatible.
Sealing Porous Surfaces – unfinished wood surfaces, stone, marble, concrete, etc. should be sealed with a thin layer of Tarbender™. See “Pouring and Spreading Tarbender™” section below.
Do Not Vacuum – Subjecting mixture to vacuum will introduce air.
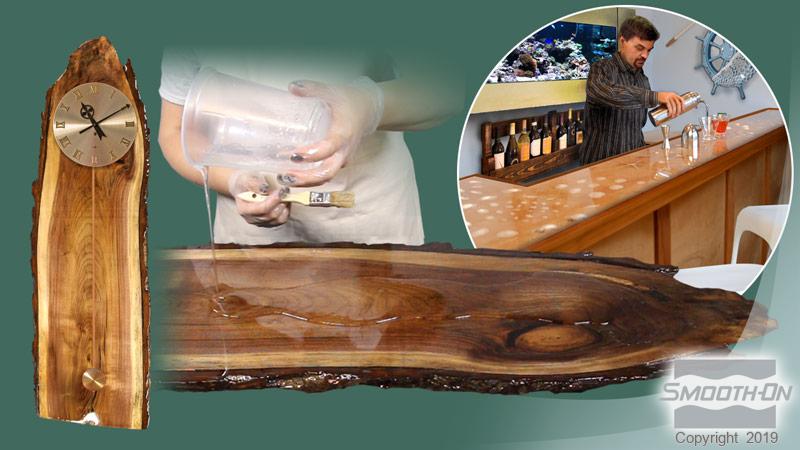
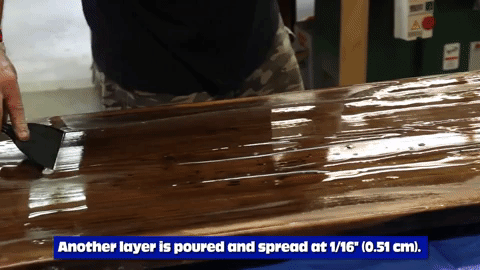
Pouring Tarbender™ - After mixing, pour a thin stream along the entire length of the surface. Do not exceed 1/16” (1.6 mm) for this layer. Your goal is to obtain an even coating. Let Tarbender™ cure for 4 hours before applying another layer. Note; do not exceed ¼” (6.4 mm) thickness per pour. If greater thicknesses are desired, pour in layers of ¼” (6.4 mm) with 4 hours minimum between layers.
For coating bar tops, a minimum thickness of 1/8” (3.2 mm) or two layers is recommended.
Non-Porous Surfaces do not require a sealing coat. Mix and pour Tarbender™ as directed to ¼” (6.4 mm) thickness. Look for bubbles and lightly pass propane torch over surface to dissipate. Let cure for 4 hours.
Dissipating Bubbles from Surface Using a Propane Torch - After Tarbender™ is poured, pass a propane torch (available at any hardware or DIY store) back and forth lightly over surface to dissipate bubbles. Be careful when handling the torch and do not get closer to the surface than 3” (7.62 cm). If pouring multiple layers, use a propane torch to dissipate bubbles after pouring each layer.
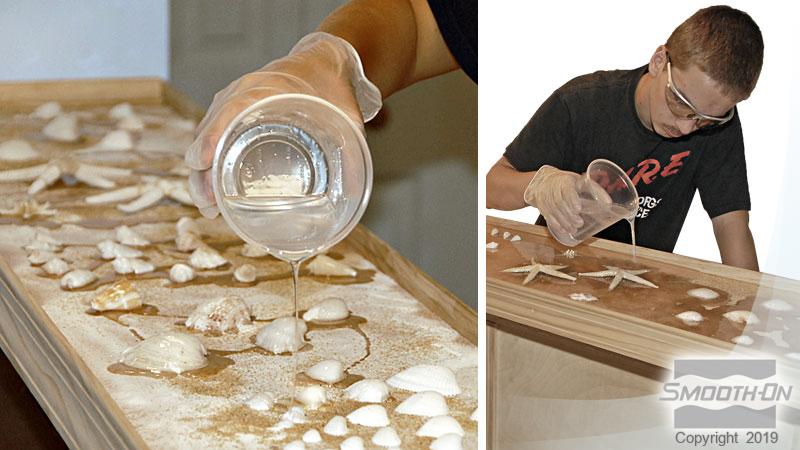
If Encapsulating 3-D Objects – Apply a 1/16” (1.6 mm) coating to bar top as directed above. Dissipate bubbles with torch. Let cure for 4 hours. Place objects on top of cured layer. Mix a small amount of Tarbender™ and pour directly over and around objects to break surface tension.
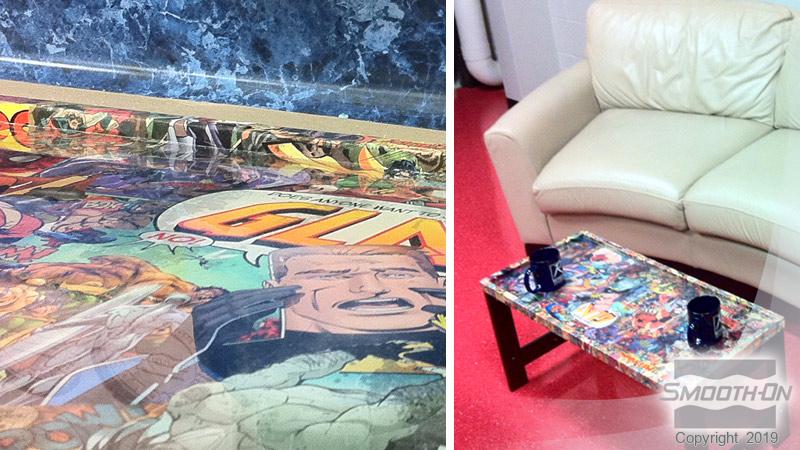
If Encapsulating Paper, Cardboard, etc. – Laminate paper before encapsulating. You can also seal surface with white glue (such as Elmer’s Glue) mixed 4 parts glue to 1 part water). Allow to dry for 16 hours before encapsulating in Tarbender™.
Brushing Tarbender™ Onto Surfaces
Apply In Thin Layers - two thin layers of Tarbender™ are recommended for a smooth, uniform coating. Using chip brush, apply 1st thin layer to surface and let epoxy partially cure until “tacky hard”. Apply 2nd thin layer. Allow both layers to fully cure.
Adding Color – You can add UVO™ or IGNITE™ colorants or Cast Magic™ Effects Fillers. Pre-mix color or filler into Tarbender™ Part A thoroughly and then add Part B.
Adding New to Old - If too much time passes (72 hours or more) between applying layers of Tarbender™, delaminating may occur if you try to add more. For Best Results; lightly sand cured epoxy surface with 220 grit sand paper and wipe clean with denatured alcohol before mixing and applying new Tarbender™.
Releasing Tarbender™ From Surfaces – if you do not want Tarbender™ to adhere to a surface, apply two coats of Sonite™ Wax. Allow wax to dry 1 hour and buff before pouring epoxy.
Clean Up – 90% Isopropyl Alcohol will remove uncured Tarbender™ from most surfaces. It can also be used to clean the surface of cured Tarbender™ epoxy. Alcohol is flammable. Follow all safety precautions for handling flammable liquids and provide adequate ventilation.
Performance – Unpainted Tarbender™ will yellow after being exposed to outdoor UV light or excessive heat above 115°F/46°C for extended periods. Tarbender™ can be displayed outdoors after priming and painting with an aliphatic urethane clear coat (such as Axalta Imron 3.5 Plus High Gloss Polyurethane Topcoat www.axalta.com).
Related Categories: Epoxy and Urethane Coatings
Related Series: Tarbender™ – High Gloss Coating, Bar Top Epoxy, and Encapsulant
How-To Articles
Make a High Gloss Themed Table Using Tarbender™ Epoxy
An old coffee table is gets a new life thanks to Tarbender™ clear coating epoxy

How To Create a Faux Marble Tabletop or Bartop
Techniques to create a bartop or tabletop surface that looks like marble.
How To Make an Epoxy Tabletop using Tarbender™
How Tarbender™ Can Be Brushed Onto a Surface To Create a High Gloss Tabletop
How To Coat a Wood Bartop Using Tarbender™
Watch as Completely Custom creates a high gloss, impact resistant bartop