Rebound™ 25
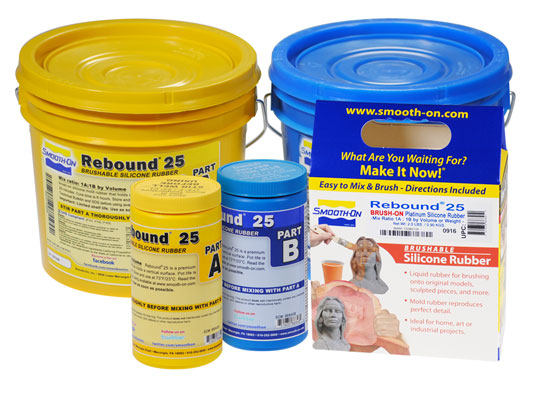
Rebound™ 25 is an easy-to-use platinum-cure silicone rubber which self-thickens for making brush-on molds of almost any model. Mixed 1A:1B by volume (no scale necessary), Rebound™ rubber can be applied with a brush or spatula to vertical surfaces without sagging and will cure with negligible shrinkage to a flexible rubber.
Features
Rebound™ 25 is soft, flexible and is good for making molds of models with deep undercuts. Depending on model configuration, Rebound™ 25 can be inverted as a glove molds. Rebound™ 40 is harder and less flexible. These products are compatible. For example, you can apply two coats of Rebound™ 25 and back it up with two coats of Rebound™ 40.
Advantages Over Urethane Brush-On® Rubber:
- Rebound™ will not stick to most surfaces, so surface preparation is minimal
- Two liquids that mix easily together
- stands up better to production casting of resins and low temperature melt metal alloys
- has a long library life
4 thin layers are all that is necessary to make a flexible, strong and durable production mold for casting wax, gypsum, concrete or resins (urethane, polyester, etc.). And because Rebound™ is a platinum silicone, it will last for many years in your mold library. Applications include reproducing sculpture, architectural restoration, making candle molds, casting pewter, etc.
Note: These products will not work with modeling clays containing sulfur under any circumstances.


Instructions
Safety - Use in a properly ventilated area (“room size” ventilation). Wear safety glasses, long sleeves and rubber gloves to minimize contamination risk. Wear vinyl gloves only. Latex gloves will inhibit the cure of the rubber.
Store and use material at room temperature (73°F/23°C). Warmer temperatures will drastically reduce working time and cure time. Storing material at warmer temperatures will also reduce the usable shelf life of unused material. These products have a limited shelf life and should be used as soon as possible.
Cure Inhibition - Addition cured silicone rubber may be inhibited by certain contaminants in or on the pattern to be molded resulting in tackiness at the pattern interface or a total lack of cure throughout the mold. Latex, sulfur clays, certain wood surfaces, newly cast polyester, epoxy or urethane rubber my cause inhibition. If compatibility between the rubber and the surface is a concern, a small-scale test is recommended. Apply a small amount of rubber onto a non-critical area of the pattern. Inhibition has occurred if the rubber is gummy or uncured after the recommended cure time has passed. To prevent inhibition, one or more coatings of a clear acrylic lacquer applied to the model surface is usually effective. Allow any sealer to thoroughly dry before applying rubber.
Important: Even with a sealer, Rebound™ will not work with modeling clays containing sulfur. If you are not sure if your clay contains sulfur, do a small compatibility test before using for an important project.
Applying A Release Agent - Although not usually necessary, a release agent will make demolding easier when casting into most surfaces. Ease Release™ 200 is a proven release agent for releasing silicone from silicone or other surfaces. Mann Ease Release™ products are available from Smooth-On or your Smooth-On distributor.
Because no two applications are quite the same, a small test application to determine suitability for your project is recommended if performance of this material is in question.
MEASURING & MIXING...
Before you begin, pre-mix Part A and Part B separately. After dispensing required amounts of Parts A and B into mixing container (1A:1B by volume or weight), mix thoroughly making sure that you scrape the sides and bottom of the mixing container several times. The rubber should be a uniform color with no streaks.
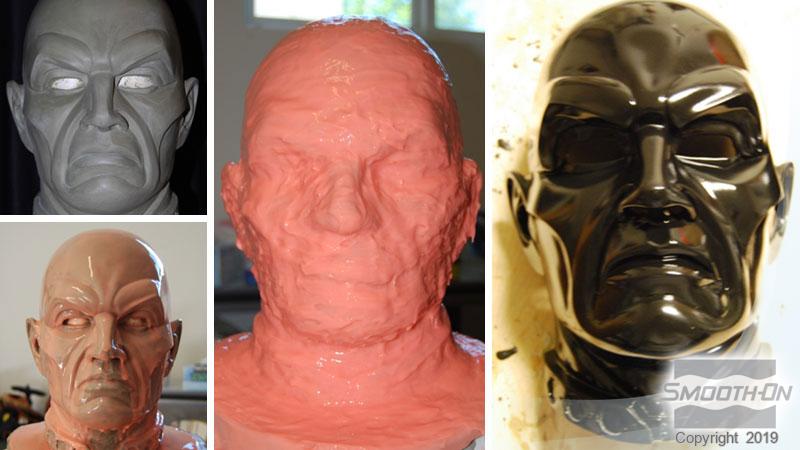
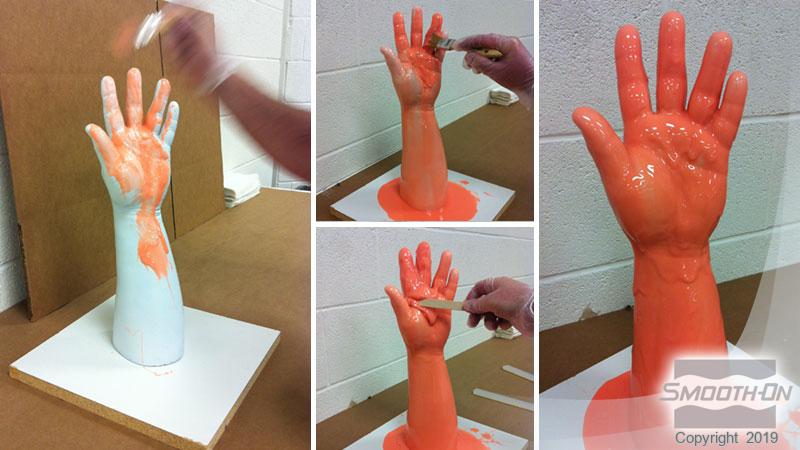
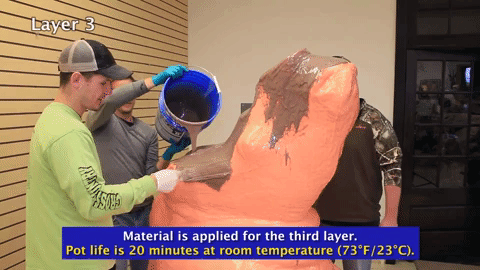
Applying The Rubber - This product must be applied in layers. Mold makers generally find that four thin layers (minimum 3/8” thickness) is suitable for a strong, working mold. Using a stiff brush, the first coat of rubber should be applied in a very thin layer to capture intricate detail. Use dabbing strokes, especially around undercuts, to reduce entrapped air. Subsequent coats will add strength to the mold. Let the first coat dry for 60 minutes at room temperature until it becomes “tacky” before adding the next coat. “Tacky” is defined as sticky to the touch, but does not come off onto your gloved finger. Once “tacky”, you are ready to apply the next layer. Tack-time can be reduced with mild heat (hair dryer or heat gun). Repeat until the necessary mold thickness is achieved.
Coverage: 1 gal. unit=7 sq.ft. (0.65 sq.m) - 5 gal. unit=35 sq.ft. (3.25 sq. m)
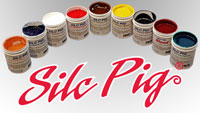
Note: Although not necessary, adding a small amount of Silc-Pig™ color pigment to every other mix of rubber will help you distinguish one layer from the next. Ensures that you apply a thorough coating each time and help build uniform layers.
Option: Add Thi-Vex™ thickener for greater thixotropy—adding a small amount of Thi-Vex™ will thicken the rubber for filling deep undercuts and detail. Adding 1% of the total volume of your mix will increase thixotropy substantially.
Option: Add Smooth-On Silicone Thinner™ to your initial mix to lower the viscosity of your “print coat”.
Apply A Support Shell - Once the mold is fully cured, a rigid support shell (mother mold) is necessary to support the rubber mold during casting. PlastiPaste™ II is a trowelable plastic and is ideal as a mother mold material.
Curing - Allow the mold to cure at least 6 hours at room temperature (73°F/23°C) before demolding. Do not cure rubber where temperature is less than 65°F /18°C. You can cure the mold faster by applying mild heat (150°F/60°C) for 2 hours.
Using The Mold - When first cast, silicone rubber molds exhibit natural release characteristics. Depending on what is being cast into the mold, mold lubricity may be depleted over time and parts will begin to stick. No release agent is necessary when casting wax or gypsum. Applying a release agent such as Ease Release™ 200 (available from Smooth-On) prior to casting polyurethane, polyester and epoxy resins is recommended to prevent mold degradation.
Mold Performance & Storage - The physical life of the mold depends on how you use it (materials cast, frequency, etc.). Casting abrasive materials such as concrete can quickly erode mold detail, while casting non-abrasive materials (wax) will not affect mold detail. Before storing, the mold should be cleaned with a soap solution and wiped fully dry. Two part (or more) molds should be assembled. Molds should be stored on a level surface in a cool, dry environment.
Related Categories: Silicone Rubber - Platinum Cure
Related Series: Rebound™ Series – Brushable Platinum Silicone Rubber
How-To Articles
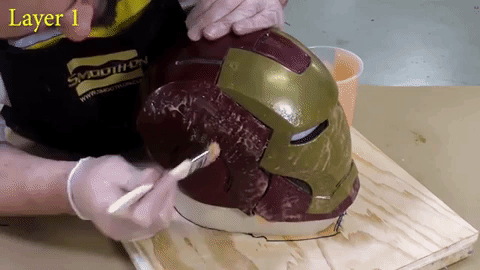
Cosplay Tutorial: Iron Man Helmet - Part 1: How To Make a Silicone Glove Mold
How you can use Rebound 25 silicone rubber to make a mold of an Iron Man helmet.
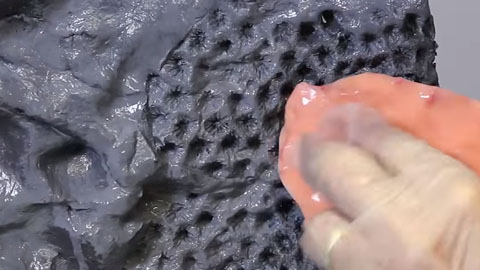
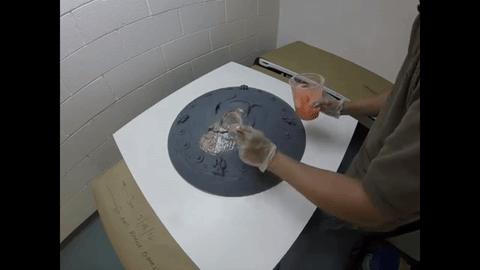
Aquarium Decoration Tutorial - How To Make a Silicone Coral Stamp
This video shows how to create a silicone stamp from a piece of coral that can then be used to create detail.

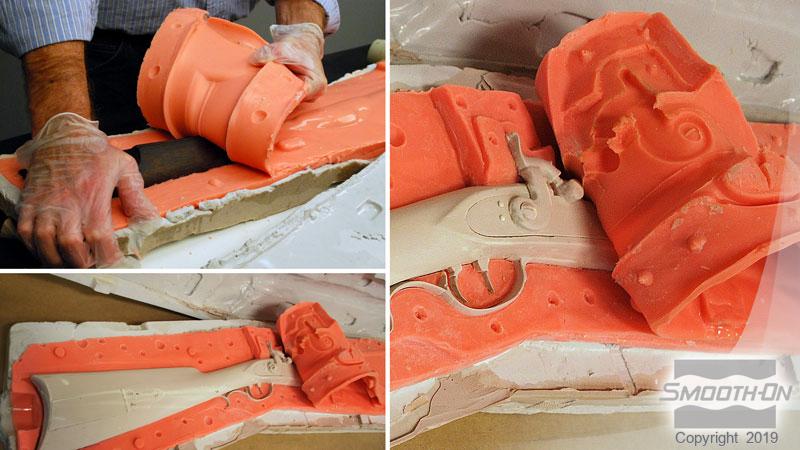
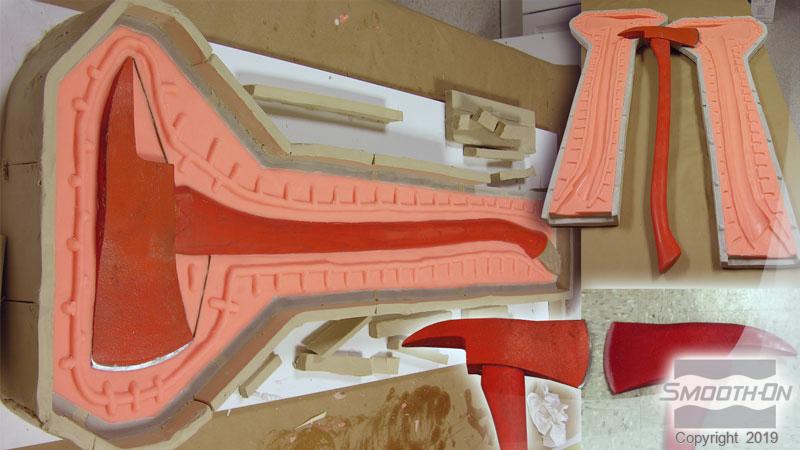
How To Make a Brush On Mold of an Antique Rifle
This tutorial shows how to make a two piece silicone mold of a historic firearm
How To Turn a Sculpting Talent Into Cold, Hard Cash
“How Nice Ice” has provided ice sculptures for private parties, professional sports team banquets...
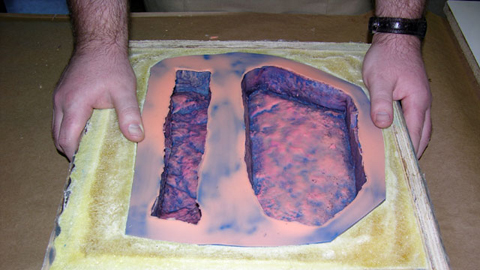
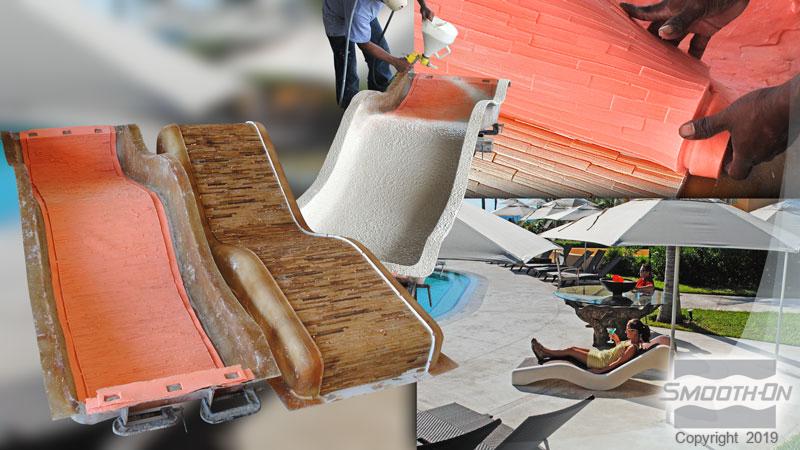
How To Make a Brush-On Mold with a Lightweight Support
The following is a demonstration on how to make a mold of stone veneer using...
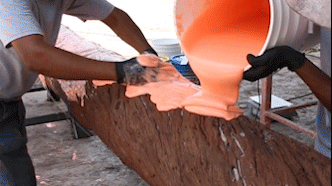
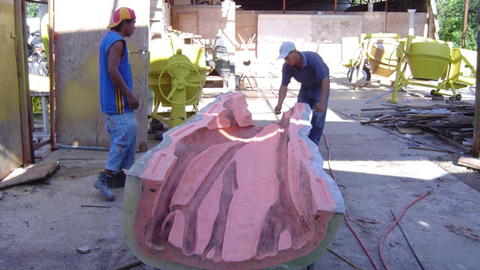
How To Make Decorative GFRC Panels from a Jungle Tree Trunk
"Taller de Prefabricados" invited us to their facilities to film their mold making process
How To Mold a Prop Shield For Cosplay
Jon N. shows us how he creates a mold for his Thundercats shield.

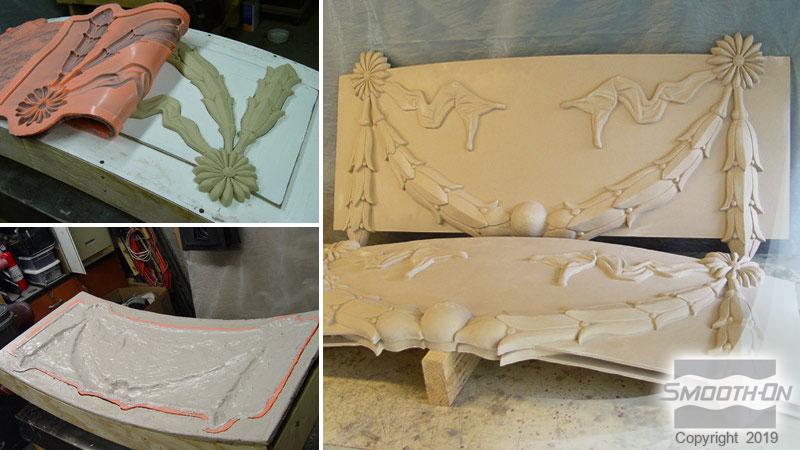
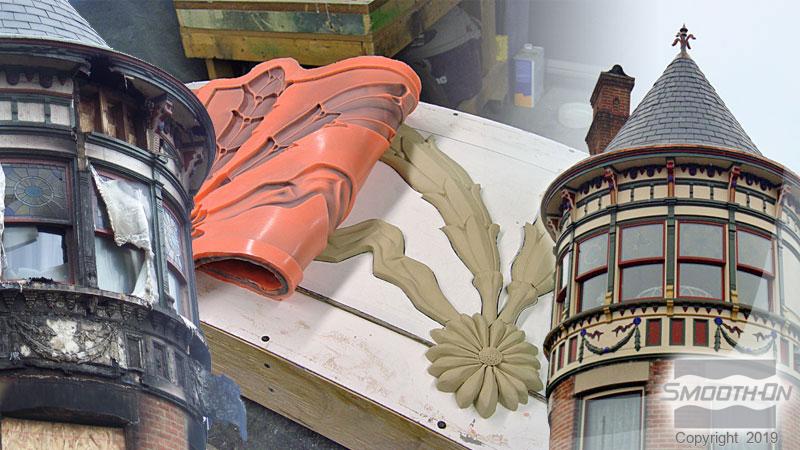
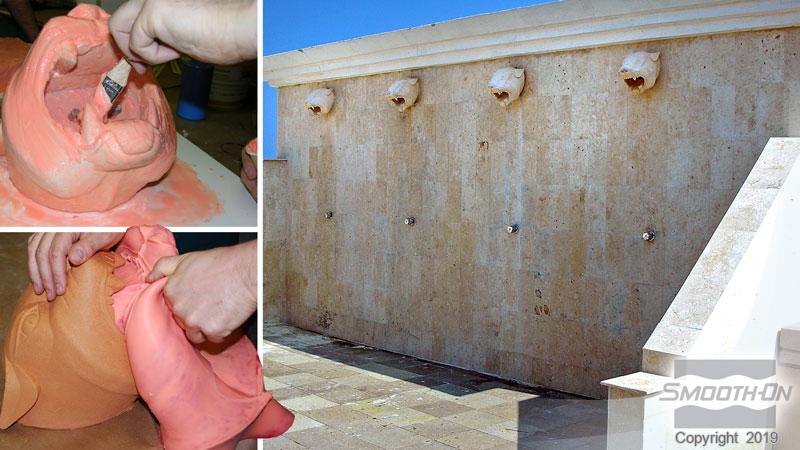
How To Make an Architectural Corbel Restoration Using Rebound 25
Watch how to make a mold of a corbel for an architectural restoration project in Brooklyn NY.
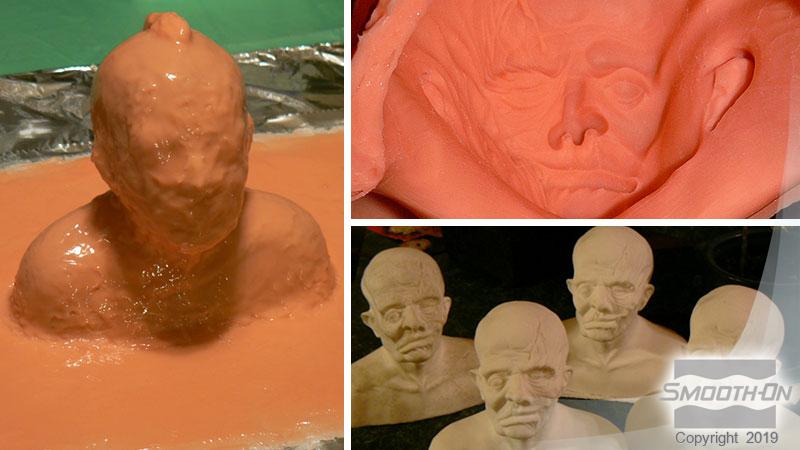
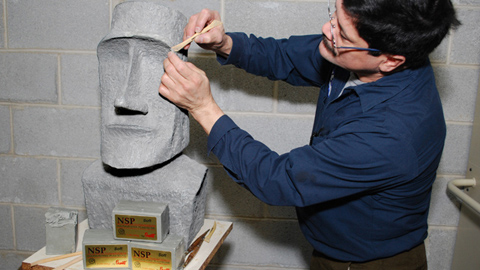
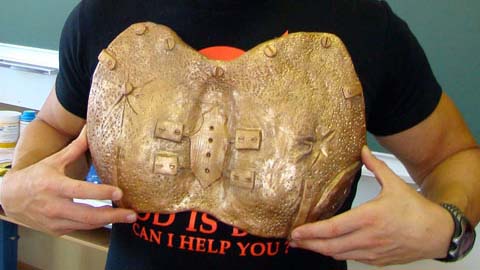
How To Make a Museum Quality Animal Reproduction
Learn how a sculpted reproduction of a rhinoceros torso was made
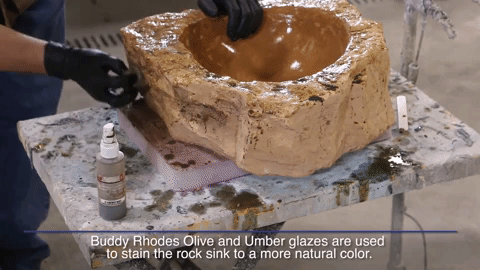
How to Make a Mold of a Rock for a Concrete Sink
Learn how to make a mold of a small boulder using Rebound 25 brush on silicone rubber.
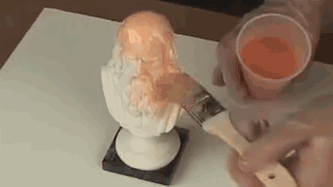
How to Make a Silicone Brush On Mold of a 3D Object
This tutorial shows how to create a Rebound™ 25 brush on silicone mold of a figurine

How To Choose The Right Method For Making a Rubber Mold
Discover the advantages and considerations behind block molds, brush-on molds, and cavity pour molds.
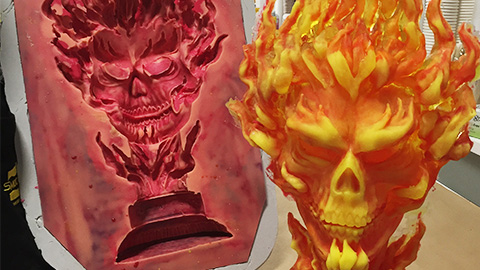
How To Mold and Cast a Resin Sculpture - Ghost Rider
Learn how to mold and cast a backlit bust of the infamous Marvel character, Ghost Rider.
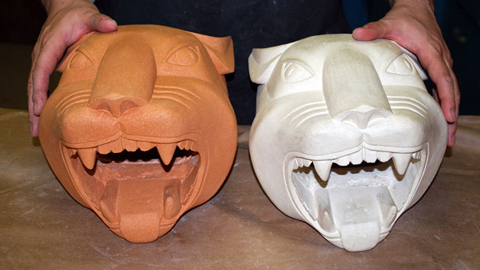
How To Make a Brush-On Mold of a 3D Hollow Model
This step by step gallery demonstrates how a challenging mold of a puma head will be made using Smooth-On's Rebound 25 brush-on silicone rubber...
How To Create a Rebound™ 25 Mold to Cast a GFRC Banyan Tree
Pretecno engineer Jose Hormiga developed a way to bring an organic feel to some of the company's latest building projects.
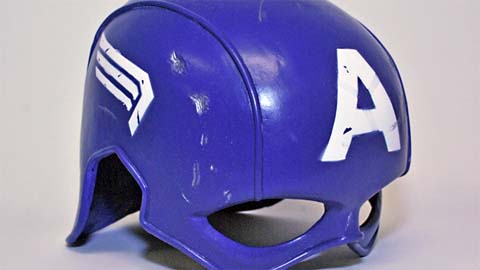
How To Mold a Captain America Cosplay Helmet Using Rebound™ 25
Justin Jotso of Jester Productions and FX's replica Captain America helmet.
How To Create Lightweight Theatrical Costume Armor
Andreas Moravec demonstrates a technique for creating theatrical armor using Rebound™ 25 silicone and Smooth Cast® resins

How To Cast a Concrete Fence Which Exhibits Detail Never Seen Before
Unique mold making process quickly generates 11,880 lightweight concrete panels...